

Every Thursday it is time for a new weekly challenge at Joan's Gardens. This week we have something different for you. Joan has completed the card for the challenge and I have the second half the challenge here, which is to create a box for your card. You should start at Joan's blog to get all the information.
I have had a lot of people ask me how I mail out my cards since most of them are very dimensional. I thought I would do a tutorial for you and we would incorporate it into this week's challenge.
I am sending out the above birthday card, which I posted here, and needed a box to put it in. I think this box would be sturdy enough to use alone to mail off the card, but I put them into a padded envelope because I like to decorate the outside too.
Below are the instructions on how to create a box for your dimensional cards.
My card is 5.5" x 6". You can use these directions to create a box any size to fit your card. For the bottom you need a piece of card stock that is one inch wider and longer than your card. For my card I cut it 6.5 x 7". It is scored all the way around at 1/2".

This is the outside of the bottom of the box. You need to cut a slit, up to the score line, on all four corners. In the picture you will see the score tape on these corners. Fold in the tabs to create your box bottom.


On the backside of the lid, you want to cut off those two tabs as shown in this picture. Place the ScorTape along the long edge. I rounded off those two back corners for a neater appearance. Place the lid over the bottom of the box. Pull off the protective covering on the tape and press it to the side of the bottom of the box. You now have a hinged lid on your box.

The box will look like this when opened. My card fits perfectly inside the box.
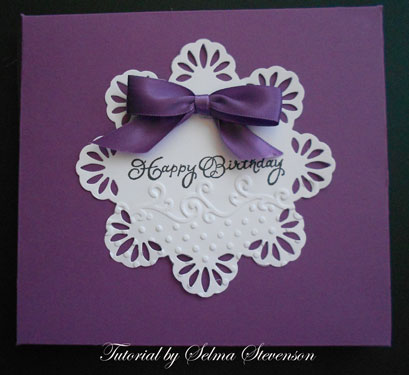
To decorate the top of the box, I die cut a doily from the Marianne LR0180 doily set. There are three doilies in this set plus a corner. I wanted the box top plain but wanted the doily to standout, so I placed the bottom half of the doily into the Sizzix "Flourish & Dots" (656980) embossing folder so there would be texture on the bottom half. On the top portion of the doily I used a Heartfelt Creations birthday stamp then added a bow.
I hope you will join us this week in the challenge at Joan's Gardens. All the details for the card are on Joan's Blog then you can complete the box for it from this tutorial. There will be a random drawing for a winner from all entries in this challenge and someone will receive a prize. The winner will also be in the drawing for the $100 gift certificate to Joan's Gardens which will be given away at the end of the year. Wouldn't you love to win that prize!
318623


15 comments:
this so beautiful as always..tfs the wonderful tut...loves ya
Beautiful project, Selma! And what a nice tutorial - thank you!
love the hinged envelope idea...I learnt something new here! thank you so much for sharing this knowledge.
All right! A box with a hinged lid -- now that's a new little twist!
Hi Selma thank you for such a simple way of making a hinged lid tutorial ....it's a great idea and you make it look so easy as always.
Love Sheila xx
Selma,
I think I may be able to give this one a try! I hope I get time :)
This is FABULOUS Selma! What a great idea and wonderful tutorial! You explain things so well ... even I can understand them! LOL!!
BEAUTIFUL card & box! Thanks for sharing!!
Love the card - thanks for the tip on mailing, I am one of those people who has wondered about this and kind of figured one would need a padded envelope but realize now it takes more. Have a great day.
Great tutorial. The box is pretty and the card gorgeous. I like the way the box hinges in the back. I will have to give this a try.
OMGoodness LOVE your colors on this one and the flowers are WOW as usual!
Your cards are so amazing. I bet your friends and family all look forward to finding one of your boxes in their mail.
Another incredible card - just love it! Thank you so much for the box tutorial- it's just the right size! Hugs
Love the project Selma and thank you for a great tutorial ... easy to follow and it came together nicely.
Awesome box Selma...excellent instructions on how to create is...I loved this challenge..thanks!
I love all your tutorials and am really glad that you labeled the inside of the lid, etc. Makes it so much easier to follow. I absolutely LOVE your 3-d cards... especially the flowers. I wanna make flowers like you when I grow up. ;-)
Post a Comment