Showing posts with label Tags. Show all posts

Thursday, August 23, 2018

Poinsettia Gift Tag


Today I wanted to show you that you can create beautiful tags using Susan's Garden Notes Poinsettia die set.  


To create the tag use one of the Els Van de Burgt Tags and More die sets.  Add a piece of gold card stock behind the open die cut area.  Glue the gold card stock on the back of the tag and trim around the edge of the tag with scissors.  

Use the Stitched Hexagon die set and die cut one gold Hexagon and one smaller ivory Hexagon. Attach the Hexagons together with dimensional tap alternating points of the Hexagons.

Use the Classic Christmas Sentiments stamp set to gold emboss the sentiments and the gold snowflakes.  Be sure to stamp the sentiments so they will be seen around the Hexagon, as shown in photo.

Attach the Hexagons to the center of the tag, using dimensional tape.

Use the Festive Glow die set and die cut one gold bow.  Assemble using 3mm Clear Double Sided Adhesive.

Use Susan's Garden Notes Poinsettia die set and die cut pieces to create one poinsettia.  Use Ivory card stock.  Use the Leaf Tool, from Susan's Flower Tool Kit, to draw veins on the leaves, as shown above.  Use the Copic marker RV34 and brush on color from center vein out towards the edges.  See photo above.  Shape the poinsettia and leaves using the Flower Tool Kit.  Assemble using Kids Choice Glue.  


To create the 'flower' (center of the poinsettia), use Bottle Green Nuvo Crystal Drops to create about 5 small dots in center.  Let set for a few minutes then sprinkle on a few yellow Prills. The Prills will stick to the Nuvo Crystal Drops.  

Attach the Poinsettia in the center of the ivory Hexagon.  Attach the gold Bow under the Poinsettia.

Use the Beads & Strings 2 die set and die cut one gold border.  Attach below the bottom sentiment.

This tag will look beautiful on any package or on the front of a gift bag.

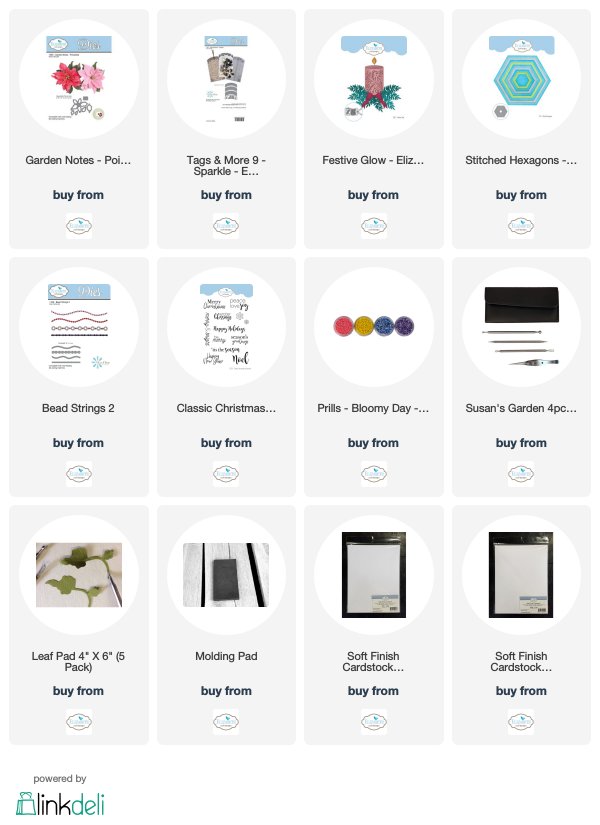
You can shop for the products used by clicking on the links below.   


Monday, February 8, 2016

Pop It Ups Designer Challenge

 Today I have a fun project for you.  Karen Burniston asked if I would like to guest design for her Pop It Ups Designer Challenge with a Theme of Glitter.  It is always fun to work with Karen's Pop Up dies so I was delighted to participate.  All the creative projects completed by the designers for this challenge, can be found Wednesday, February 10th on Karen Burniston's blog.

I chose to create a tag with a pop up surprise at the bottom.  I used the Els van de Burgt Tags & More 9 - Sparkle for the tag.  It was die cut using white card stock then a second time using red card stock for the overlay design at the top.  This tag is approximately 8 1/4" tall. 

There are two pieces to this tag.

For the lower half of the tag, cut a piece of red card stock 7 1/4 inches by approximately 4 1/4" (make it as wide as your tag).  Score across the middle creating a square piece.  It will measure approximately 4 1/4" x 3 3/4" when folded in half.  This piece will house the Pop Up which I will show you later.

Attach a piece of ECD Clear Double Sided Adhesive to one side of white card stock and die cut all the pieces (expect the large backing piece)  for Dutch the Fox.  Peel off the adhesive on the small die cuts (except legs/feet) and add Warm Diamond Silk Microfine Glitter.  Rub the glitter in with your fingers.  Peel the adhesive off the large overlay body piece and add Rust Silk Microfine Glitter.  Add Black Silk Microfine Glitter to the leg die cuts. Die cut the large backing of the fox, using black card stock, then glue glittered pieces to it. This will give you a black silhouette around the die cut fox.  Isn't he cute!

Use the fourth largest die from the Stitched Squares die set to die cut a white square to attach the fox to.  Use black card stock and the Fitted Frames 3 Curvy Squares to die cut square to fit under the white Stitched Square (it is the 4th square down).

To ground the fox, use the small grass die,  from the Props 7 die set ,and die cut 3 to fit across the bottom of the white Stitched Square.  The gold Star was die cut from the Happy Birthday Pop Up die set.  More about that later.

Assemble the white frame and fox as shown, on the front of the small red folded square.  Use the discarded dots from the top of the die cut tag, to decorate the edges of the black frame.

The red folded card will be attached to the bottom of the tag, but first decorate the top portion of the tag because you will need to add the Happy Birthday Pop Up inside this folded card.  Use the third square from the center of the Stitched Square die set to cut a white frame.  Once die cut, center the second smallest Stitched Square die in the center and die cut.  This will give you a cut out frame.  Attached this frame at the top of the red tag as shown.  Die cut the "a gift for you" using the die in the Gift Card Accordion die set.  Use white card stock that has Clear Double Sided Adhesive, then add Black Silk Microfine Glitter to it.  Use the Ribbons & Jewels die set to die cut the ribbon that is under the square on the top of the tag. 


 This is a side view to show how the Pop Up is inside, at the bottom of the tag.

This picture shows the pop up at the bottom of the card, which is inside the red card.

To complete the inside of the red square at the bottom of the card, cut a piece of white card stock slightly smaller to fit inside the red piece and score it across the middle.  This white piece will be used for the Pop Up  .Use the Happy Birthday Pop Up die to die cut the Birthday Pop Up.  You can see how to use this die in Karen's YouTube Video at this LINK. The Happy Birthday was die cut with Clear Double Sided Adhesive and True Red Silk Microfine Glitter added to the letters.  The large Stars were die cut twice and Solar Gold Silk Microfine Glitter added.  Five of the large stars were added to the inside and one was used on the outside  by the Fox.  A strip of white card stock, with adhesive, had Solar Gold Silk Microfine Glitter added and was glued behind the small star die cuts.  The Corners 1 die set was used for the four red corners.    In between the stars, the dots from the Corners 1 die cuts were added.  A red/white gingham ribbon was tied around the bottom of the white Pop Up before it was attached to the red card.  The red card was attached to the bottom of the tag using 3/8" Clear Double Sided Adhesive.

I hope you enjoyed my project.  Be sure to visit Karen's BLOG Wednesday to see all the Challenge Cards.

Supplies from Elizabeth Craft Designs:

947 - Happy Birthday Pop Up
1095 - Gift Card Accordion
946 - Dutch the Fox
1099 - Props 7
1118 - Stitched Squares
1064 - Fitted Frames 4 Curvy Squares
1070 - Ribbons & Jewels
1124 - Corners 1
611 - Rust Silk Microfine Glitter
614 - True Red Silk Microfine Glitter
638 - Solar Gold Silk Microfine Glitter
601 - Basic Black Silk Microfine Glitter
640 - Warm Diamond Silk Microfine Glitter
509 - Clear Double Sided Adhesive
507 - 3/8 inch Clear Double Sided Adhesive


Monday, November 30, 2015

Two More Ornament Tags


As promised yesterday, I have the other two tags I created using the Elizabeth Craft Designs Ornament Set 5.  

 The tags were die cut using the Soft Finish Cardstock.  The front of this tag was embossed with the Sprig Embossing Folder.  I sponged the edges and Sprigs with Bundled Sage Distress Ink.  The solid part of this ornament was die cut using white card stock that had Clear Double Sided Adhesive Tape attached to the front side.  The adhesive cover was removed, and I covered it with Cool Diamond Silk Microfine Glitter.  The top part of the ornament was die cut using Gold Metallic Shimmer Sheetz that had the Double Sided Adhesive Tape attached to the back of the Shimmer Sheetz. I used the Metal Adapter Sheet for a better cut.   Before attaching the decorative portion of the ornament, I colored the Holly and Berries with Copic Markers. Did you know you can color Shimmer  Sheetz?  I added color twice to achieve a dark color.  I love how it turned out.  Once colored, I pulled out the extra die cut  pieces around the holly/berries, and attached it to the glittered background. 

To match the embossed Sprigs, I die cut Garden Notes Whitepine Bough and attached at the top of the tag for dimension.  A gold cord was attached to the hanger of the ornament, and was glued under the pine bough.  I die cut the bow from the Ornament Set 3 set, using Gold Metallic Shimmer Sheetz that also had Clear Double Sided Adhesive Tape on the back.  Both the corners and the design for the top hanger on the tag were die cut using Gold Metallic Shimmer Sheetz.  I know in the photo that the corners look silver, but they are really gold.  The three little pieces, at the bottom of the tag, are discards from other die cut pieces.  Gold Cording was added at the top of the card.


This is the same die cut ornament, but love how different it looks.  The ornament was die cut using Gold Metallic Shimmer Sheetz with Clear Double Sided Adhesive on the back.   I did not use the Metal Adapter Plate, so it didn't cut all the way through.  I didn't want to pull out the extra pieces around the holly/berries, because I wanted a gold ornament. The holly and berries were colored with Copic markers. The adhesive cover was pulled off and the gold ornament was attached to the solid die cut ornament from this set, for stability. A gold cord was added to the hanger.

The Tags & More 1 tag was die cut using Soft Finish Cardstock and the lower portion embossed with the Lots of Dots Embossing Folder.  The red bow (Four Bows die set) was die cut using white card stock with Clear Double Sided Adhesive Tape on the front.  True Red Silk Microfine Glitter was added to the adhesive. The bow was attached over the gold cord with a glue dot.

At the bottom of the card I added the Holly Border that was die cut using Gold Metallic Shimmer Sheetz.  The Holly was detailed using Susan's Flower Tool Kit, then colored the same as the holly/berries in the ornament.  At the top of the card I added one of the pieces from the tag set for the gold cording to go through.  Christmas Gold Peel Off Stickers were added.

I am very happy with the four totally different tags created with the Ornament Set 5 and Tags & More 1 - Lace die sets. 

The following products can be purchased from Elizabeth Craft Designs:


Sunday, November 29, 2015

Christmas Tags


 A lot of us have started purchasing Christmas gifts.  Now it is time to make tags.  Today I used the Elizabeth Craft Designs Ornament  Set 5 and the Tags & More 1 - Lace dies to create two very different tags. I will explain how I created each tag below.

Tags & More 1 – Lace (951)

Ornament Set 5 (1066) 
 Above are the two die set used.


 For the detailed ornament design,  both tags were die cut using Gold Metallic Shimmer Sheets.  They were die cut with Clear Double Sided Adhesive Tape on the back.  The back ornament, for this purple one, was die cut using Purple Iris Iridescent Shimmer Sheetz.  The Gold design was attached over the Shimmer Sheetz.  I used Elizabeth Craft Purple Peel Off Dots in the circles of the die cut.  For the background on this tag, I embossed a piece of white card stock with the Heart Strings Embossing Folder and cut it to fit the tag.  At the top and bottom of the embossed piece, I added a strip of the Purple Iris Iridescent Shimmer Sheetz.  At the top of the tag, die cut Garden Notes Whitepine Bough were attached.  A gold cord was strung through the ornament loop and attached at the top of the pine bough.  A gold cord bow was attached with glue dots then a Star Peel Off Sticker was added just above the bow.  Gold Cording was also added at the top of the tag.  Merry Christmas Peel Of f Stickers were added at the bottom.

Now for a totally different look using the same dies.


 I used the same Tags & More 1 dies to create this tag.  The bottom of the tag was embossed using the Snowflake Embossing Folder. The edges of the tag were sponged with Tea Dye Distress Ink. The ornament was created by die cutting the intricate design using Gold Metallic Shimmer Sheets with Clear Double Sided Adhesive Tape on the back.  You need to use the Metal Adapter plate to achieve a good cut.  The back of the ornament was die cut using white card stock that had the Clear Double Sided Adhesive Tape on the front, so I could add Copper Silk Microfine Glitter.  The gold die cut was attached over the glitter.  A gold cord was attached to the top of the ornament so it could hang from the Garden Notes Whitepine Bough.  A speckled poinsettia was created with Garden Notes Poinsettia dies.  I used GooseBumps spray to achieve the speckles on the petals and sponged on Tea Dye Distress Ink.  To complete this tag, I added a Gold Holly Peel Off  Sticker Border and Merry Christmas Stickers.

I have created two totally different tags using the other Ornament Set 5 die.  I will post it tomorrow.

You can purchase the following products from Elizabeth Craft Designs:

1066 - Ornament Set 5
951 - Tags & More 1 - Lace
610 - Copper Silk Microfine Glitter
E126 - Snowflakes Embossing Folder
508 - Clear Double Sided Adhesive Tape
SS-0212 - Gold Metallic Shimmer Sheets
803 - Metal Adaptor Plate
SS0106  - Purple Iris Iridescent Shimmer Sheetz
1090 - Garden Notes Poinsettia
1091 - Whitepine Bough & Pine Cone
356 - Merry Christmas Peel Off Stickers
353 - Merry Christmas Peel Off Stickers
352 - "Star" Peel Off Sticker
Holly Border Peel Off Stickers
7018 - Glitter Dots 


Tuesday, November 10, 2015

Garden Notes Holly Tag


This is a Christmas tag using Susan's Garden Notes Holiday Holly & Berries dies.  You can watch Susan's YouTube Video at this LINK to show how she assembles this pretty Holly Branch.  I think you will find it interesting to see how she gives the waxy look that holly leaves have.

I used one of the Tags & More 9 - Sparkle dies for the white tag.  On the tag I added a piece of card stock that was embossed with the Snowflake Embossing Folder.  For the red frames, I used two frames from the Fitted Frames 2 Lace Squares.  

Along the bottom of the card I added Christmas Peel-Off Stickers.  Gold cording was used to create a bow at the top.

Below are links to the products used from  Elizabeth Craft Designs:

1088 Garden Notes Holiday Holly & Berries
1077 Tags & More 9 Sparkle
E126 Snowflake Embossing Folder
1062 Fitted Frames 2 Lace Squares
Christmas Peel-Off Stickers

Monday, September 14, 2015

CountryScapes Snow People


 I am having so much fun creating my Christmas cards with Susan's CountryScapes dies.  Today I decided to create a Step Card to create a different type card.  I used the instructions to create a basic step card but created the card larger, and with a few more score lines.  It was just a test, but I like how it turned out.  

 Here is a side view of the Step Card

 For the center background for the snow people, I used the new ECD Sparkle tag die set.  Dark Blue polka dot design paper was die cut with both the tag shape and the snowflake design dies.  For a white backing, I just die cut the basic tag shape, then glued the two pieces together - this added strength to the and created a white background for the die cut snowflakes.  At the bottom of the tag, I added two pieces of white card stock to resemble snowbanks.  The tag was attached to the center of the step card.  The Sparkle Tag die set also includes corner dies that I used on the bottom edge to tie in with the top of the tag. 

One CountryScapes Woods 4 Holiday Evergreen was die cut and glued in the center of the tag. Now for the part that is so much fun!!  I die cut the CountryScapes Build A Snowman twice, using glitter card stock.  The snowman die can be used for either a snowman or a snowlady, so I created one of each.  It is fun to decorate because you can decide how to dress them and which way you want them to face.  It doesn't show up very well in the photo, but the lady has a purple scarf and earmuffs with a purple band and white over the ears. 

Did you notice the little blue bird sitting in the Evergreen?  It was die cut from the CountryScapes Critters 2 die set.  To hold the Step Card in place when standing, I cut a base card that fits on the bottom (flat side) and used the Snowflake from ECD Stand Up Helpers Set 2 die set near the front to hold the card in place. This panel was glued to the bottom.  In front of the Stand Up Helpers, I added the ECD Season's Greetings die cut.  To fill in the white section on each side of the tag, I created dimensional snowflakes by die cutting the snowflakes from the Spiral Circle Pull Card and from the All Seasons Tree.  The smaller snowflake was attached with dimensional tape over the larger one, and Cool Diamond Silk Microfine Glitter added.  
  I hope I have given you inspiration to start on your Holiday cards.

These products can be purchased from Elizabeth Craft Designs:

1081 CountryScapes Build A Snowman
1093 CountryScapes Woods 4 Holiday Evergreen & Trimmings 
 1012 CountryScapes Critters 2
1077 Tags & More 9 Sparkle
930 Stand Up Helpers Set 2 
945 Season's Greetings
781 All Seasons Tree
916 Spiral Circle Pull  Card
642 Cool Diamond Silk Microfine Glitter 


Saturday, August 22, 2015

Masculine Christmas Tag


 Today I designed a Christmas tag that I think will look great on a masculine Christmas gift.  (I know the tag looks crooked in the picture but I chose the photo that shows the details on the tag best -- the tag is not crooked.)  I used the new ECD Tags & More 9 Sparkle dies for the tag.  I used some of the die cut circles from this tag to create an embossed background (glued the die cut dots to tag).  At the top of the tag I added some of the Garden Notes Whitepine Bough & Pine Cone die cuts.  The sentiment is one of The Way With Words sentiments by Quietfire.


 I used Susan's CountryScapes Critters 3 dies for the Deer, and a branch from the CountryScapes Woods 1 die set.  You can see the deer die cut on the left, and the branch I used for antlers for the deer is the one on the bottom right.  I thought it would be fun to create a buck since I could use one of the branches for his rack.  Just another way to great creative with the CountryScape dies!!!!

The tree was created using 4 die cut layers of the CountryScape Woods 1 die.  Along the bottom I cut card stock to create "grounding" for both the tree and the deer.


I receive a lot of requests asking about the card stock I use for my flowers and other die cuts.  I purchase the above pictured card stock from WalMart and use it for probably 90% of my die cuts.  It shapes very well, especially for flowers/leaves. I like to color most of my die cuts with either Susan's Pan Pastels or Distress Inks, so that is why I use white card stock. The cost is less than $6.

The following items can be purchased from Elizabeth Craft Designs:

1091 Whitepine Bough & Pinecone (coming soon)


Saturday, August 15, 2015

Pretty Pansies


I always smile when I see pansies.  They are such dainty flowers and come in a large variety of colors.  These pansies were created with Susan's Garden Notes Pansy dies that will be out soon in a new release from Elizabeth Craft Designs.  There are three die cuts to create this flower, which make these pansies super easy to create. Don't you think they look real!

The tag die I used is the ECD Tags and More Lattice 8. The base tag was die cut using vanilla card stock.  The design paper was die cut then die cut a second time with the lattice design.  Green card stock was glued behind the openings of the lattice.  A strip of the same green card stock was cut and glued to the bottom of the design paper.  I wanted a small corner so die cut the edge of the top portion of the lattice die, then glued the small die cut triangles just above the green strip. I thought this gave it a nice finishing touch.

The vase die used is the Asian Vase.  The backing was die cut using the same green card stock and the design part of the vase was die cut using vanilla card stock.  A little Tea Dye Distress Ink was sponged on the vase.

At the bottom of the tag I used Susan's new Happiness Comes from Within stamp.  Green twine was added to the top of the tag.

Susan's new release will be out soon.  The other products used from Elizabeth Craft Designs are linked below:


Sunday, June 28, 2015

Tag with Garden Patch Mini Dasies in Wheelbarrow


 Don't you love to receive a gift with a pretty tag!   Today I wanted to fill the ECD Wheelbarrow with Susan's Garden Patch Daisies.  The wheelbarrow was die cut and colored with Copic markers then filled with grass from Susan's CountryScapes - Country Flora grass

GARDEN PATCH -1 inch & Mini Daisy & Chrysanthemum (1003) 

The smallest daisy in the Garden Patch 1-inch & Mini Daisy and Chrysanthemum die set was used to fill the wheelbarrow.

Tags & More 8 - Lattice (961)

The ECD tag used is the Tags and More 8 - Lattice die. There are a lot of embellishments in this set - I used two at the top, one under the sentiment, and one at the bottom of the tag.   The lattice tag was die cut twice - once using white card stock then a second one die cut using design paper.  They were glued together.  The edges of the tag were sponged with matching Distress Ink.


I really enjoy trying to find many ways to use my dies.  I used the Lorna Label PopUp die to create a label for the sentiment. 

 I die cut the PopUp and cut it away from the frame.  You can see in this picture which portion I used.  I left the top popup portion on the label because I wanted it to have the label dimensional on my tag.  Only the top portion is a pop up. The bottom part lays down on the tag.  You could write a personal note on this side, if you wanted to. 

 This is how the PopUp looks from the side, on the tag.  Before attaching the PopUp Label to the tag, I used Susan's Hope Sentiment Stamp.  The edges of the label was sponged and an embellishment from the Lorna Label PopUp die set added. 

To complete this tag, I added light green flat-backed pearls and a bird embellishment from my stash.

Hope I have given you inspiration to create a pretty tag for someone special.

The following products can be purchased from Elizabeth Craft Designs:


Monday, May 4, 2015

Susan's Garden Notes Poppy

Today I designed a tag using Susan's Garden Notes Poppy dies. It is always fun to create a pretty, dimensional tag for your gifts.  


This is a picture of the Garden Notes Poppy dies.   These poppies are very easy to assemble.  There is one large base with three petal and three smaller petals.  To create the large poppy, you just shape and glue two of the three-petal die cuts together then add the stamen.  The three small petals are used to create a poppy bud.  I am sure you will have fun creating this pretty little flower.    

The tag is the Elizabeth Craft Designs Tags & More 1 - Lace dies.  The vase for the poppies was die cut using the ECD Asian Vase dies  The backing  for the vase was die cut using black card stock and the front design of the vase die cut using red card stock.  The ladybugs were die cut using the ECD Lady Bug die; they were shaped with Susan's Garden Tool Set and glued together, then attached with dimensional glue dots.  

These supplies can be purchased from Elizabeth Craft Designs:


Friday, March 13, 2015

Beautiful Bluebonnet


I am so excited to show you this gorgeous flower created with Susan's, Garden Notes - Blue Bonnet/Lupine dies.  It is so realistic.  You can follow Susan's step-by-step instructions  on her video at this LINK.  

I followed Susan's instructions and colored the petals with the three colors of Copic Markers, B29, B34, and B41.  My coloring (blending) is not always great so I used Pan Pastels over the inked petals for better blending.  I used Violet  470.5 at the base of each petal.  Next I used Titanium White 100.5 to rub over all the coloring which seemed to blend all the coloring together.  I used a pointed Fantastix coloring Tool Brush Point tool to add the color and used my finger to rub it in. White was also added to the very base of each petal but it was not rubbed in. Once the flower was assembled, I went back and added Ultramarine Blue Shade 520.3 to add additional dark shading at the base of some of the petals.  If I wanted the top edge of the petals a little lighter, I used the white Pan Pastel.  I love how the final color turned out by coloring the petals with the Copic markers then adding shading with the Pan Pastels.   Susan's new flower tools were used for shaping the petals. I used a moss green card stock for the leaves.  I used the leaf tool as shown on the video for shaping the leaves, then shaded them with  Chrom. Ox Green Tint 660.8  Pan Pastel.

I used the Elizabeth Craft Designs Tags & More 6 - Daisy dies for the tag.  It is easy to create many different looking tags with this tag die set.  On the overlay I used the decorative top die at the top of the tag then the long die with holes, which created punched holes under that design.  On the bottom of the tag, I used that same die to die cut holes in a narrow piece of the same card stock that is used for the lining. There is dimensional tape between the die cut tag and lining.   The sentiment is from the ECD Text Stickers.  On the background behind the flower, I white embossed small dots using a background stamp.  To finish the card, I added a ladybug created with red and black Viva Paper Pens, and a bow.  

This Bluebonnet flower tag is going to be so pretty on a birthday gift.

The products used from Elizabeth Craft Designs are listed below:

397 - Text Stickers Happy Birthday

Saturday, March 7, 2015

Daisy and Butterfly Tag

 Who doesn't love daisies and butterflies!  Today I created a pretty tag using the Elizabeth Craft Design Tags & More 1 - Lace dies.  To decorate the tag, I used the ECD Swirly Curves Embossing Folder for a background on the solid portion of the white die cut tag piece; for a different look, I used the debossed side.  Double sided dimensional tape was used to attach the white tag to the lower yellow die cut tag.

The cute little daisies were created using the Garden Patch - 1-inch Mini Daisy & Chrysanthemum dies.  There are six small flower dies in this package which can also be used to create cute little chrysanthemums, but I die cut all the little flowers using white card stock to have different size daisies.  A grouping of daisies were glued under the die cut at the top of the tag.

I used "The Butterfly Is Proof" sentiment stamp for the center of the card.  It was stamped on white card stock then the words cut apart.  Each piece was sponged with Mustard Seed Distress Ink, then the sentiment glued to the background.  I used the Mustard Seed Distress Ink to sponge around the edges of the tag too.  

Under the sentiment, I glued on three more daisies and the ECD Small Butterfly. At the top of the tag I used some matching yellow and white twine through the hole. 

Elizabeth Craft Designs has many beautiful tag dies that are so fun to decorate.  You can make them any length you want and the new small flower dies by Susan are just perfect for tags and cards.

Here is a list of products from Elizabeth Craft Designs used:


Friday, February 20, 2015

Pretty Tag


Elizabeth Craft Designs has the most beautiful tag dies.  Today I designed a tag using the Tags & More 7 - Vine tag die set.  

 Here is a picture of the Tags and More 7 - Vine die set.  I die cut the main tag using the piece at the top of the picture of dies using a light green card stock.  Second, I die cut the pretty leaf border (2nd piece down in picture) using white card stock.  Both the green and white card stock are the same size.  You can create a tag as long as you want because you place the dies at the top of the card stock then trim along the sides to achieve the length you want.  Isn't that great!  The white die cut (with the leaves) was attached over the green tag with dimensional tape.  That gives some depth between the two pieces and adds dimension.

To decorate the front of the tag I used the Oval Flourish Frame Edges dies to create a frame.  With this frame you die cut two each of the die pieces.  It creates a lacy frame.  I wanted a light green background on the frame and it was super easy to do because the frame is die cut in four pieces to form the oval center.  I laid the white die cut frame pieces on green card stock and traced around each one, lightly with a pencil - doing this for all four pieces.  Cut inside the pencil mark so it is slightly smaller than the frame pieces.  The white frame was then glued to the green pieces.  I love this type of frame because I didn't have to find another oval die the same size to create an opening in the center of the frame.


Next I wanted an embossed background for the pretty rose, under the frame.  I used the Elizabeth Craft Spring Leaves embossing folder.  It was a perfect fit behind the frame.  To give it dimension, I attached the frame, over the embossed piece, with dimensional tape to the tag.

Next I created a beautiful rose using Susan's Garden - Rose 1 dies.  The rose was attached with a pop dot and the leaves attached under it with glue.  The butterfly was die cut using the Elizabeth Craft Designs Small Butterfly dies.  All three pieces of the butterfly were die cut using light yellow card stock.  I used Mustard Seed Distress Ink to sponge around the edges of the solid butterfly and Mustard Seed and Tea Dye Ink on the body.  The butterfly was glued together and attached to the tag with dimensional tape.  

Along the top edge of the die cut frame, I used the scallop die from the same Tag Set to create a border.  In the center of the scallop openings, I die cut the small circle from the same set and glued them on. These little circles created a background for the white pearls glued on top.  To finish the tag, I added a row of string pearls above the frame and a matching ribbon to the top of the tag.  I forgot to mention I used the reinforcement circle die from this tag set over the hole at the top of the tag.

A beautiful tag on a gift box or bag is usually cherished.  I am sure who ever I give this tag to will love it.

All these products can be purchased from Elizabeth Craft Designs:


LinkWithin

Related Posts with Thumbnails