Sunday, September 30, 2018

Astrantia and Daisy Thank You


Today's card was designed using two of Susan's new Garden Notes die sets:  Astrantia and Trevi Urn.  I believe the Astrantia is one of my favorite flowers.  

This is a 6-inch square card.  A piece of the ModaScrap Butterfly Dream Cardstock was added to the front.

The Dotted Scallop Square die set was used to die a  Soft Sky Blue square.  The Stitched Squares die set was used to die cut a slightly smaller square to fit inside the blue square.  The squares were attached to the card front using dimensional tape.

Use the Garden Notes Trevi Urn die set and die cut two urns, using white Soft Finish Cardstock.  Sponge gray ink on one urn and use a fine point gray pen to color in the design.  Glue the gray urn on top of the white urn.  Attach to the card as shown.

Use the Garden Notes Maidenhair Fern die set and die cut 4 ferns.  Shape with the Flower Tool Kit or pinch each leaf using the fine pointed Elizabeth Craft Designs Tweezers.

Use the Garden Notes Astrantia die set and create 4 pink flowers.  Color the petals light pink and the base of each petal bright pink.  Use a grey marker and color the tips of each petal.  Die cut two sets of stamens for each flower.  Shade the stamens the same as you did the flowers.  Use a gray pen to push down in the center of each of the tiny white flowers and attach to the tips of the stamens.  

Use the Garden Notes Shasta Daisy die set and create two daisies.  Shape with the Flower Tool Kit.  Add yellow pollen over the tiny yellow flowers in the center of the flower.

Arrange the Maidenhair Ferns, Daisies, and Astrantia in the Urn, as shown. 

Use the General Sentiments die set for the sentiment.

This card can be mailed in one of the clear acrylic boxes linked below.


Bougainvillea


This card was designed using Susan's new Garden Notes Bougainvillea die set.  

Use a 6-inch square card  Cover the front with a piece of the ModaScrap Cucina With Love pink card stock.

Use the Romantic Corners die set and die cut 4 of the smaller corners.  Trim down and attach to each corner of the card.

Create two ovals using the Dotted Scallop Oval die set.  Attach them together using dimensional tape.  Attach to the center of the card.  Before attaching the ovals together, usie the General Sentiments stamp set and stamp the sentiment on the right side of the smaller oval, as shown.  

Use the Garden Notes Bougainvillea die set and create 12 flowers.  I used hot pink vellum for the flowers.  I liked using the vellum for the flowers because it looks similar to real bougainvillea petals, however, you can use regular card stock. Press the little white flowers that are on the tips of the stamens, using a green fine point pen, to shape them.   Attach the flowers and leaves along the left side of the ovals.

Garden Notes  - Bougainvillea

The Garden Notes Bougainvillea die set also comes with a branch, which I did not use on this card.


Saturday, September 29, 2018

Autumn Pumpkins


It is so much fun to work with Susan's new French Pumpkin die set.  I have created several cards using this die set and filled the pumpkin filled with flowers.  Today I created an Autumn card that could be used for any occasion.

Start with a 6-inch square card.  Cut a piece of white card stock 5 3/4 inches square.  Score around the edges and lightly sponge rust ink around the edges.  Mask around all the edges with 1-inch Post-It Note tape.  Lightly sponge yellow and brown inks inside the tape to create a frame.  Lightly sponge light yellow in the center of this square.  Remove the tape.  You will have a nice square border for the next step.

Use Susan's Garden Notes Grapevine Square Wreath die set and die cut one wreath, using brown card stock.  Attach over the sponged square created above.

Use the Garden Notes French Pumpkin die set and die cut all the pieces, using white card stock.  Use orange and yellow inks to sponge on colors.  Lightly sponge a little green on pumpkin.  Use the same die and die cut the pumpkin and lid out of light yellow card stock.  Glue the orange sponged pumpkin on top of the yellow die cut pumpkin. Attach to the card, leaving the right side loose so you can tuck a smaller pumpkin under.  Insert the yellow die cut piece, that is the inside of the pumpkin, down in the die cut opening.  Attach the lid of the pumpkin on, as shown in the photo.  Color the leaves and stem green.  Shape with the Flower Tool Kit.  Add stem and leaf to the lid of the pumpkin.

Use Joset's Pumpkin die set and die cut two pumpkins, the leaves and vines.  Color the pumpkins the same as the French pumpkin.  Attach the pumpkins, leaves and vines as shown.  

Use the Joset Designs Spring Basket die set and die cut grass to go along the bottom edge of the card, under the pumpkins.

Use Susan's CountryScapes Critters 1 die set and die cut one black bird.  Use the back side as the front of the bird and attach to the top left corner of the grapevine wreath.

Use the CountryScapes Critters 4 die set and die cut the three small bats.  Attach above the upper right corner of the grapevine wreath.

Use the CountryScapes Critters 7 die set and die cut one black cat.  Attach to the lower right corner of the grapevine wreath.

Use the Garden Notes Woodland Leaves die set and die cut seven of the smaller leaves.  Sponge on autumn colors, shape with the Flower Tool Kit, then clear emboss the top of each leaf.  Add to the card as shown.

Use the A Way With Words 4-Seasons die set and die cut Autumn using a piece of black and a piece of Copper or Burgundy Metallic card stock.  Glue the two pieces together with the metallic piece on top.  This will give the word some dimension.  Attach above the French Pumpkin, inside the Grapevine wreath.   

There are so many fun ways to use Susan's new French Pumpkin die set.  What can you think of creating with it?


French Pumpkin Autumn Arrangement


I love working with Susan's new French Pumpkin die set.  

This is a 6-inch square card.  A piece of the ModaScrape Wood Effects card stock was attached to the front of the card.  

Use the Lake Scene die set and die cut one Dark Chocolate Soft Finish Cardstock die cut frame.  Attach to the front of the card.  

Use the Garden Notes French Pumpkin die set and die cut the pumpkin, lid, stem, and leaves.  Sponge on several shades of orange and yellow inks on the pumpkin and lid.  Sponge on several green inks on the leaves.  Shape the leaves with the Flower Tool Kit.
Attach the pumpkin inside the brown frame.  Attach the pumpkin lid in the lower right corner, leaning up next to the pumpkin.  Attach the two small leaves, and the stem.  

Use the Garden Notes Sunflower die set and die cut pieces to create two yellow/burgundy flowers.  Use markers to color the petals yellow then stroke burgundy from the base of the petals toward the tip.  Shape the flowers using the Flower Tool Kit.  Create the center of the flowers using the small die cut pieces die cut from brown card stock.  Use the Fine Pointed Tweezers to add the tiny flowers to the center of each sunflower.  Add a small amount of glue to the tips of the little flowers and sprinkle on brown pollen.  Press into the die cut pieces.  

Use the Garden Notes Lavender die set and create one lavender branch.  Die cut the little flowers, using dark purple card stock.  Attach the little flowers to the branch, using the Fine Pointed Tweezers.  Cut the branch in half.

Use the new Garden Notes Feverfew 1 die set and create one branch of flowers.  

Use the Garden Notes Lily 2 die set and create three yellow lilies.  Use the Fine Pointed Scissors to cut each stamen in half.  Add pollen to the tips of each stamen.

Use the Garden Notes Berry Spray to die cut two branches.  Add orange berries using Nuvo Crystal Drops.  Let Dry.  Cut the branches into several pieces to tuck behind the arrangement.

Use the Garden Notes Woodland Leaves die set and die cut 5 or 6 of the smaller leaves.  Color the leaves and clear emboss the top of each.

 Attach the larger flowers then tuck the other smaller pieces behind the large flowers.  Use the photo above for arrangement.

Product links are provided below.


Friday, September 28, 2018

Cymbidium Orchid

I am posting twice a day right now because there are so many new die sets and stamp sets in the new releases at Elizabeth Craft Designs.  I am anxious to show you these new products.  Today I have used one of Susan's new Garden Notes die sets.

I have to be honest -- when I saw Susan's new Garden Notes Orchid die sets, I was afraid they would be difficult to create.  Boy, was I surprised!  They are very easy to create.

Plaisir des yeux

On my card today I used the new Garden Notes Cymbidium Orchid 1 die set.  I stopped by the florist to look at all the different colors of orchids.  I loved this burgundy colored orchid.

For the background on this card, I used a piece of the ModaScrap The Rainbow Bark card stock.

The Garden Notes Potted die set was used for the Terra cotta  flower pot.  Shades of brown inks were sponged on.  The pot was attached with dimensional foam tape placed just in the center of the pot.  This helps to bend the pot slightly for a rounded appearance.

The Garden Notes Cymbidium Orchid 1 die set was used to die cut enough pieces to create three orchids.  A lot of leaves were die cut.  A magenta marker was used to color the petals and green ink was sponged on the leaves.  The flowers were shaped using the Flower Tool Kit.  Kids Choice glue was used to assemble the flowers.

The Spring Sentiments clear stamp set was used for the sentiment.  It was stamped using black VersaFine ink.

There are so many beautiful colors of these  cymbidium orchids and I am anxious to make many more.


Nasturtiums


I have two urns filled with Nasturtiums on my deck so was anxious to create this card with Susan's new Garden Notes Nasturtiums and Garden Notes Vintage Tin Milk Can.

Begin with a six in square card.  Cut a piece of white card stock 5 3/4 inches square and score around the edges.  Add to the front of the card.  Sponge light yellow ink on the piece just added in an uneven pattern.  This will be just a light shadow behind the arrangement. 

Use Susan's Little Words That Mean A Lot clear stamp set for the sentiment.  Stamp it using VersaFine Black ink in the upper right corner.

Use the Garden Notes Vintage Tin Milk Can die set and die cut one milk can.  You can use Pewter Soft Finish Cardstock and add silver and black metallic rub-ons for a shinny finish. 
Attach to the left side of the card, using a piece of double sided dimensional tape in the center to give the can a rounded appearance.

Use the Garden Notes Nasturtiums die set and create a variety of yellow and orange flowers.  Shape the flowers using the Flower Tool Kit and assemble using Kids Choice Glue.  When creating the stamens, cut each stamen in half using the Elizabeth Craft Designs Fine Pointed Scissors.  Add a small dot of glue on the end of each stamen and dip in Yellow Pollen.  Arrange the flowers, as shown.  Die cut the Nasturtium's leaves, using white card stock and sponge on two shades of green ink.  Use a white opaque marker to follow the embossed lines in each leaf.  Shape with the Flower Tool Kit and attach behind the flowers.

Use a ruler and draw a line on the left side of the Milk Can.  It gives the appearance of being grounded.  Use a yellow marker and add dots around the edges of the arrangement.

This is a very easy flower to create.  These flowers will also look beautiful trailing out of one of the other Garden Notes containers.

Links are provided below for all the products used.


Thursday, September 27, 2018

Pink Clematis


One of the flower sets in Susan's new Garden Notes release is the Clematis die set.  

This is a 6-inch card.  The front was covered with a piece of the ModaScrap My Little Girl card stock.

A white frame was die cut using the Fitted Square die set for the outside of the frame and a smaller die from Susan's Frame It/Stitched Squares die set to cut the opening in the center.  It was attached to the front of the card.


This is a picture I found of a pink clematis and I tried to duplicate it using Susan's die set.  The petals were die cut using white card stock. Light Pink ink was used to sponge color on the petals.  A darker pink ink was sponged on to shade the base of each petal a darker pink.  White and yellow card stock were used for the stamen.  The Elizabeth Craft Designs fine tip scissors were used to cut the die cut stamen points in half for a fuller look.  The flowers were shaped with Susan's Flower Tool Kit and assembled using Kids Choice Glue.

The three Clematis and green leaves were attached to the top of the white frame.

Use the Dotted Scallop Oval die set and die cut a small oval for the sentiment.

Use the Summer Sentiments die set and stamp the sentiment using VersaFine Black Ink in the center of the Dotted Scallop Oval.  Attach to the bottom of the card.  Attach one green Clematis leaf on one side, as shown.

This card can be mailed in one of the Elizabeth Craft Designs Clear Acrylic Boxes.

The products used from Elizabeth Craft Designs are link below.


Krista Schneider Reindeer


Christmas is not far off.  Have you seen all the new Krista Schneider Christmas stamps and matching die sets from Elizabeth Craft Designs?  Today I used her new Reindeer stamp set.

This is a 6-inch square card.  A piece of white card stock cut 5 3/4-inch square was cut and scored around the edges, then attached to the front of the card.  A piece of Navy blue card stock was cut 5 inches square, scored around the edges, and attached in the center of the card.

Krista Schneider's Reindeer was stamped using black Archival ink.  The image was water colored, then die cut using the matching die.  The moon on the Reindeer stamp was stamped on gold metallic card stock and die cut. The moon was attached over the moon on the original die cut.  Attach the reindeer to the lower portion of the card.

Use Suzanne Cannon's A Way With Words - Dec 25 die set and die cut the date using gold metallic card stock.  Attach at an angle above the Reindeer.

Use the gold Season's Greetings Peel Off Stickers sheet for the gold stars.  Attach the stars around the die cut image.

Links to the products used are provided below.


Wednesday, September 26, 2018

Peace, Love, Joy


This card was designed using one of the new Krista Schneider clear stamp sets available from Elizabeth Craft Designs.

Poinsettia stamp set

The Poinsettia Clear Stamp set also has coordinating dies.

For my card today, I only used the Poinsettia stamp.  The image was stamped on watercolor paper and watercolors were used to color it.  A mask was die cut with the coordinating die and the pine branch was stamped along the bottom.  While the mask was still on, light blue ink was sponged around the flower.

The Stitched Rectangle die set was used to die cut out the stamped image.  For a red border, the Dotted Scallop Rectangles die set was used.  

The Classic Christmas Sentiment Clear Stamp Set was used for the sentiment.  It was stamped using VersaFine Black Ink.

A piece of the ModaScrap Christmas Vintage Collection card stock was used for a small border along the bottom of the card.  This piece was bordered with a piece of the Ladybug Red Soft Finish Cardstock and attached below the stamped image.

A green polka dot bow was added.

The product links are shown below.


French Pumpkin


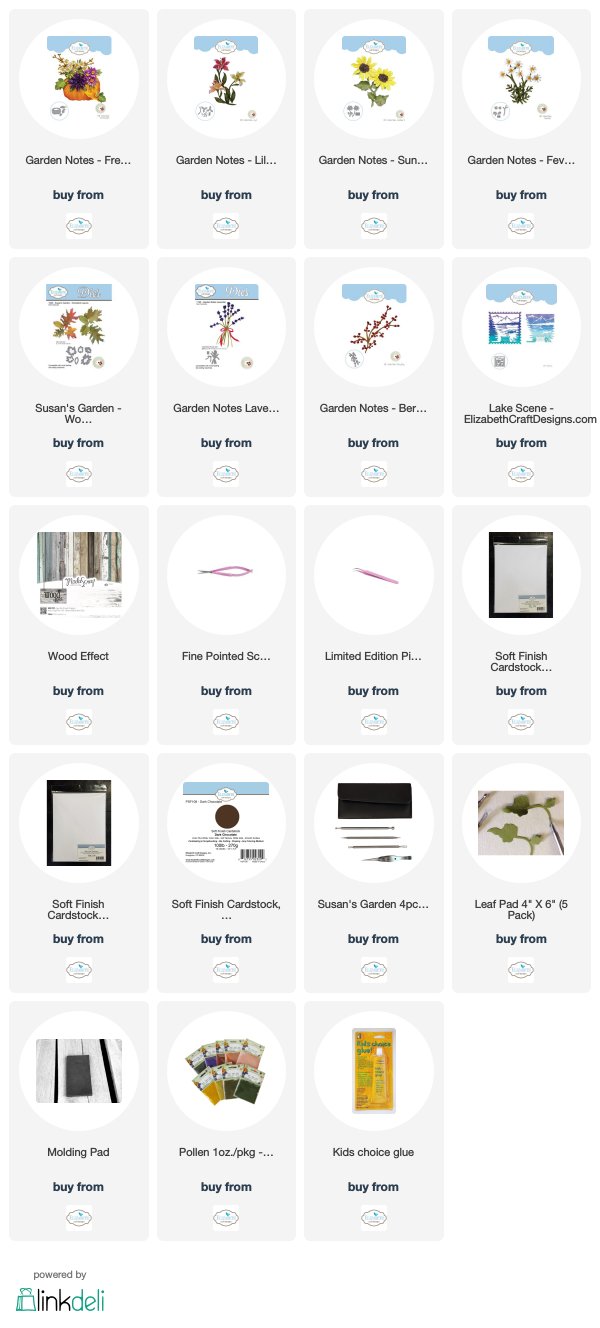
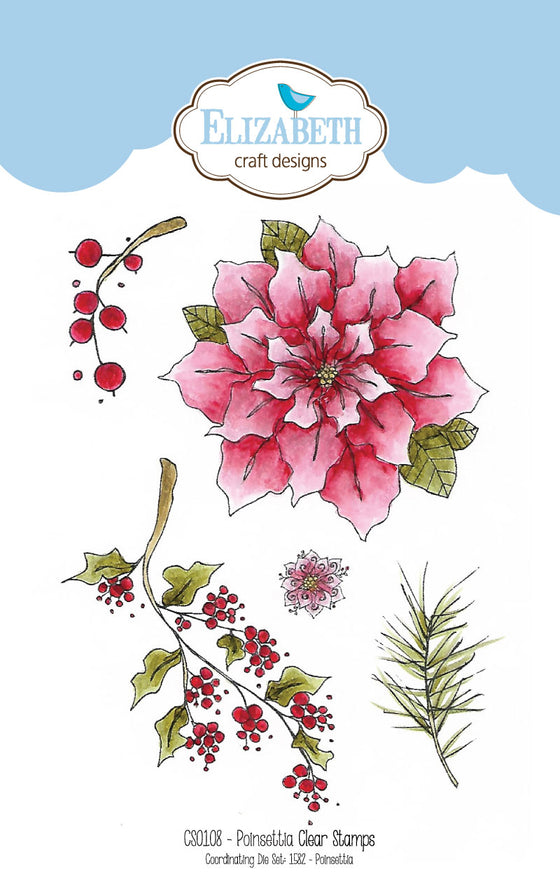
Today is the release of Susan's new Garden Notes die sets at Elizabeth Craft Designs.  Today I am featuring the French Pumpkin die set.  


Garden Notes - French Pumpkin

The Garden Notes French Pumpkin die set includes the pumpkin, lid and several leaf dies.  You can create cards with just the pumpkin, fill it with flowers or be creative and decorate it for Halloween.

I used the French Pumpkin die set along with Joset's Pumpkins die set to create an Autumn card.  A variety of flower die sets were used to create the bouquet.

Start with a 6-inch square card.  Cover the front with a piece of the ModaScrap Wood Effects card stock.  The dark wood card stock helps the yellow and orange colors stand out.

Use the Garden Notes French Pumpkin die set and die cut the pumpkin, using Buttercream Soft Finish Cardstock.  Use several shades of orange inks to sponge on color.  Use green card stock to die cut the leaves.  Shape the leaves using Susan's Flower Tool Kit.

Use the Pumpkins die set and die cut one each of the pumpkins using Buttercream Soft finish Cardstock.  Color the same as the French Pumpkin, leaving the shading a little different so they each stand out when grouped together.  Die cut the leaves and vines using green card stock. 

Use the Garden Notes Sunflower die set and create one sunflower.  Shape using the flower tool kit.  Add pollen to the center of the flower.

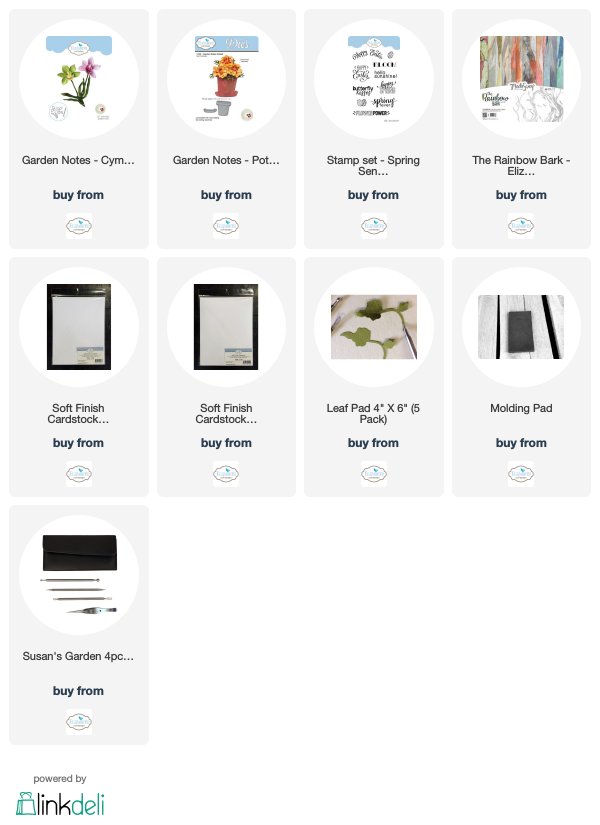
Use the Garden Notes Dahlia 2 die set and create a variegated flower.  Shape with the flower tool kit and assemble using Kids Choice Glue.

Use the Garden Notes Lily die set and create 2 lilies.  Add pollen to the ends of the stamens.

Use the new Garden Notes Feverfew 1 die set and create one stem of flowers.  

Use the Garden Notes Lavender die set and create the small yellow flower stems.  Use the Elizabeth Craft Designs small pointed tweezers to hold and glue each of the small flowers to the stem.  

Use the Garden Notes Primrose die set and create two orange flowers. 

Use the Garden Notes Pansy 1 die set and create one small orange flower.  (This one is optional - you can use use three primrose.)

Use the Garden Notes Ostrich Fern die set and die cut three ferns.  Shape with the flower tool kit.

Use the Garden Notes Ivy Vine die set and die cut one ivy vine, using white card stock.  Color from the center of each leaf with a green marker leaving a white border along the outside edge of each leaf.  Shape with the flower tool kit.

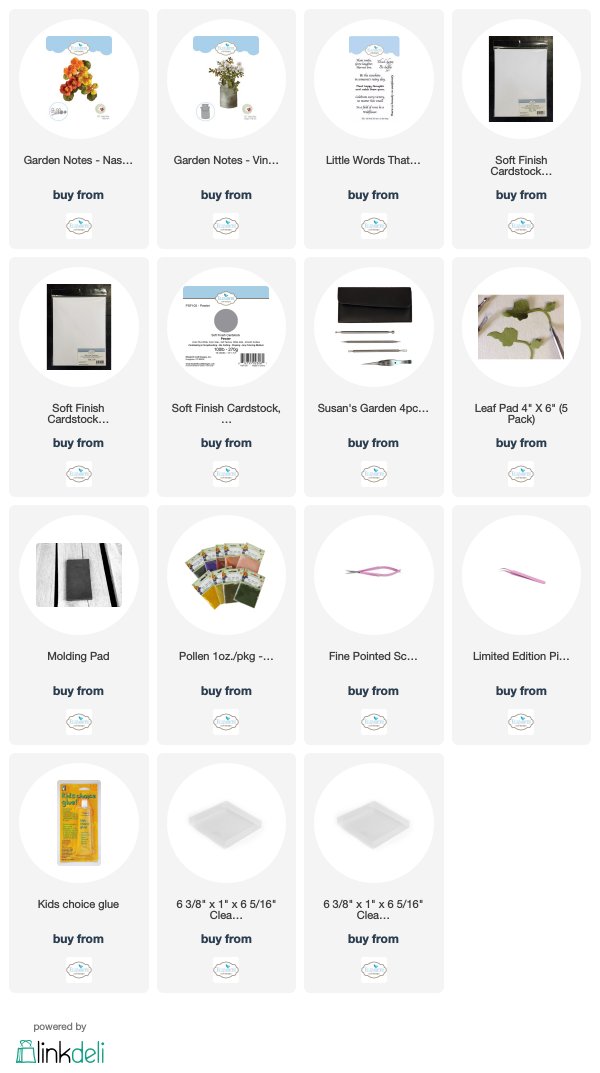
Use the Rustic Ladder die set and die cut one ladder, using ModaScrap Wood Effect card stock.  I used the white wood card stock and lightly sponged on gray ink.

Use the Spring Basket die set and die cut four grass, using tan card stock.  Use the Elizabeth Craft Fine Pointed Scissors and cut each blade of grass in half.  This will make it easy to bend the grass for a natural look.

To assemble the die cut pieces to the card:

Attach the French Pumpkin to the bottom of the card, using dimensional tape in the center.  This will give the pumpkin some rounded dimension.
Attach the two smaller pumpkins, using dimensional tape, to each side of the French Pumpkin, as shown.
Attach the Rustic Ladder to the left side of the card.  
Attach the Ferns at the top of the card.
Attach all the other flowers, using the picture above for reference, inside the top of the pumpkin.  
Attach the grass along the bottom edge of the pumpkins, cutting pieces in half on each end.

This will be a beautiful Autumn Greeting card but especially to someone with a birthday this time of year.

This card will fit inside one of the Clear Acrylic Boxes from Elizabeth Craft Designs for easy mailing.

I will have many more cards featuring Susan's new release in future posts.

Thank you for stopping by.

Links to the products used are listed below.


Monday, September 24, 2018

Let It Snow


I did something a little different today.  I created a Christmas card using a heart die cut background.

Heartfelt Love

For the heart, I used the Heartfelt Love die set.  This heart has die cut swirls and flowers in it.  To use it for a winter scene, it was die cut using glitter card stock.  A piece of Soft Sky Soft Finish Cardstock was used to die cut the backing.

There are different size flowers in the heart die cut.  Snowflakes from five different die sets were used to cover the flowers.  A large snowflake was added in the center.   The die sets used for snowflakes include:  Snowflakes, Ornate Snowflakes, Penguin, Reindeer, and Hot Chocolate die sets.  The larger snowflakes include two different size die cuts for dimension.  In the center of the snowflakes, a light blue rhinestone was added.  The heart was attached to the front of the card.

The Moose die set was used to die cut the cute moose.  It was attached with dimensional tape.

The Santa's Sleigh die set was used for the gift.  The package and bow were die cut using white card stock with Clear Double Sided Adhesive on top.  Lavender Ice Silk Microfine Glitter was added to the package and Cool Diamond glitter added to the bow.

The Winter Sentiments stamp set was used for the sentiment.  It was stamped using VersaMark Ink and Silver embossed.

Three small snowflakes were added above the sentiment.

Product links are provided below.


Tuesday, September 18, 2018

Let It Snow - Challenge Card

The challenge theme for the design team this month is Classic Christmas.  We are to create a card with things or traditions which always come to mind when we talk about Christmas, such as snowflakes, ornaments, Christmas Trees, etc.  You can view all the cards by the design team on the Elizabeth Craft Designs Blog at this LINK.


*******************
For today's challenge Elizabeth Craft Designs is giving away a $20 Gift Card to use on their website to 3 winners

To enter simply leave a comment on the Elizabeth Craft Designs Facebook Giveaway Blog Post, or the Elizabeth Craft Designs Challenge post, and tell us:  What Elizabeth Craft Designs die or stamp set would you select if making a  Christmas card.

Three lucky winners will be selected in a random drawing. 

The winners will be announced on Friday, September 21 on the Elizabeth Craft Designs Blog and Facebook page.

*****************

I chose to create two cards for the challenge using Joset's new Snowflake die sets.  There is a second post for this challenge.

This card was designed using the new Snowflake Border and A Way With Words Sentiment.

1.  Begin with a 6-inch square card.

2.  Use a piece of white card stock cut 5 x 6 inches.  Use the Snowflake Border die and die cut the border on both the top (along the 6 inch width) and bottom, with the solid portion of the die along the cut edge. Run through the die cutting machine.  The inside side edge of the border will be cut around, leaving the straight edge along the outside edge.

3.  Cut a piece of white card stock 6 by 1 1/2 inches.  Score around the edges of this piece.  Attach to the center of the 5 x 6 inch piece, between the snowflake borders.  

4.  Use the A Way With Words 'Let It Snow' die cut for the sentiment.  Die cut it using silver metallic Shimmer Sheetz or cardstock.  Glue the sentiment to the middle of card.

Australian Opal Gemstone - 3 Pack - ElizabethCraftDesigns.com

5.  Use a piece of the Australian Opal Gemstone Shimmer Sheetz to attach behind the two die cut snowflake borders.  The shimmer sheets create beautiful pastel colors behind the snowflakes when moved side to side.  I did not glue the inside edge of the snow border down.  Attach the snowflake border panel to the front of the card.

  The products used can be purchased from the links below.


Winter Blessings - Challenge


The theme for the design team this month is Classic Christmas.  We are to create a card with things or traditions which always come to mind when we talk about Christmas such as snowflakes, ornaments, Christmas Trees, etc.  You can view all the cards in this challenge on the Elizabeth Craft Designs Blog at this LINK.


*******************
For today's challenge Elizabeth Craft Designs is giving away a $20 Gift Card to use on their website to 3 winners

To enter simply leave a comment on the Elizabeth Craft Designs Facebook Giveaway Blog Post, or the Elizabeth Craft Designs Challenge post, and tell us:  What Elizabeth Craft Designs die or stamp set would you select if making a  Christmas card.

Three lucky winners will be selected in a random drawing. 

The winners will be announced on Friday, September 21 on the Elizabeth Craft Designs Blog and Facebook page.

*****************

I chose to create two cards for the challenge using Joset's new Snowflake die sets.  There is a second post for this challenge.

1.  This is a 6-inch square card.

2.  Cut a piece of Gold or Silver Metallic card stock six inches square. 

3.  Use the largest snowflake die in the Snowflakes die set.  Center the die in the center of the metallic card stock and die cut. 

4.  Use a piece of white card stock 4 1/2 inch square with a piece of Clear Double Sided Adhesive attached to one side.  Remove the protective covering and sprinkle with Cool Diamond Microfine Glitter.  Polish the glitter with your fingers.  Attach to the back of the die cut snowflake.  Attach this piece to the front of the card.


To create the frame:

5.  Use Becky Sneddon's Garden Scene die set and the Fitted Frames Square die set, using largest Fitted Frame die and die cut a frame, using white card stock.  Place the Fitted Frame die inside the Garden Scene frame die and run through the die cutting machine.

6.  Use the frame die from the Garden Scene die set and die cut one solid piece of white card stock.  

7.  Use the Garden Scene piece die cut in step 6 and place the Fitted Frames 2-Lace die in the center and die cut.  This will cut an opening in the larger piece.  Use only the two largest frames in the Fitted Frames die cut.

8.  Cut a piece of white Fun Foam 5 1/4 inches square.    Use the Fitted Squares die set to die cut an opening in the  center of the Fun Foam.  Attach the frames to the Fun Foam using Clear Double Sided Adhesive.  The foam will add dimension to the card.  Attach the Frame over the Metallic die cut snowflake.    In the corner of the frame, add one of the metallic ovals from the die cut snowflake. 

9.  Use the Classic Christmas stamp set for the sentiment. Emboss the sentiment on white card stock, cut around it and attach to the bottom of the frame.

The products used are linked below. 


Monday, September 17, 2018

Happy Holidays


Today I have another Christmas card.  This is a 5x6 1/2 inch card.  

Cut a piece of white card stock slightly larger than the front of the card.  Score around the edges using a ScoreBoard.

Create a gold metallic frame using the Largest Dotted Scallop Oval die set and the Garden Notes Frame It-Stitched Oval die set (use the 3rd die down in this set).    Place the Stitched Oval inside the Dotted Scallop Oval and die cut.  Save the center for another project.  I love that by using the Frame It-Stitched Oval, you get the stitched design around the inside of the Dotted Scallop Oval.  It is a very finished look.  Attach to the front of the card.

Use the Words 5 - Winter Wishes die set and die cut the sentiment using gold metallic card stock.  Attach inside the frame as shown.

Use the Garden Notes Poinsettia die set and create one red Poinsettia. A combination of Copic Markers and PanPastels were used to color the poinsettia and green leaves.   Use the Flower Tool Kit to shape and the Kid Choice Glue to assemble. Attach the Poinsettia in the upper left corner over the edge of the gold frame.

Use the Garden Notes Whitepine Bough & Pine Cone die set for the pine boughs and pinecone. Die cut 2 pine boughs and enough pieces for one pine cone. Attach the Pine bough and Pine Cone in the lower right side of the oval, as shown above.  Save one small pine bough to tuck under the bottom of the poinsettia.

Use the Garden Notes Berry Spray and create one berry branch. Use red Nuvo Crystal Drops for the berries.  Allow to dry.   Cut the branch into small pieces and tuck under the poinsettia.

Use the CountryScape Critters 1 die set and die cut 1 squirrel.  Color and attach as shown above the pine cone.

Use the Reindeer die set and die cut the reindeer.  Color and attach with dimensional tape to the lower left corner.  My favorite way to color die cuts is to sponge on ink or PanPastels.

When I use the Festive Glow and Christmas Tree die sets, I save the small snowflakes for future use.  A few of these saved snowflakes were glued to the card, as shown.  

This dimensional card can be mailed in the Clear Acrylic Box that measures 6 3/8 x 6   
5/16.  

Links are provided below for the products used.  


LinkWithin

Related Posts with Thumbnails