Showing posts with label Die Cut Design Team Challenge. Show all posts

Tuesday, October 10, 2017

Susan's Garden Design Team Challenge - Fairy


A fun challenge this month for the Elizabeth Craft Designs Susan's Garden design team is to design a card using one of her Fairy die sets.  Here is the LINK to go to the Elizabeth Craft Designs Blog so you can see all the cards created by the Design Team.

******************
For our Challenge today Elizabeth Craft Designs is giving away a $20 Gift Card to use on the Elizabeth Craft Designs website to 3 winners. 


To enter, simply leave a comment on the Elizabeth Craft Designs blog post and answer this question:   “If you had your own fairy, what would be 3 products on your crafting wishlist?”


Elizabeth Craft Designs will select 3 lucky winners in a random drawing.

The winners will be announced on Friday, October 13, on the Elizabeth Craft Designs blog.

Good Luck!

*******************


Start with a six inch card.  Cut another six inch square for the front panel out of White Soft Finish Cardstock.  

Use the 2nd largest Fitted Oval die to die cut an opening on the left side of the six inch square.  Sponge green ink around the outside edges.  Attach this square to the front of the card using dimensional tape.

Use Susan's Garden Notes Fairy - Tiger Lily die set to die cut the Fairy.  To create a stable Fairy that you can add dimensional tape under, die cut the body of the Fairy 4 times, using 100 lb card stock.  Glue the four Fairies together.   Color the Fairy and the Tiger Lily skirt.  I used Susan's PanPastels to sponge on color.  A red fine line marker was used to add the dots and lines on each petal of her skirt.   I used a clear Wink of Stella pen to give her hair, and dress sparkle.

Die cut the Wings of the Fairy using White Iridescent Shimmer Sheetz.   Use Silver Shimmer Sheetz to die cut the container (shown in her left hand).  Attach the wings to the Fairy's back using dimensional tape.   

Use the Garden Notes Coreopsis die set to die cut enough pieces to create seven flowers.  Use Susan's Flower Tool Kit to shape and assemble the flowers.  For information on how to create this flower, you can watch Susan's Garden - Coreopsis YouTube Video at this LINK.

Use the Pair of Leaves 1 die set to die cut three leaf branches. Use Susan's Flower Tool Kit to shape each leaf.   

Arrange the Leaves and Coreopsis on the lower left corner of the card.  

Attach the Fairy on the right side of the die cut Oval, as shown.  Leave room to add heart sequins below her hand.  You can add dots of glue and  sprinkle on glitter or use Peel Off Glitter Dots.

Attach the container under the left hand of the Fairy onto the card.  Again add sequins or whatever you used you falling from her right hand, under the container, as shown.

Use Susan's Little Words That Mean A Lot stamp sent and stamp the sentiment.  I used VersaFine Ink and clear embossed the sentiment.  Die cut the sentiment using a die from the Dotted Scalloped Oval die set.  Sponge around the edges of the Oval with Yellow ink.  Attach more sequins around the sentiment.  Attach this oval above the flowers, as shown.

For a final touch, use a fine tip marker and add a few black dots around the lower edges of the  flowers.


Tuesday, June 6, 2017

Anything But A Card Challenge


The design team was challenged this month to create Anything But A Card with the Elizabeth Craft Designs die sets.  My project is a recycled wood cigar box.  I had a lot of fun decorating the box using Joset Designs Dreamcatcher, Feather, and Arrow die sets.  You can see all the projects created by the design team at this LINK.

*******************

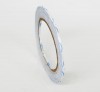
For today's challenge Elizabeth Craft Designs is giving away .... two sizes of the Clear Double Sided Adhesive which will include: a pack of the 5” x 12” sheets and a 10 mm roll of tape, in addition they will also give away a pack of the new ModaScrap 12” x 12” Viaggi Vintage Patterned Paper Pack to 3 winners. 


To enter simply leave a comment on the Elizabeth Craft Designs Challenge post and tell us "Besides the classic card, what are some project ideas you like to play around with?”

Three lucky winners will be selected in a random drawing 

The winners will be announced on Friday, June 9 on the Elizabeth Craft Designs blog

*****************
Instructions for my box:

1. Attached to the top of the cigar box lid is a piece of turquoise card stock. Leave enough room at the bottom to add one of the Bead String 1 borders. Black Line Peel Off Stickers were attached around the edge, for a finished appearance.  Two black Peel Off Sticker Corners were added on the top corners.


2.  Use the Dreamcatcher, Feathers, and Arrow die sets to die cut all the pieces needed to decorate the box.  I die cut a few extra pieces.  I like to die cut the pieces using White Soft Finish Cardstock and sponge on the color.  When you sponge on the color, it gives you a softer look, but you can also use markers to color the pieces or even use colored cardstock.

3.  Once the pieces are colored, assemble the Dreamcatcher.  Add Blue and Black Prills to resemble small beads, as shown.  

4.  Sponge color onto large and small feathers.  I used two shades of blue ink.  Use a small sponge dauber and apply black ink around the edges and center of the feathers.  Use a black marker to add thin black feathery lines coming away from spine of feathers.  Use a black marker to add dots of black ink on the end of each feather, as shown in photo.  

5.  Attach small feathers on bottom of Dreamcatcher strings.  

6.  In the photo of die cut pieces, it shows the small circles that are to be placed over the end of the small feathers, die cut in white.  I decided to die cut these pieces again using gold metallic Shimmer Sheetz.  Prills were added to these pieces.

7. Chose the Arrow you wish to use and glue two of them together, for strength.  Color with markers.

8.  Use the Dream Sentiments Clear Stamp Set for the Sentiment.  Die cut with one of the small Stitched Rectangles that is long enough for the stamped verse, having the verse at the bottom of the rectangle.  Use the paper trimmer to cut the top edge off to make it narrower.  Sponge around the edges with blue and black inks.

9.  Glue the Sentiment Rectangle to the lower right corner of lid.  Attach the arrow above the sentiment using dimensional tape.  Use two of the Dreamcatcher strings and attach to the arrow so they come down to the sentiment.  You want it to look like the arrow is holding the stamped sentiment sign.  Attach two small feathers over the bottom ends of the die cut strings.

10.  Attach the Dreamcatcher to the upper left corner using dimensional tape under the feathers.  

11.  Attach the three large feathers in the upper right corner.  Attach them only at the end with dimensional tape or glue dots.

12.  Use one Black Line Peel Off Stickers to add three lines on the lower left corner.


On the front of the box, two large Feathers were attached.

14.  The perfect design paper for the inside of the box is from the ModaScrap Butterfly Dream pack.

Be sure to go over to the Elizabeth Craft Designs Blog, at this LINK, and leave for comment for a chance to win this great prize.

All the products used to decorate this box are linked below.


Tuesday, April 4, 2017

Glittered Background Challenge


It is time for the April Elizabeth Craft Designs, Design Team Die Cut Challenge.  This month our challenge was to create a card/project with a glittered background.  You can view all the projects on the Elizabeth Craft Designs Blog at this LINK.


Elizabeth Craft Designs has another designer challenge giveaway for you. They are giving away "Three 1/2 oz containers of Silk Microfine Glitter in the colors of your choice"  to 3 winners. 

To enter simply leave a comment on the Elizabeth Craft Designs Challenge post and tell us "What is your favorite technique using Silk Microfine Glitter”

Three lucky winners willl be selected in a random drawing. 

The winners will be announced on Friday, April 7 on the Elizabeth Craft Designs blog.


For my project today I created a pretty glittered pocket for a gift card or money.  Here is how it was created.

Die cut the Leaf Pocket using Soft Finish Olive Twist Cardstock.  Fold back edges along the score line.  

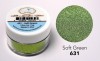
Cut a piece of White Soft Finish White Cardstock the same size as the pocket.  Adhere Clear Double Sided Adhesive to cover one side of this cardstock.  Attach the adhesive side to the back of the die cut leaf pattern.  Press down well so all portions of the die cut adhere well.  Pour the Soft Green Silk Microfine Glitter over the adhesive which shows through the front of the die cut.  Use your fingers to rub the glitter in well and bring out the shine.  The reason I added the glitter after the adhesive  was attached to the back of the die cut, is because I wanted to be sure all the die cut design was attached well to the adhesive.  If you add the glitter to the solid piece of adhesive and attach to the back of the die cut design, the die cut pieces will not stick unless you add glue.  I found it easier to add the glitter through the die cut design.

Cut a piece of Black Soft Finish Cardstock, and attach to the back of the pocket, over the folded tabs, using 3mm Clear Double Sided Adhesive.  You now have a complete pocket.

For the pull out tag, cut a piece of Soft Finish Olive Twist Cardstock slightly narrower than the width of the pocket.  Use the Tags & More 9-Sparkle die set to die cut the design on the top.  Use a corner rounder to round off the edges.  Cut off the bottom off this piece so that only part of the design shows (see picture) when the tag is inside the pocket.  

Use a piece of the Olive Twist cardstock, that was cut off the bottom of the tag, to create a pocket on the bottom of the tag.  To create a decorative edge on the top edge, use the Dotted Scallop Rectangle die to die cut only the top edge of this small piece.  Cut a piece of black card stock for a narrow border under the scalloped edge so it shows up well.  Attach  pocket along the outer edges of tag with 3mm Clear Double Sided Adhesive.

You now have a tag with a pocket to add either a gift card or money for that special person.

Links to the products used are below.


Tuesday, February 7, 2017

In Stitches Die Cutting Challenge -- and a chance to win


Today is the Elizabeth Craft Designs Die Cutting Design Team Challenge. 
This months challenge is exciting because Elizabeth Craft Designs is giving you a chance to win 6 die sets!  Here is the announcement:

 Elizabeth Craft Designs will be giving away 6 of the Stitched die sets which will include: Stitched Hearts,  Stitched Fishtails,  Stitched Squares, Stitched Ovals, Stitched Rectangles and Stitched Circles die sets, to 3 people.  To enter for a chance to win these Stitched die sets,  simply leave a comment on the Elizabeth Craft Designs Challenge blog post, at this LINK, and tell us "What designer challenge you would  like to see in the future.”  The 3 lucky winners will be selected, in a random drawing, and will be announced on Friday, February 10 on the Elizabeth Craft Designs blog.

The challenge this month is In Stitches;   the design team challenge this month is to use any of the stitched dies in our design.  I chose to use the new Stitched Fishtail die set.  

This card was so much fun to create.  I used the Joset Design Dream Catcher die set to create the focal point.  All the pieces were die cut and additional feathers die cut to create a full feather design at the bottom. You can add just a few feathers or a lot as I did.  Color was sponged on the feathers, and a fine point marker used to add the dots.  To make the feather appear very "feathery" I used the Elizabeth Craft Design Fine Pointed Scissors to cut fine lines along the sides of the feathers.  I also like to use the Fine Pointed Tweezers to place the small elements to the die cuts. Also a couple small feathers were added to the top.  Turquoise Glitter Peel Off Stickers were added around the ring of the Dream Catcher. Flat back pearls were also added above the feathers.  A turquoise rhinestone, from my stash, was added to the center of the Dream Catcher.

Using Joset Designs Arrow die set, two black arrows were die cut to decorate each side of the Dream Catcher.

Use the Stitched Fishtail die set to die cut one large white Fishtail, for a background for the Dream Catcher. Center and attach it over the blue background.  The card is 6 inches square, which leaves rooms for additional decorations.

Use Black Soft Finish Cardstock to die cut the Diamond Background.  Save the background for another project, but use the small "discard" pieces to decorate the side of the card and to add corners at the top of the white Fishtail. 

Have fun creating your Dream Catcher.

Be sure to leave your comment on the Elizabeth Craft Designs Blog for your chance to win 6 die sets.  Good Luck.

Links to the products used are below. 


LinkWithin

Related Posts with Thumbnails