Wednesday, May 31, 2017

Sweet Strawberries


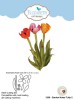
I love strawberries.  It is always fun to create a card using the Joset Designs Strawberries die set.  They were die cut using Soft Finish Ladybug Red Cardstock.  The solid piece under the red strawberry was die cut using Soft Finish Sunflower Cardstock.  The two pieces were glued together then a black marker was used to add a small dot on each of the yellow spots.  Use the large ball stylus from Susan's Flower Tool Kit to shape the strawberries.

Die cut the strawberry leaves and stems, using Soft Finish White Cardstock, and sponge on green ink.  Use the Joset Designs Flourish with Flowers die set for the Flourishes around the strawberries.  Sponge them green and cut of the flourishes you want to use.

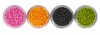
Use the Els van de Burgt Bunch of Flowers 2 die set to die cut three flowers.  Shape with Susan's Flower Tool Kit.  Add yellow Prills to the center of the flowers.

Assemble the strawberries on the lower left corner of the card.  Add a few Red Glitter Dot Peel Off Stickers around the arrangement.  Use a very light gray marker to shade under the arrangement.

Use the A Way With Words Sweet Smiles die set to die cut 'Sweet", using Soft Finish Ladybug Red Cardstock.  Attach above the strawberries.  Use light gray marker to lightly shade under the sentiment.

Use Els van de Burgt Studio Bead Strings 2 die set to die cut one border.  Attach Red Glitter Dot Stickers on the border, as shown.

Thank you for stopping by today.

The products used are linked below.


Saturday, May 27, 2017

Happy Birthday


The new ModaScrap lacy dies, from Elizabeth Craft Designs, are so beautiful.  For my card today, I used the new Oriental Card die.  It was die cut using Soft Finish Whisper Blue Cardstock.  
For the sentiment, the A Way With Words, Happy Birthday die was used.  It was also die cut using the Soft Finish Whisper Blue Cardstock.

The basic card, using Soft Finish 100 lb White Cardstock, is is 6 inches square.  A piece of Soft Finish Rich Black Cardstock, cut 5 1/2 inches square was added to the front.  The sentiment and Oriental Card die cut were attached using Kids Choice Glue.  To finish the card, a few blue rhinestones were added.

Thank you for stopping by today.  Enjoy your weekend.

Products used are linked below.


Monday, May 22, 2017

May All Your Dreams Come True


A simple card with a beautiful message.  This is the card I designed for by design team post at Elizabeth Craft Designs.  The stamp sets used are the Krista Schneider Birch Forest and Joset Designs Dream Sentiments stamp sets.


1.  For the stamped image, use a 4 inch square piece of Watercolor Paper.  Using stamp from the Birch Forest Stamp Set and Black VersaFine Ink, stamp Birch Trees in the center of watercolor paper square;  clear emboss.  When you stamp an image on watercolor paper and emboss it, the water-color ink will stay within the embossed lines.  Before applying color, wet the area to be colored with water; this will help the ink spread better.  Use a light brown and light gray ink, to lightly color the tree trunks.

2.  Use the Earth & Sky Stencil and light blue ink to sponge clouds around the tree trunks.

3.  Use the Rainbow Sky die set and die cut three clouds.  Attach the clouds on each side of the stamped trees, as shown.

4.  Use two pieces of White Soft Finish Cardstock, cut 5 1/2 inches square to create a dimensional frame around the stamped image.

5.  Stack the two 5 1/2 inch squares together.   Use the Stitched Rectangle and the Fitted Rectangle die sets to die cut a  double frame opening.  Center the smaller die inside the larger die and tape down; by doing this, you will create two  perfectly centered die cut frames.  From the center of the dies, use the 3rd smallest die from each set.  Tape the two dies to together on the card stock to die cut two frames.  See finished card above for approximate placement of the dies.

6.  Use stamp from the Dream Sentiments Stamp set for the sentiment.  Use VersaFine Black Ink and Clear Emboss.

7.  Stamp the two butterflies from the Birch Tree Stamp Set, using VersaFine Black Ink, and clear emboss.  Use the matching die set to die cut the butterflies.  Attach the butterflies around the stamped sentiment, as shown.

8.  Attach the two die cut frames together, using dimensional tape.

9.  Attach the frame, with dimensional tape,  over the stamped image, being sure the frame covers the branches on top and bottom.

Products from Elizabeth Craft Designs are linked below.


Monday, May 15, 2017

Slider Spinner Card


I always look forward to the Elizabeth Craft Designs Challenges.  Today the Color Design Team was challenged to create a Slider/Spinner card using the Joset Designs Sliders and Spinners die set along with any of the Krista Schneider Clear Stamp sets.  You can view all the cards by the design team at this LINK

As with all the design team challenges, Elizabeth Craft Designs has another chance for you to win a prize.  Here are the details:

*************

For today's challenge Elizabeth Craft Designs is giving away Joset Designs Sliders & Spinners die set to 3 winners. 

To enter simply leave a comment on the Elizabeth Craft Designs Challenge post and tell us " What Elizabeth Craft Designs image would you make spin or slide?

Three lucky winners will be selected in a random drawing 

The winners will be announced on Friday, May 19 on the Elizabeth Craft Designs blog.

*************** 

Jungle Cuties Clear Stamp set and matching dies were used for my card.  The monkey was colored with markers and die cut with the matching die.  

To create the slider, use a piece of Soft Finish White Cardstock and create the background using Distress Oxide Inks.  For the oval to mount the monkey, die cut two small Dotted Scallop Ovals - one from the Oxide background and one from white.  Glue these two ovals together to create a strong oval.  Die cut a larger Dotted Scallop Ova,l out of the Oxide Background cardstock.  Use one of the dies in the Sliders & Spinners die set and die it close to the top of the oval. Create the slider with the small and large ovals.  There are many YouTube Videos you can watch if you need instructions on how to create a Slider/Spinner card.

Use the ModaScrap Leafy Branch 5 to die cut one green branch.

Use the Joset Designs General Sentiments Clear Stamp set for the sentiment.  Color in the letters using different colors.  Use scissors to cut around the words.  

Attach the monkey so only the top of his head is attached to the small oval. Attach the sentiment as shown, then glue pieces of the Leafy Branch 5 behind the oval and below the sentiment, as shown.  

Attach the slider, with dimensional tape to a larger Dotted Scallop Oval.  Use two layers of dimensional tape so that the slider has plenty of room to slide across the oval.  Attach the slider to the larger blue Dotted Scallop Oval using just one layer of dimensional tape.

Be sure to go over to the Elizabeth Craft Designs Blog and leave your comment on " What Elizabeth Craft Designs image would you make spin or slide?

Good Luck in the drawing.

Products from Elizabeth Craft Designs are Linked below.


Saturday, May 13, 2017

Smiles


Tulips are always a favorite flower in early Spring.  I created this card using Susan's Garden Notes Tulip 2 and Garden Notes Jasmine die sets.  For the stems of the bouquet, I used the Garden Notes Bouquet Stems die set.  The flowers were arranged on the card, then the Bouquet Stems die cut added at the bottom of the Tulip stems.  A Silk purple bow was added to tie the bouquet together.

One of the Dancing Butterfly die cuts was added.  I love using these beautiful Dancing Butterflies on my cards.   

The sentiment used is one of the dies in the A Way With Words Sweet Smiles die set.

Do you know someone who would like to receive a pretty card designed using these pretty flowers?

Wishing you a wonderful weekend.  Happy Mother's Day to all you moms.  

The links to the products used are listed below.


Thursday, May 11, 2017

Happy Birthday


Spring is here and it is time for all the little baby birds to be seen, which was the inspiration for my card today.  I hope my Spring card, created with die cuts, makes you feel happy and gives you inspiration to create a similar card.

 Use a piece of design paper of your choice to cover the front of a 6-inch square card.

Use the Els van de Burgt Studio Fitted Frames 5 - Lace Circles die set and a piece of Celadon Green Soft Finish Cardstock to die cut the green circles.

Use the Stitched Circle die set to die cut a plaid circle slightly larger than the small Lace Circle.  Use the same die set to die cut a white Stitched Circle slightly larger than the plaid circle.  Glue these three circles together as shown.  Attach the large Fitted Frames 5 - Lace Circle around the smaller circles.

Use the Joset Designs Bird die set and die cut the bird facing to the left, using white Soft Finish Cardstock.  Sponge on yellow and brown inks to color.  Add a Black Prill to the eye of the bird.  Attach inside the layered circle frame.

Use the 10mm Clear Double Sided Adhesive and Forest Green Silk Microfine Glitter to create a glittered strip across the bottom of the card.

Use the Fitted Frames die set to die cut the small Rectangle, using the Celadon Green Soft Finish Cardstock.

Use the A Way With Words - happy birthday 2 die set, and die cut 5 'happy' die cuts, using White Soft Finish Cardstock.  Glue all the die cuts together to create a dimensional sentiment.  Glue to the small Fitted Green Rectangle.  Attach to the the bottom of the Circle Frame.

Use Susan's Garden Notes Hyacinthe die set to create two pink Hyacinthes.  Instructions to assemble this flower are at this LINK.  Attach the flowers as shown.

Use Susan's Garden Notes Zinnia die set to create one flower and attach over the right side of the green glittered strip.

Use the Dancing Butterflies die set to die cut one butterfly out of Dusty Sky Soft Finish Cardstock.


To complete the inside of the card, use the A Way With Words happy birthday 2 die set to die cut a green 'birthday'.

 Use two dies from the Fitted Frames die set to die cut a narrow frame that will fit around the 'birthday' die cut.  Use White Soft Finish Cardstock.

Use the Bird die set to die cut the bird, which faces to the right, color and attach to the bottom left side of the inside of the card.

This card could be used for different occasions depending on the word you use on the inside of the card.

Products from Elizabeth Craft Designs linked below.


LinkWithin

Related Posts with Thumbnails