Showing posts with label A Way With Words. Show all posts

Wednesday, February 12, 2020

Flowering Trees of Spring


I am so tired of snow so wanted to think about Spring.  Today I created my card using Susan's Flowering Trees of Spring die set.  

The branch was die cut using brown card stock.  Cut two branches and glue them together for strength.

The flower petals were die cut using white card stock to create 8 flowers and 3 buds.  Leaves were also die cut using white card stock.  Light pink ink was sponged lightly around the tips of the flower petals. The two die cut petal pieces were glued together to form the flower.   The stamens were die cut with yellow card stock and a light green marker  used to color the base.  The stamen pieces were cut down the center of each stamen to make them thinner.  A small dot of ink was added to the tips and then dipped into Susan's Yellow Pollen.  The stamen was then rolled and glued into the center of the flower.  The tree buds were created by using the two die pieces for the flower.  The petals were lightly sponged with light pink ink.  On the outside of the three petal die cut, a bright pink ink was sponged at the base.  A small pearl was used to create the round shape of the bud.  First the two petal die cut was hot glued around the bead, then the three petal die cut, with the bright pink inked side on the outside, was glued around the two petal die cut.  Pinch the petals close together to form the bud.  The leaves were detailed with the leaf tool, sponged with green ink, then shaped.  

The background on this card is a piece of design paper from the Tonic Studios Craft Perfect Blue Blossom 6x6 pad.  The Tonic Classic Quatrefoil die was die cut using white card stock and attached to the top portion of the card.  

Suzanne Cannon's A Way With Words 4-Seasons die set was used to die cut the Sentiment.


Monday, October 14, 2019

White Poinsettia Christmas Card plus new Tonic Glass Mat


Have you started working on your Christmas cards yet?  Today I have a gold and white card designed using Susan's Garden Notes Poinsettia die set.

I am excited to announce another new product from Tonic Studios.  I have loved working on my large Tim Holtz Glass Media Mat but today, there is a smaller version of this glass media mat that will be perfect for travel or for a friend to use when they come to craft with you.


 This is the large Tonic Studios Glass Mat with the card created today.  I LOVE working on this great Glass Mat on my desk but now there is a new smaller glass mat that we can travel with.


This is the brand new smaller, Tonic Studios Travel Glass Mat.  Watch the Tim Holtz demostration for this new mat on FaceBook Live at this LINK.  


Turn your cards into a gift.  I wanted to show you how you can design a card and easily turn it into a framed gift that will be treasured year after year.  You can usually find beautiful frames on sale at the craft store to fit any size card you wish to create.  This is a great idea for those people hard to buy for, or for people who treasure your cards!

How to Create this card:   This is a 6-inch card.  The backing is a piece of Tonic Mirror Gold Card Stock. The edges of this piece were scored on the Tonic Studio Super Trimmer that includes both a cutting and scoring blade.  On top is a smaller piece of white card stock.  To decorate the corners, use the Tonic Studio's Snowflake Flurry Stencil. Add Nuvo Moonstone Glimmer Paste, with the Tonic Spatulas, to two different snowflakes, onto the top corners.  Allow to dry while working on the rest of the card.  Once dry, add to the Gold Card using the Tonic Adhesive Tape Runner.

Use the Tonic Studios Mirror gold Card Stock to create a smaller square gold frame to fit down in the lower right corner.  

Use the Budding Vine - Floral Blossom die set for the design behind the gold frame.  Use both pieces of this set to die cut.  Trim this die cut down to fit behind the Gold Mirror Card Stock Frame.  You can use the narrow Nuvo Tape Runner to attach the die cut background. 

Use Suzanne Cannon's A Way With Words - Merry Christmas die set for the sentiment.  Die cut it using the Mirror Gold Card Stock.  Use the Nuvo Precision Glue Pen to add glue to the back and attach inside the gold frame, as shown.

Use Susan's Garden Notes Poinsettia die set to die cut the poinsettia.  Use Nuvo Bottle Green Crystal Drops in the center of the Poinsettia for the bracts. Add yellow Pollen to each drop.  Color the Poinsettia leaves with Green and a touch of red Embellishment Mousse.  Shape and attach under the white poinsettia.

Use the Garden Notes Whitepine Bough & Pinecone die set for the pine boughs.  Two different shades of green card stock.  Attach the pine boughs under the poinsettia.  Use the Garden Notes Berry Spray and die cut two sprays out of Tonic Kraft Brown Card stock.  Use Nuvo Chalk White Stone Drops to create the berries.  Use the Nuvo Deluxe Adhesive to glue the pine boughs and berry branches under the Poinsettia.  

I have added product links below.  If you use these links to purchase products, I will receive a small commission which helps me purchase supplies -- no additional cost to you.  I appreciate you visiting my blog and appreciate your support.


Saturday, March 16, 2019

Crocus in Crate


Spring should be just around the corner!  Today I have a crate full of pretty crocus.  

This is a 6-inch square card.  A piece of embossed white card stock was cut 5 3/4 Inches square and attached to the font of the card.  

Use Soft Finish True Green Cardstock and the A Way With Words 4-Seasons die set to die cut the sentiment.  Use the same card stock and the Corners 1 die set and die cut 2 corners.  Attach the corners on the top of the card and center the sentiment between the corners.

Use the Garden Notes Wooden Fruit Crate die set and die cut two crates.  Attach the die cut s together, for dimension.  Cut a piece of Chocolate Cardstock to fit behind the crate and glue to the back.  Attach the crate to the bottom of the card.

Use the Garden Notes Crocus die set and die cut enough pieces to create 16 flowers.  Die cut 8 flowers using bright yellow card stock and 8 flowers using lavender card stock.  Shade the base of the lavender flowers with a darker purple ink then use a white gel pen to draw lines up from the base to the top of each petal.  Shape all the petals using the small loop tool in the Flower Tool Kit  Glue the petals together, cupping well.  Snip the ends of the stamen with the Fine Pointed Scissors.  Dip the stamen piece in glue then in Yellow Pollen.  Allow the glue/pollen to dry on the stamen.  Once the glue is dry, roll the stamen with the tweezers and insert into the center of the crocus.  

Die cut the leaves and stems for the crocus.  Use the leaf tool and draw a line down each leaf.  Use a white gel pen to add white lines down the leaves.  

Attach the stems, flowers, and leaves inside the crate, adjusting the size of the stems so the flowers are at different heights.  Attach leaves all coming from the very bottom of the stems and with some behind the shorter flowers.

I added some very fine beads inside the crate, to resemble sand.

This card can be mailed out in one of the clear acrylic boxes, which are linked below.

HAPPY SPRING!


Monday, December 3, 2018

Christmas Explosion Box


Several people have asked me to create a Christmas Explosion Box. These boxes are easy to create and always fun for the recipient to open. Below is a tutorial on how to create this project.

Sunday, November 4, 2018

Joy


I have a friend who loves vintage type cards.  With the help of the ModaScrap  Xmas Vintage Collection design paper I created this card.  The design paper has a collection of vintage Christmas ornaments and goes perfect with this beautiful A Way With Words Christmas ornament.

This is a 6-inch square card.  The front is covered with the ModaScrap Xmas Vintage Collection Design paper.  

Use the Dotted Scallop die set to die cut two different size squares using True Green and Silver Gray Soft Finish Cardstock.  Attach the squares to the front of the card.

Use the A Way With Words Love, Joy, Peace Christmas Ornament,  die set for the ornament.  Use a piece of white Soft Finish Cardstock covered with a piece of Clear  Double Sided Adhesive to die cut the ornament.  Peel off the adhesive covering and sprinkle Light Gold Silk Microfine Glitter on both the die cut circle and the flourish.  Polish well with your fingers to bring out the sparkle.  Attach the ornament in the center of the green die cut square.

Use the same die set and die cut the 'Joy' using a piece of white card stock that has Clear Double Sided Adhesive on the top.  Sprinkle on Cool Diamond Silk Microfine Glitter.  Use a piece of Fun Foam and die cut the sentiment again - this will give the sentiment dimension.  Glue the glittered sentiment to the top of the Fun Foam then attach to the center of the ornament.

Use the Garden Notes Poinsettia die set and create a red poinsettia. For this flower, I combined the petals of the large Poinsettia with the petals from the small Poinsettia.  Shape the poinsettia using the Flower Tool Kit and assemble using Kids Choice Glue.  Add Yellow and Green Prills to the center.

Use the Beautiful Baubles die set and die cut two pine branches.  Use the fine pointed scissors to cut some of the pine needles in half; this will give them some fullness.  Sponge a little white pigment ink on the branches and use a brown maker to color the center (branch) of the pine bough.   Attach the boughs to the upper left corner, then attach the poinsettia on the corner.  

For a final touch, use the Gold Corners, Peel Off Stickers, on the other three corners.

This card can be mailed in one of the clear acrylic boxes which is linked below.


Thursday, November 1, 2018

Baby It's Cold Outside


I really love this moose.  He was created with the Joset Designs Moose die set.  Suzanne Cannon's stamp was used for the perfect sentiment for this card.

This is a 6-inch card.  A piece of white card stock was cut 6-inches square and scored around the edges, which is used for the front of the card.  

Use Susan's Earth & Sky Stencil and the light blue PanPastel to create a cloudy sky, approximately half way down, on the 6-inch square piece of cardstock.

Use the Reindeer die set to create the pine trees.  Use a scrap piece of card stock and die the tree in the center of it to make a stencil.  Use a sponge and green ink to sponge inside the tree stencil.  Stencil the tree on the left; move the stencil over and sponge on a second tree, making it slightly darker green.  Move the stencil between the two trees and lightly sponge on green ink.  If the trees are colored different shades of green, it gives them dimension when sponged on the card.

Use a white opaque pen and create snowflakes in the sky and on the trees.

Use the Christmas Collection stamp set and stamp the sentiment, using VersaFine Black Ink, in the lower left corner.

Use the Moose die set and create one Moose.  I die cut the pieces using white Soft Finish Cardstock and sponged on tan and brown inks.  He was assembled using Kids Choice Glue.  Attach the moose using dimensional tape in the lower right corner.

For extra dimension and sparkle, use Nuvo Glitter Crystal Drops and draw in snow lines below the trees and under the hooves of the moose.

This card is flat enough to be mailed in a regular 6-inch square envelope.


Warm Thoughts Card and Pine Cone Tutorial


A Way With Words, Flourished Candle


The A Way With Words die sets are perfect for creating an elegant Holiday card.  This is Selma Stevenson today and I designed a card using Suzanne Cannon's Warm Thoughts and Flourish Candle die sets.  For additional embellishment, Garden Notes die sets were used.


Begin with a 6-inch square card  Cover the front with gold metallic card stock.  Add a piece of white card stock cut 5 3/4 inches square.  Layer a piece of the ModaScrap Wood Effects design paper on top for the rustic background.

Use the A Way With Words Warm Thoughts die set and die cut the sentiment using gold metallic card stock.  Attach to the top of the card, as shown.

A Way With Words, Flourished Candle

Use the A Way With Words Flourish Candle die set and die cut the candle once using gold metallic card stock.  Use the same die and die cut the candle, and extra flame and melting wax, using ivory card stock.  Color the flame using yellow and orange markers.  Add a small amount of Kids Choice glue to the flame with your finger, then sprinkle on Warm Diamond Silk Microfine Glitter.  Attach the ivory candle and flame on top of the gold metallic candle.  Use a clear glaze and spread over the candle to give it a waxy appearance.

Use the Garden Notes Whitepine Bough & Pine Cone die set to die cut 8 green pine branches.


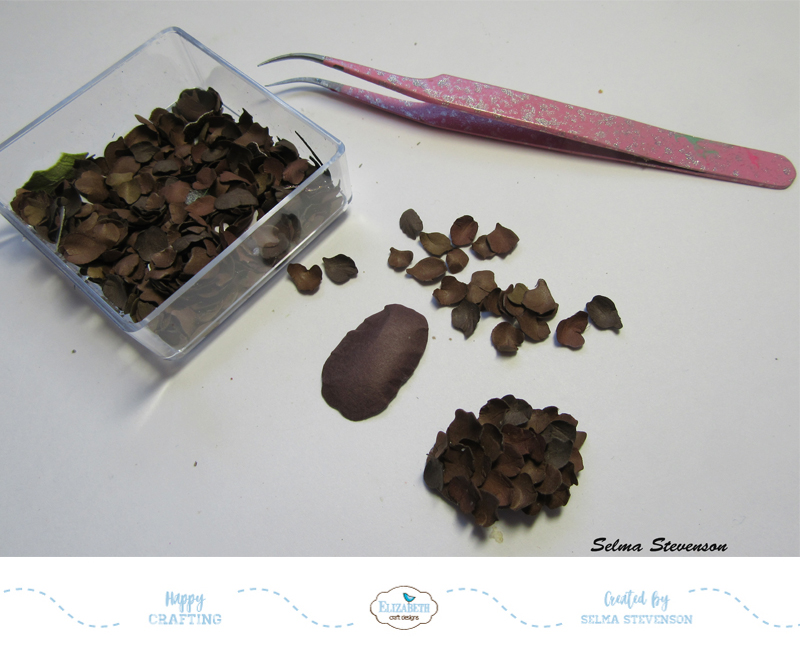
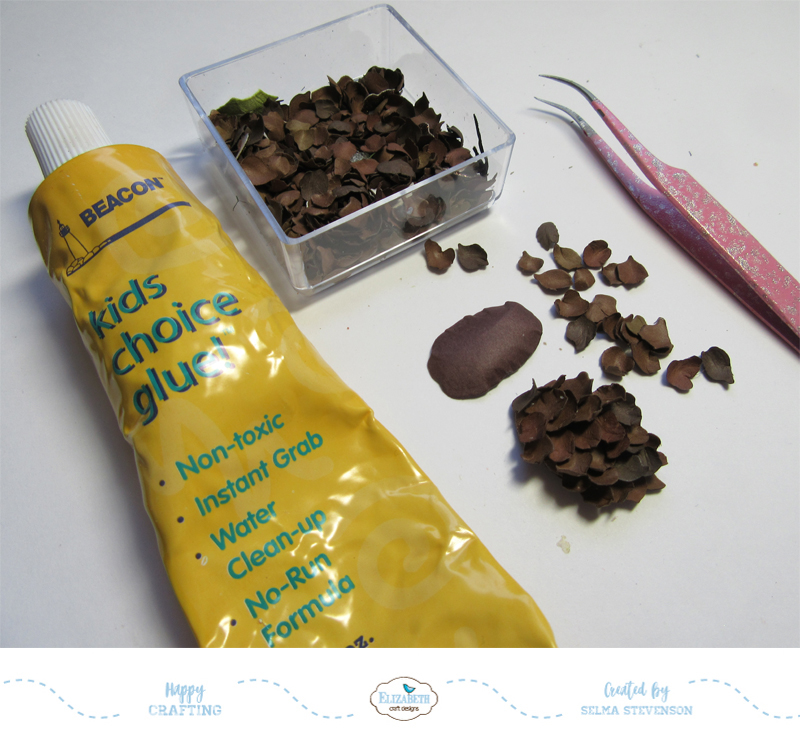
Use the Garden Notes Whitepine Bough & Pine Cone die set to die cut pieces to create two pine cones. Die cut 4 oval pieces and 6 plates of the pine cone petals.   To assemble, shape the oval pieces with the large ball stylus.  Glue two oval pieces together, adding glue to only the edges of the oval.  By using two oval pieces it will help hold the rounded shape of the pine cone.


Use the small loop tool and shape all the pine cone petals - pull down from one end to the next and it will slightly cup each one.

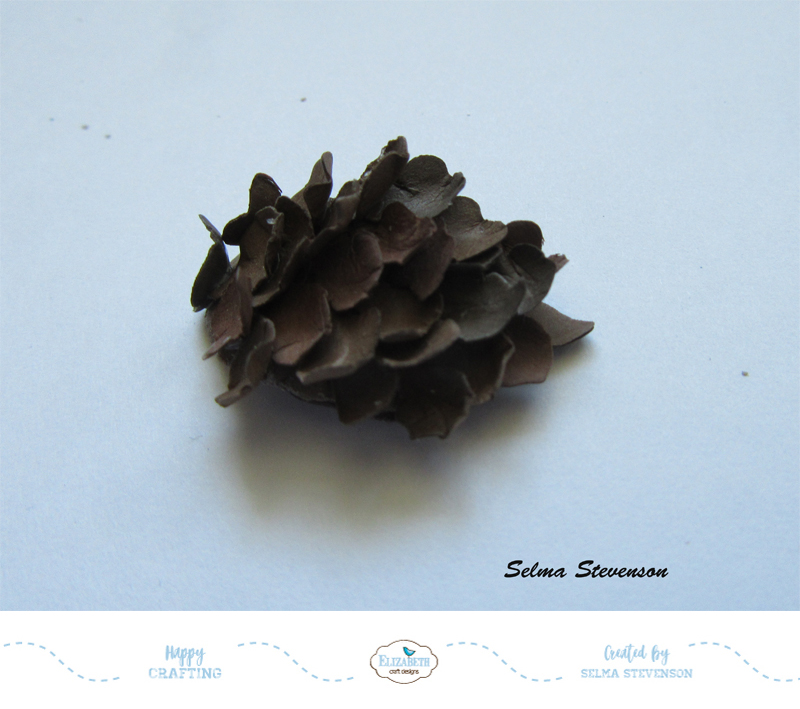
There are two ways you can create the pine cone.  Susan shows in her Facebook Susan's Garden Club video to glue the petals on the oval with the cupped side down and you will have a pinecone that hasn't yet opened.  She pulls the tips of the petals back once they are glued, for a more open pinecone.


For a more open pinecone I prefer to add the petals with the curved sides facing up.  Add the first couple of petals at the tip of the oval with the curved petals down, then start gluing the petals with the curve facing up.  Alternate all the petals going across in rows.

Use the Garden Notes Leafy Berry Branch die set and die cut two branches, using a very light brown card stock.  Shape the leaves using the Elizabeth Craft Designs Fine Pointed Tweezers.  Place the point of the tweezers on the end of the leaf and pinch up.  This will give the leaves dimension.  Add red Nuvo Crystal Drops for the berries.  Allow to dry before assembling the centerpiece.

Glue four pine boughs on the lower left side of the card and four boughs on the left.  Glue the longest branch from the Leafy Berry Branches on each side, over the pine boughs.

Attach the assembled Candle Flourish, with dimensional tape, in the center between the pine boughs and berries.

Use the Garden Notes Poinsettia die set and assemble one white poinsettia.  Use the very pale yellow PanPastel from Set #3 to shade the lower half of each petal then use the light yellow green PanPastel from Set #1 to shade over the the light yellow just at the base.   Shape the poinsettia using the Flower Tool Kit.  Attach the poinsettia at the base of the candle.  Use yellow green Nuvo Crystal Drops to make 5 dots in the center of the poinsettia.  While the Nuvo Drops are still we, drop in a few yellow Prills.

Add the pine cones on each side of the poinsettia, as shown.

This card will mail nicely in one of the large clear acrylic boxes.


Wednesday, October 31, 2018

Merry Christmas


Suzanne Cannon's A Way With Words Flourished Christmas Minis die set is such a beautiful die set to create elegant Christmas cards.  For this card I combined this die set along with the new small A Way With Words Merry Christmas and Garden Notes Poinsettia die set.

A Way With Words, Flourished Christmas Minis
A Way With Words Flourished Christmas Minis

This is a 6-inch card created by using a piece of the Silver Gray Soft Finish Cardstock.

Use the ModaScrap Wood Effects card stock and cut one strip of the wood grain and attach to the left side of the card.  

Use the Fitted Squares die set and die cut a 4 inch square of ivory card stock.  Use the Gold Border Peel Off Stickers and place stickers around the edges. 

Use the A Way With Words Flourished Christmas Minis die set and die cut the ornament and the reindeer, using gold metallic card stock.  Attach to the center of the ivory square.   Use the gold Dot Peel Off Stickers to add snow around the ornament, as shown.  Attach this square to the top of the card.

Use the A Way With Words small Merry Christmas die set and die cut the sentiment using gold metallic card stock.  Add to the lower right corner of the card.  Add three gold Dot Peel Off Stickers, as shown.

Use the Garden Notes Poinsettia die set and create one poinsettia.  I used an off-white pearlized card stock for the poinsettia and shaded the center using light pink PanPastel.  (This card stock did not shape nearly as well as the white Soft Finish Cardstock I usually use.)  Shape the poinsettia and leaves using the Flower Tool Kit and assemble using Kids Choice Glue.  Add yellow and green Prills to the center.  Sponge light green ink on the leaves.  Sponge pink PanPastels on the edges of the leaves.  Attach the poinsettia to the lower left corner. 

Use the Garden Notes Whitepine Bough & Pinecone die set and die cut 4 pine boughs  Glue the boughs under the poinsettia.

This card can be mailed in one of the clear acrylic boxes.


Tuesday, October 30, 2018

Let It Snow White Poinsettias


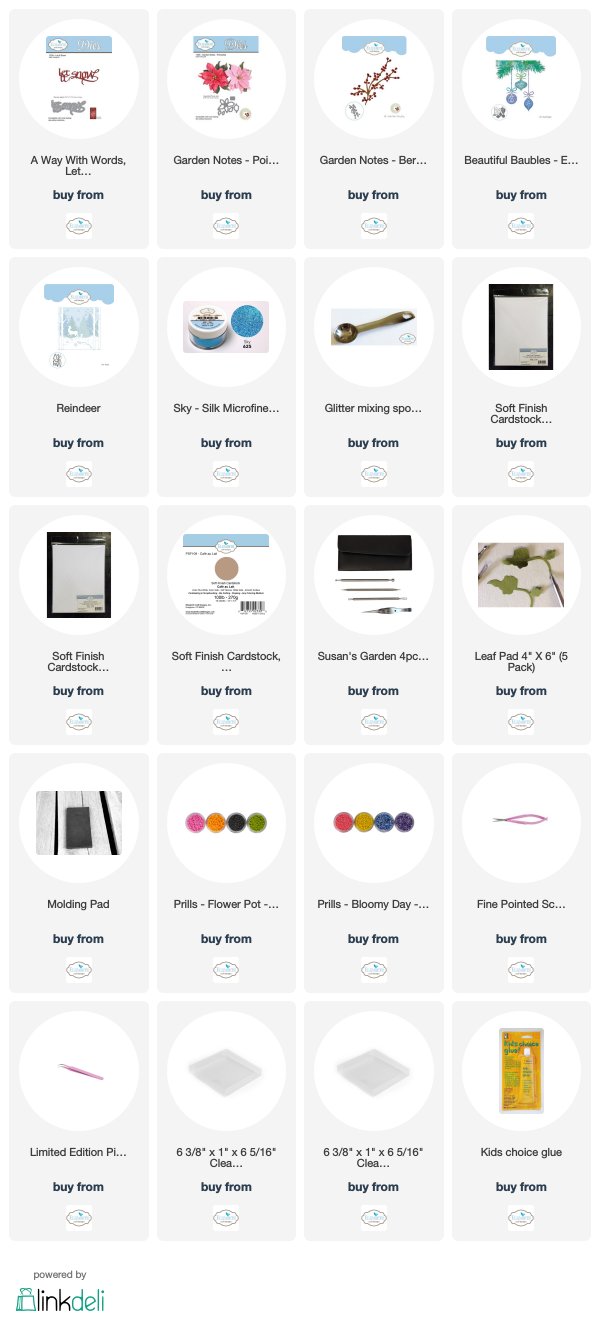
A little bit of sparkle for this Christmas card! When you use the Elizabeth Craft Designs Silk Microfine Glitter, it will not fall off once you polish it with your fingers and bring out the shine.  Today I wanted the A Way With Words die cut sentiment to stand out on this white card, so I used the beautiful Sky glitter on it.

This is a 6-inch square card.  A piece of white card stock was cut 6-inches square and a piece of 15mm Clear Double Sided Adhesive was lined around the edges.  The protective covering was pulled off and Sky Silk Microfine Glitter was sprinkled over the Adhesive.  Be sure to polish the glitter with your fingers.  Add this piece to the front of the card.

Cut a piece of white card stock 5 3/4 inches square.  Score around the edges for a finished appearance.  Attach to the front of the card.

Use the A Way With Words Let It Snow die set and die cut the sentiment using white card stock covered with Clear Double Sided Adhesive. Sprinkle on Sky Silk Microfine Glitter and polish with your fingers. Attach the sentiment to the upper right corner.

Use the Beautiful Baubles die set and die cut three pine branches, using White Soft Finish Cardstock.  Attach to the front of the card with a pine branch facing each of the three corners, as shown.

Use the Garden Notes Berry Branch die set and die cut 2 branches using Cafe au Late Soft Finish Cardstock.  Use white Nuvo Crystal Drops to create the berries.  Allow to dry before attaching to the card.  The branches should be cut apart and will be attached behind the poinsettias.

Use the Garden Notes Poinsettia die set and create 2 white poinsettias.  Use 100 lb white Soft Finish Cardstock.  Shape the poinsettias and leaves using the Flower Tool Kit.  Add green and yellow Prills to the center of each poinsettia.  Attach the two poinsettias as shown.  Once the berries are dry, cut the branches apart and glue under the poinsettias.  Use a fine point marker and add a small black dot to the end of each of the berries.  

Use the Reindeer die set and die cut the white snowflakes.  Attach them around the glittered sentiment.  

This card can be mailed in one of the clear acrylic boxes.


Sunday, October 28, 2018

Merry Christmas Cardinal


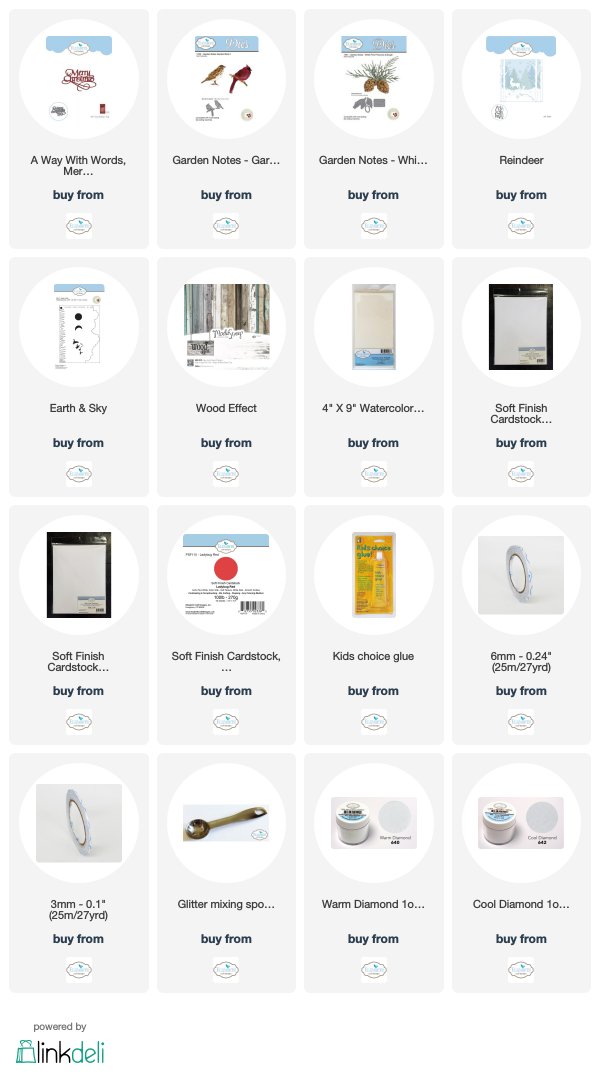
I am still working on my Christmas cards.  I love to create winter scenes and have another card using the Garden Notes Garden Birds die set.  I also love Suzanne Cannon's new A Way With Words small Merry Christmas die set.  This sentiment fits so perfect on cards that you want to add a lot of other elements.

This is a 6-inch card.  I used watercolor paper for the background and the snow bank on the bottom of the card because I liked the added texture.  

Use the Earth & Sky Stencil to lightly sponge blue ink on the top of watercolor paper.  I used Stormy Sky Distress Oxide Ink.  You want to create a very light background so just lightly sponge the ink around the cloud stencil.

Use the A Way With Words small Merry Christmas die set and die cut the sentiment using Ladybug Red Soft Finish Cardstock.  Attach to the upper corner of the stenciled sky.

Use the Garden Notes Whitepine Bough & Pine Cone die set and die cut the pine branches 5 times.  I used a sparkly white cardstock from the craft store.  Attach the branches to the upper left corner, as shown.

Use the Reindeer die set and die cut one snow bank, using watercolor paper.  Attach along the bottom edge of the card, gluing only around the sides and bottom.  Leave the top open so you can tuck in the fence posts.

Use the ModaScrap Wood Effects card stock.  Use the light wood plank piece to create the fence posts.  Use a paper  cutter and cut narrow strips approximately 3 inches long.  I used 8 strips for the fence, so I cut 4 of the wood planks in half.    Round off the corners on one end, with scissors.  Add Kids Glue to the back of each strip and tuck down in the snow bank, making the top of the posts uneven. The fence only goes half way across the card.   I did not add glue to the upper half inch of each strip because I wanted it to stand away from the background.  Add two strips of the same card stock to go across the wood fence to make it look realistic.  
Use the Reindeer die set and die cut 3 pine trees.  I used a sparkly white card stock, the same as used for the pine branches.  Use a piece of fun foam and die cut one tree.  Attach the fun foam to the back of one of the trees - this will be the tree in the foreground.  Use a strip of 6mm Clear Double Sided Adhesive down the length of two trees and attach to the right lower side, covering the edge of the fence.  Put a piece of Clear Double Sided Adhesive on the back of the tree with the fun foam, and attach on the lower edge of the card, as shown.

For extra snow on the fence and along the snow bank, add some Kids Choice Glue with a toothpick then sprinkle on Cool Diamond Silk Microfine Glitter.  


Saturday, October 27, 2018

Floral filled Sleigh


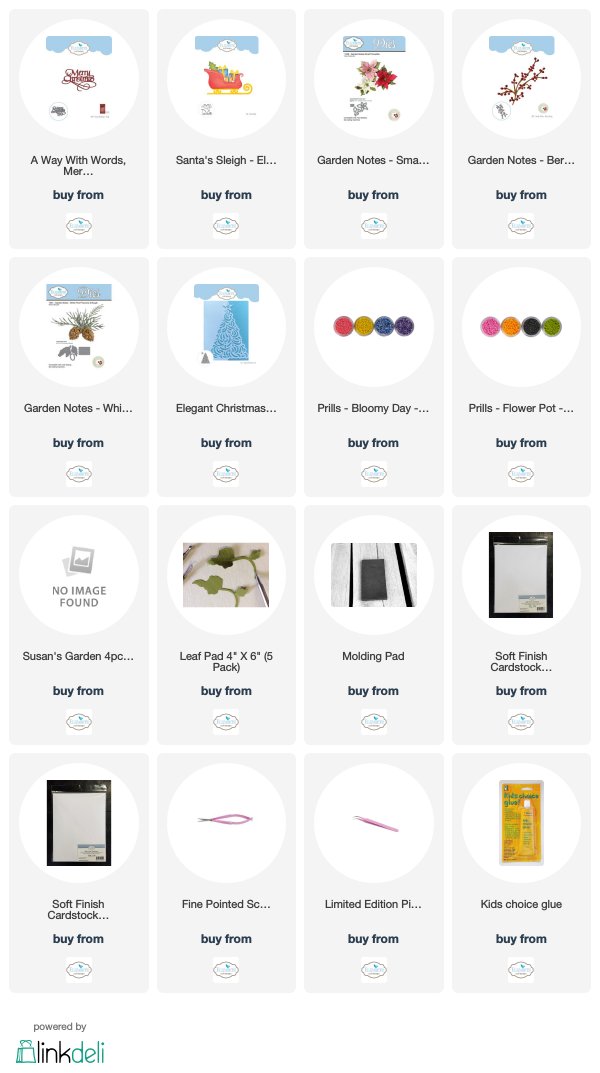
I had fun working on this card.  I love Christmas Sleighs and thought it would be fun to fill the Joset Design Christmas Sleigh with holiday greenery and poinsettias.

This is a 6-inch card.  A piece of white design paper that has shiny polka dots on it was used for the background.  The edges of this piece were scored around the edge for a finished appearance.

The A Way With Words Small Merry Christmas die set was used for the sentiment.  It was die cut using gold metallic card stock and glued to the upper right corner.

The Joset Designs Elegant Christmas Tree die set was used to die cut the tree, using silver metallic card stock.  A small portion of the left side was cut off and it was glued to the left side of the card, inside the scored line along the edge.

The Santa Sleigh die set was used to die cut one gold metallic sleigh.  The same die was used to die cut just the top edge of the sleigh on another piece of gold metallic card stock.  This piece was trimmed with scissors to create the gold trim along the edge of the sleigh.

The Santa Sleigh was used again to die cut the sleigh using a rosy bronze metallic card stock.  The bottom edge of the die cut was cut off with scissors.  (The bronze sleigh will be attached above the gold metallic base.)  Use an embossing folder to emboss a design on the bronze sleigh.  I used the discontinued Elizabeth Craft Designs (119) Swirly Curves embossing folder. A pewter metallic paste was rubbed lightly over the embossed design.  Glue the embossed piece in place on top of the gold sleigh.  Glue the Gold trim for the top of the sleigh along the top edge of the bronze piece.  Attach the sleigh, using dimensional tape, at the bottom of the card, as shown.

Use the Garden Notes Whitepine Bough & Pine Cone die set and die cut the pine branches 5 or 6 times (depending on full you want the branches in the sleigh).  

Use the Garden Notes Berry Branch and die cut 2 brown Berry Branches.  Use Autumn Red Nuvo Crystal Drops to create the berries.  Allow to dry before adding to the arrangement.


Picture of a Picasso Poinsettia

Use the Garden Notes Small Poinsettia die set and create two poinsettias.  There is a poinsettia called Picasso Poinsettia, which is tan and red.  This is the type of poinsettia I created.  The Poinsettia pieces were die cut using white Soft Finish Cardstock and sponged using Vintage Photo Distress Ink.  Red ink was then sponged around the edges.  The poinsettias were shaped using the Flower Tool Kit and assembled using Kids Choice Glue.  Prills were added to the center of each poinsettia.  

Fill the sleigh with a lot of the pine boughs.  Once the berries are dry on the Berry Branches, cut the branches into smaller branches.  Tuck the berry branches in between the pine bough.  Add the two small Picasso Poinsettias to the Sleigh.  

As an extra embellishment, small glittered balls were glued around in the arrangement.  These little balls were purchased at a craft store.  A little bit of flaked snow was added along the bottom of the sleigh.


Wednesday, October 24, 2018

Ho Ho Ho Gift Card Folder


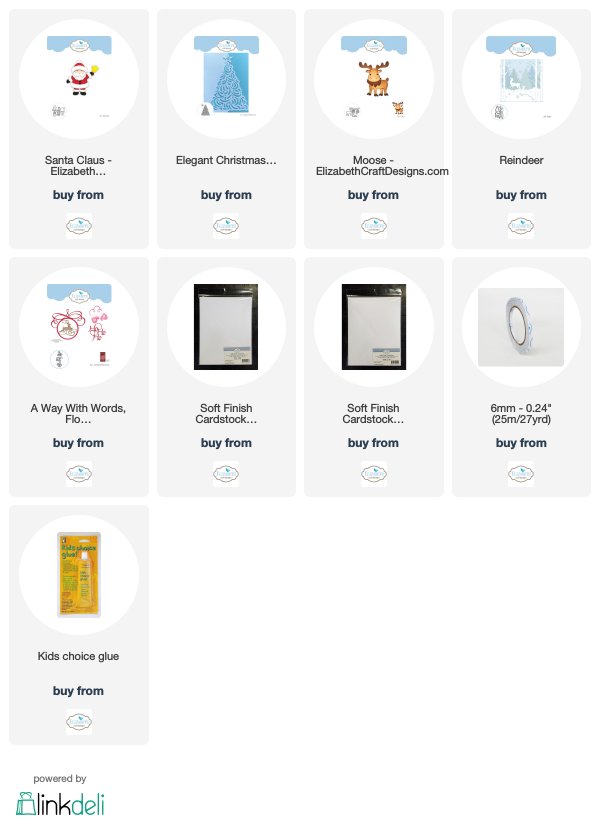
My grandchildren love to receive gift cards or money for Christmas.  I have created a Christmas card that has a pocket inside to hold a gift card.

This is a 6-inch square card.  

Use the A Way With Words Flourished Christmas Minis die set and die cut the sentiment, using glossy black card stock.  

Use the Joset Designs Santa Clause die set and assemble the Santa.  

Use the Elegant Christmas Tree die set and die cut one white elegant tree - use both dies in this set to die cut the tree.  Use only the back (solid tree) and die cut 3 white trees.  Use the same solid tree die and die cut one green tree, using green mirror (metallic) tree.  Glue the 3 solid white trees together.  Glue the green metallic tree on top, then the elegant tree die cut on top.  Gluing all these pieces together creates a dimensional tree.

Use the Elegant Christmas Tree die set and die cut one silver star.

Use Joset's Moose die set and die cut the red metallic Christmas Ornaments.

Place several pieces of 6mm Clear Double Sided Adhesive to the back of the Christmas tree.  Pull off the adhesive covering and wind a thin metallic silver cord around the tree.  Having the long strips of adhesive on the back will hold the cord in place on the back of the card.  Use Kids Choice glue and attach the red ornaments so they hang from the silver cord.

Use the Reindeer die set and die cut two snow banks.  Also use this die set to die cut the small snowflakes two times (6 snowflakes in total.

Attach the snowbanks at the bottom of the card, alternating the mounds and trimming off the ends to fit.  Attach the tree to the right side of the card, as shown.  

Attach the sentiment at the top of the card, next to the top of the tree.

Attach Santa Clause, using dimensional tape to the left of the tree, just below the sentiment.  

Glue the small snowflakes around on the top portion of the card.


On the inside of the card, glue a piece of card stock along three sides to hold either a gift card, money, or a check. (Adjust the size of the pocket according to what you want to insert.) Use one of the A Way With Words Merry Christmas die sets for the greeting inside the card.

This card will fit into a regular 6 inch square envelope.

The products used are linked below.


Friday, October 19, 2018

Merry Christmas Deer Scene


I live in an area where  we see deer almost every day.  I love to create cards with the Elizabeth Craft Designs Reindeer die set.  You have probably noticed that I love this die set, because I use it so much!    It is a great die set to use alone or in combination with a lot of other die sets.  It is a great die set to create Christmas/Winter cards, but can also be used for many other types of cards.

This is a 6-inch square card.  There are many layers to create this card.

Use a piece of white card stock 5 3/4 inches square to create the cloud background.  Use the Earth & Sky Stencil to sponge blue ink around the cloud stencil.  This only needs to be sponged about half way down.  Attach this piece to the front of the card.

Use the A Way With Words Merry Christmas die set and die cut the sentiment using metallic silver card stock.  Attach to the upper right corner of the card.

CountryScapes - Mountains

Use the CountryScapes Mountains die set and die cut the three different mountain  layers.  Color the trees and attach each layer under the sentiment.  These die cuts are going to give a lot of depth to this scene.

Use the Reindeer die set and die cut four snow banks.  Attach each one to the front of the card, alternating the snow mounds.  You want different layers of snow to tuck the pine trees in.

Use the Reindeer die set and die cut 5 pine trees, using white Soft Finish Cardstock.  Color with markers.  Tuck the trees down in the snowbanks.  Use dimensional tape behind the four trees in the foreground and the back tree can be glued to the card.

Use the Reindeer die set and die cut both reindeer.  Color and attach the jumping reindeer behind the pine tree on the left.  Use dimensional tape.   Color and attach the other reindeer near the bottom of the card, as shown.

This type of card is great to use when you need a masculine card.

Links for the products are listed below.


Wednesday, October 17, 2018

Peace


I love Christmas cards with trees for a peaceful winter scene.

This is a 6 inch square card.  Cut another piece of white card stock 6 inches square and tape the largest Frame It/Stitched Squares die, centered, on it.  This will die cut the white frame.  

Cut a piece of the ModaScrap Let It Snow design paper 5 3/4 inch square and use 3mm Clear Double Sided Adhesive along the edges to attach to the back of the white frame.  Attach the frame to the front of the card.

Use the Reindeer die set and die cut 3 trees, and 2 snow banks using white Soft Finish Cardstock. 

Glue the two snowbanks together, alternating mounds, cutting to fit inside the frame, and glue only around the outside edges.  Leave the top of the snow open so you can tuck in the trees.

Attach the 3 trees, gluing down the tree in the middle and using dimensional tape for the other 2 trees.  

Use the CountryScape Woods 1 die set and die cut 1 white tree.  Attach to the right side of the card, using glue.

Use the A Way With Words Love, Joy, Peace  die set and die cut Peace using blue card stock.  Attach to the bottom of the card below the pine trees.

Use Kids Glue and add small amounts of glue on the tips of the pine trees, on the branches of the birch tree, and along the edges of the snowbanks.  Sprinkle on Cool Diamond Silk Microfine glitter.


LinkWithin

Related Posts with Thumbnails