Sunday, November 27, 2022

Sympathy Card


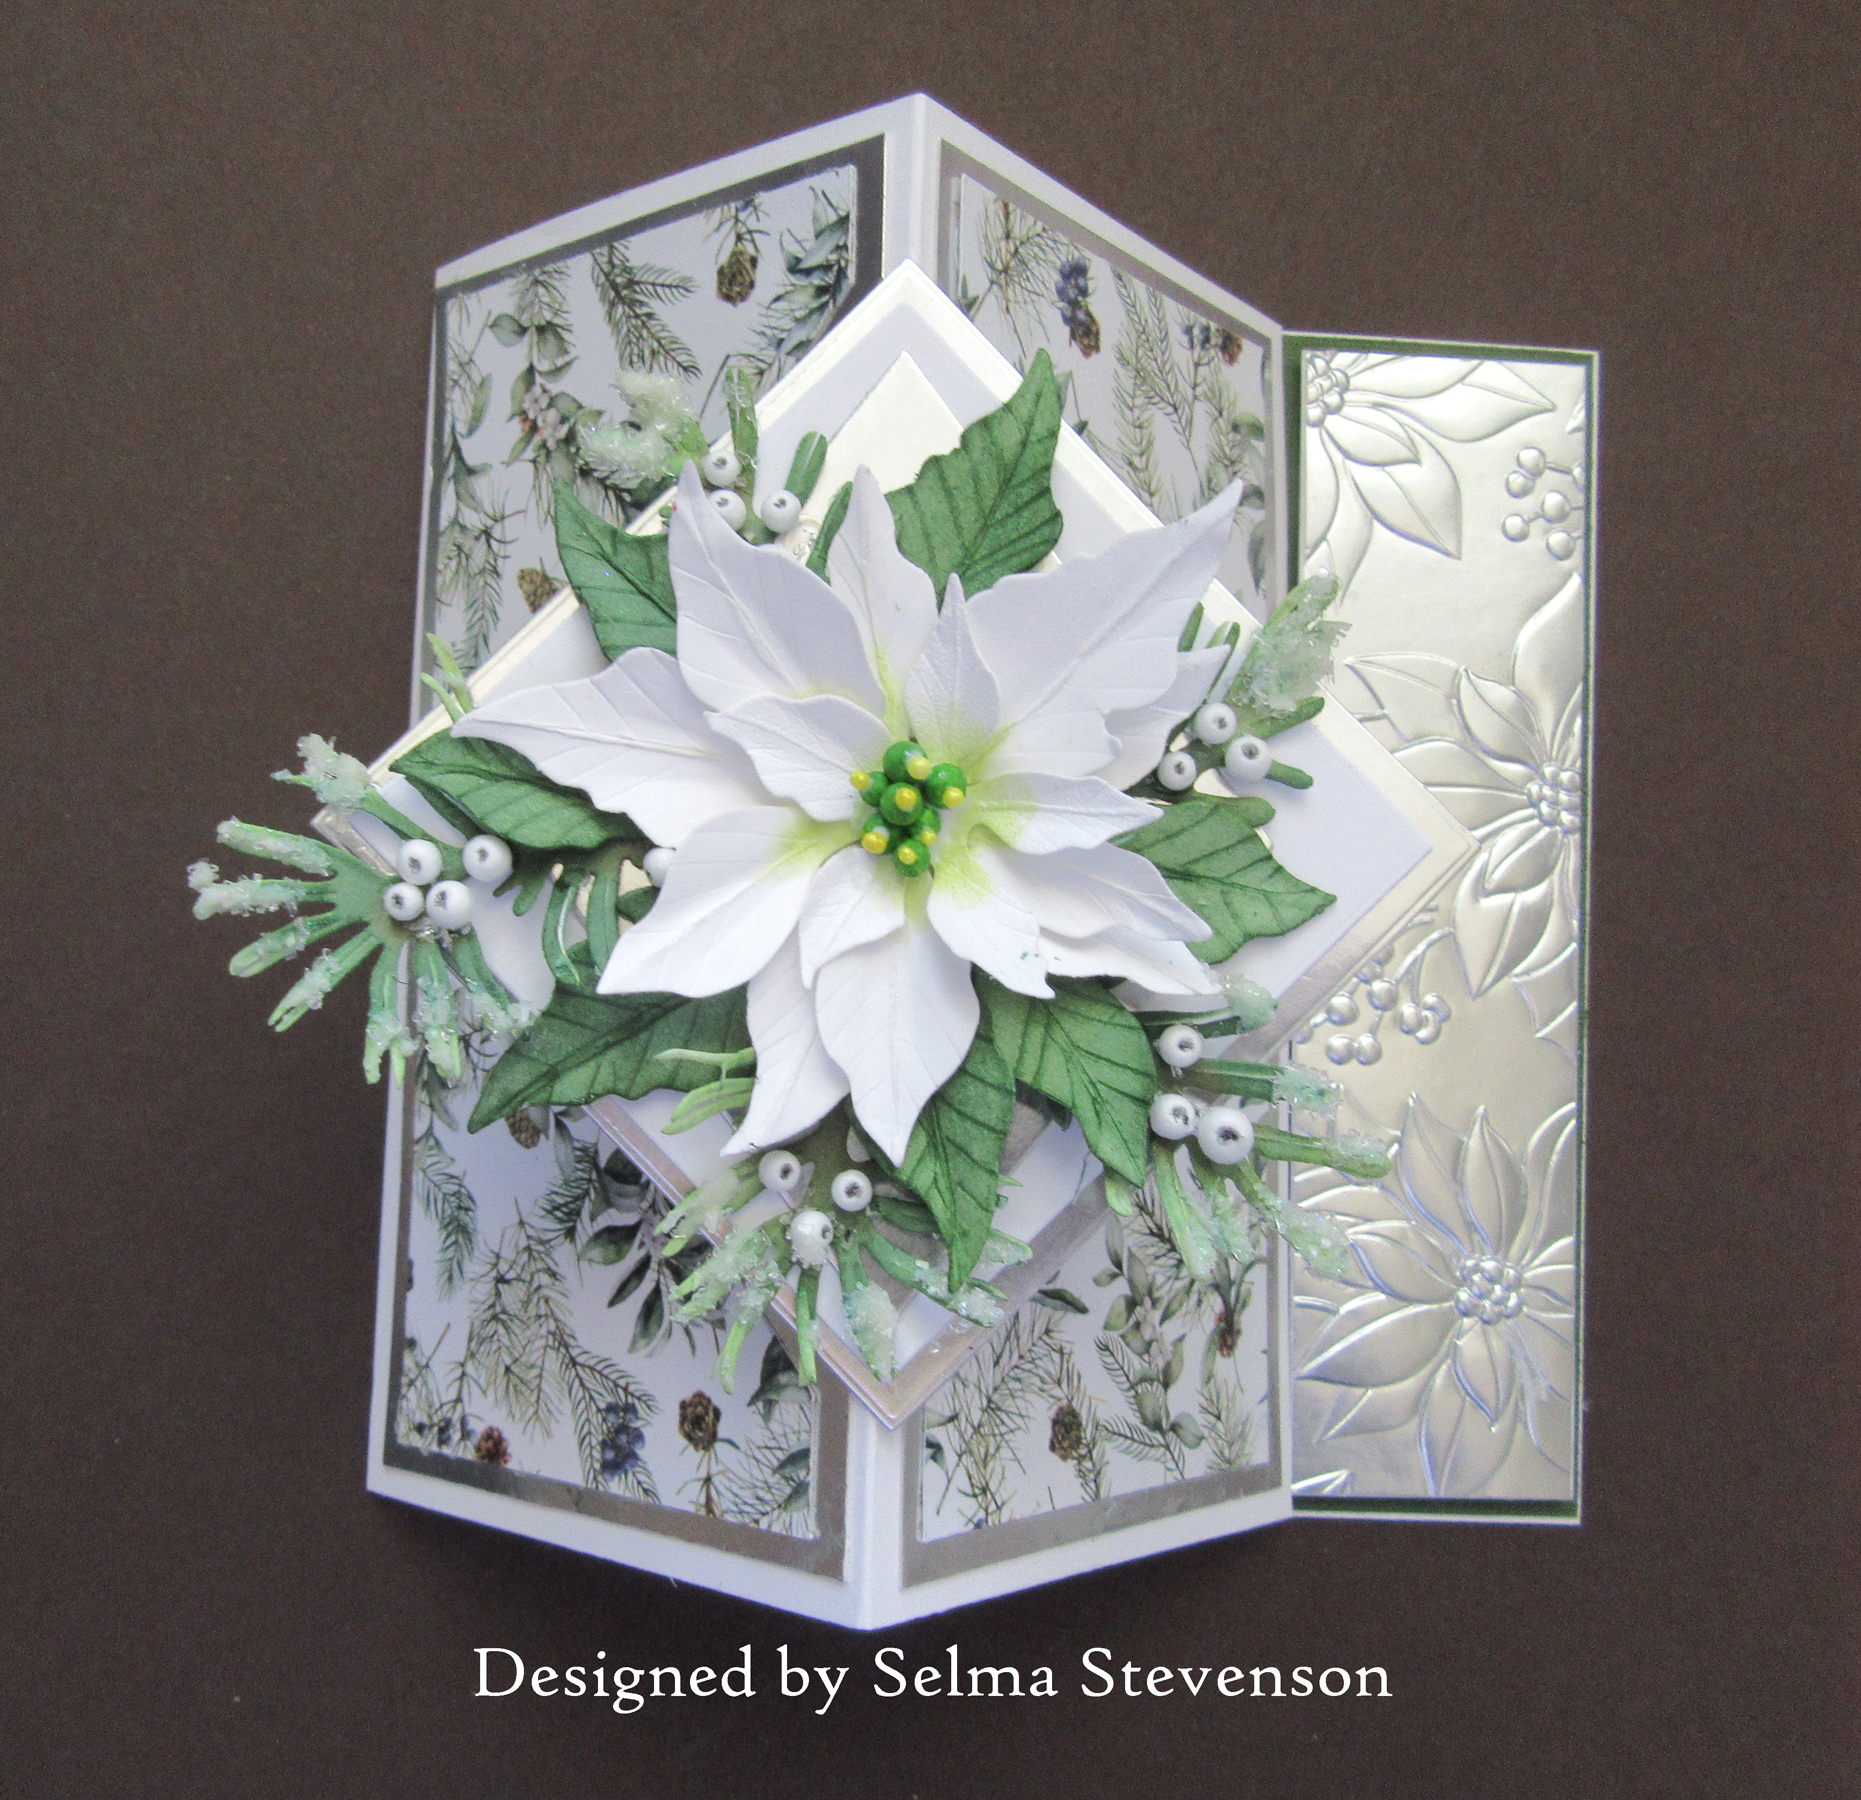
Today I have a sympathy card I created for a dear friend.  This is Multi Diamond Panel card.  I followed the instructions on Sam Calcott YouTube Video to create this card.  The card is very easy to create.  The front of the card is a piece of clear acetate and the design on the front is created with squares attached to the acetate.  

There are a total of eight small squares attached to the acetate front with dimensional dots.  Four squares have design paper from my stash.  Four  squares were embossed with the Altenew Garden Harmony 3-D embossing folder on Spellbinders Graphite card stock.    In the center, is a three layerd square.  I used a stamp from my stash for the sentiments.  Spellbinders silver embellishments were used on the corners of the squares and a few around the flower.  

I used Susan's Garden Sunflower die set to create one flower.  It was colored to match one of the colors in the design paper.  Oh no, I just realized I used leaves from the Gaillardia die set. The sunflower and gaillardia flowers are very similar.  
  
Susan's Ferns & Ivy die set was used to die cut three ferns that are tucked under the top of the flower.


This is the back of the card.


This picture shows the paper spring used to keep the card from opening too far when it is standing up.  If you look closely you can see the acetate on top with the squares attached.  

I think you will have fun creating this beautiful card design.  Be sure to watch Sam Calcott's YouTube Video for instructions.

Saturday, November 26, 2022

Decorated Letterbox


Good Morning friends. I have a good start on my holiday decorating.  My tree is up, and the garlands are are hung.  There is more to do, but our house is starting to look like Christmas.  It almost time for me to get Christmas cards ready to send.  How are you doing getting all your Christmas cards ready?  Today I have another card designed using Susan's Garden Letterbox die set.  

This is a 5x7 inch card.  On the inside, I used a piece of P13-Cosy Winter design paper.  For space to write a greeting, I added an oval using the Spellbinders Picot Petite Oval on the inside.  The design matches the die cut border on the front the card.  I used the Spellbinders Christmas Foliage Strips & Border die set and die cut the design on the front panel.  Then I die cut the same strip and attached for additional design.  It was glued on the card front matching the curves on the edge of the card.  

Using Susan's Letterbox die set, the letterbox was die cut using a silver cardstock.  The pole was die cut using a piece of woodgrain cardstock.  Looks like someone has received some Christmas Letters!  Three small pieces of cardstock were added for envelops and a black marker used to create address and stamp.

Susan's Pinecone die was used to to create one pinecone and her Whitepine die was used for the pine branches.  Snow paste was used for the snow.  For the berries, I used tiny bean bag styrofoam balls that I colored red with acrylic paint.  This was attached to the top corner of the card.  A few whitepine branches and berries were attached on the letterbox pole.

One of the stamps from Susan's Winter Garden stamp set was used for the sentiment.  It was die cut using a small oval die.


OLO Marker Holiday Offer


Today I wanted to tell you about a special sale right now on the OLO markers that Susan uses for coloring her flowers. You can receive a 10% discount by using the promo code susan (use lower case letters), Plus OLO has a  Holiday Offer until December 5th - With every $125 purchase (excluding shipping) you will receive a $25 gift card for future purchases. This card can be used to purchase additional markers, refill cartridges, or accessories.  More info on the OLO site.

One of the reasons you will love OLO markers is because each OLO marker contains nearly two times more usable ink than any other alcohol marker.  You can order different color ink cartridges  (with either brush and/or chisel tips) and combine with a connector ring, which comes with each two cartridges.  This allows for more compact storage.  There are 128 colors available with rich hues and varied depth.  You can shop individual colors, collections and accessories. Another great feature of these markers, is how simple it is to add a new ink cartridge when you run out of ink.  There is more info at OLO.com.   

To start my collection, I ordered the markers in Susan's garden collection, plus a few others and two green ink refill cartridges (I use a lot of green coloring leaves for every flower).  I ordered all the markers with brush tips for great blending.  OLO sent connector rings so I have connected two different colors on each marker.  There is one marker in the picture without the second marker attached.  One of the colors I ordered is on back order and will be shipped to me later.  I also ordered the 64pc OLO marker stand to store my markers.  

I have to tell you I am so impressed with the Top Notch customer service at OLO.   When you call, you actually get to talk to a customer service representive.   I had questions, so called and had the friendliest person help me. Also, I was amazed at how quickly I received my order - it was shipped out the same day as I ordered. 

I am excited to keep adding to my OLO marker collection.   It is nice we can watch Susan's Garden Club Videos, and have the exact markers she uses in her tutorials.

For great savings, be sure and check out this great promotion. 

Friday, November 18, 2022

Faceted Diamond Easel Card


I am happy you came to visit my blog today.  It is a very, very cold day here today so I decided to create another Christmas card.  In Susan's Garden Club Facebook Live Video, she showed how to create a faceted diamond easel card.  Using her directions, I created one of these cards.  


Silver metallic card stock triangles were added to the diamond cut outs in that fold in on the center of the card.  

Before adding the front panels to the card, a strip of acetate was added across the center of the card.  This is what the square that holds the poinsettia is attached to.

The design paper I used is from the Paper Heaven-White As Snow 6x6 inch pad.  For the mats I used Silver Metallic Card Stock. 

For the side panel on the inside of the card, I used a piece of dark green cardstock for the mat and then used the Spellbinders Scenic Poinsettia 3-D embossing folder to embossed a piece of silver metallic card stock.  I added a piece of heavy weight white cardstock under the embossed piece.  This piece was attached using dimensional tape.


 I die cut a 3" white square, a 3 1/4" silver square and glued them together.  In the middle of this square, I used the Spellbinders Essential Diamond  Etched die set to die cut a silver diamond.  It was attached in the middle of the squares.  This square was attached to the piece of acetate that goes across the center of the card.  

Susan's Poinsettia die set was used to create a white poinsettia.  It was die cut using Susan's Specialty Card Stock.  For the bracts,  added light green styrofoam balls then glued a small yellow Prill to the top of each ball.  To shape the poinsettia, I used Susan's Flower Tool Kit then assembled using Kids Glue.

Susan's Winter Evergreen Foiliage die set was used to die cut the Whitepine branches.  I used white styrofoam balls for the berries, then used a fine tip pen to press down on the end of each berry.

As a final touch, I added snow paste to the white pine branches then sprinkled on Twinkletts glitter.

Sunday, November 13, 2022

Decorated Tiered Tray


Hello Friends,

Last week on Susan's Garden FaceBook Live, she created a beautiful card using the Spellbinders Tiered Tray and Accessories die sets.  If you are interested in a chance to win her next Garden Club Release - Painted Garden, she has given you a challenge to create something using the Spellbinders Tiered Tray die set and any of Susan's Garden flowers.  She will be giving away three sets of her release.  The winners will be chosen by a random drawing.  I hope my card will give you some inspiration to enter this challenge.   You can see Susan's Tiered Tray instructions and get all the information about the challenge at this LINK.

For my card, I used the Spellbinders Orgami 3-D embossing folder to embossing the background.  

The Tiered Tray die set was used to die cut the tray out of gold mirror card stock once, and again to die cut the tray twice from heavy weight white card stock.  The pieces were glued together for dimension.  In Susan's video, she explains how to create a taller tray.

Susan's Poinsettia die set was used to create three poinsettias.  They were die cut using Susan's Specialty Cardstock and red ink was brushed on using the Waffle Flower Stencil Mat and brushes.  The were shaped using Susan's Flower Tool Kit and assembled using Kids Choice Glue. I have my glue in the Spellbinders SILI Glue Pod.  You will love this little container for your glue!   The stamens were created using tiny styrofoam balls.  

The Evergreen Foilage die set was used to die cut the Whitepine branches.  They were colored then cut apart to tuck under the poinsettias.

The Winterberry and Mistletoe die set was used to die cut the Winterberry.  Red stryrofoam balls were used to create the berries.

The Feathered Friends die set was used to die cut the cardinal.

The Tiered Tray Accessories die set was used to die cut the little gnome.  

The sentiment from Susan's Winter Collection Stamp Set was green embossed and backed with a piece of gold mirror cardstock.  It was attached with dimensional tape.

I hope you will watch Susan's Club FaceBook Video and create a card using the Spellbinders Tiered Tray for a chance to win a set of Susan's next Garden Club die sets.  Good Luck!

LinkWithin

Related Posts with Thumbnails