It is time for the April Elizabeth Craft Designs, Design Team Die Cut Challenge. This month our challenge was to create a card/project with a glittered background. You can view all the projects on the Elizabeth Craft Designs Blog at this LINK.
Elizabeth Craft Designs has another designer challenge giveaway for you. They are giving away "Three 1/2 oz containers of Silk Microfine Glitter in the colors of your choice" to 3 winners.
To enter simply leave a comment on the Elizabeth Craft Designs Challenge post and tell us "What is your favorite technique using Silk Microfine Glitter”
Three lucky winners willl be selected in a random drawing.
The winners will be announced on Friday, April 7 on the Elizabeth Craft Designs blog.
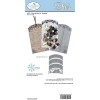
For my project today I created a pretty glittered pocket for a gift card or money. Here is how it was created.
Die cut the Leaf Pocket using Soft Finish Olive Twist Cardstock. Fold back edges along the score line.
Cut a piece of White Soft Finish White Cardstock the same size as the pocket. Adhere Clear Double Sided Adhesive to cover one side of this cardstock. Attach the adhesive side to the back of the die cut leaf pattern. Press down well so all portions of the die cut adhere well. Pour the Soft Green Silk Microfine Glitter over the adhesive which shows through the front of the die cut. Use your fingers to rub the glitter in well and bring out the shine. The reason I added the glitter after the adhesive was attached to the back of the die cut, is because I wanted to be sure all the die cut design was attached well to the adhesive. If you add the glitter to the solid piece of adhesive and attach to the back of the die cut design, the die cut pieces will not stick unless you add glue. I found it easier to add the glitter through the die cut design.
Cut a piece of Black Soft Finish Cardstock, and attach to the back of the pocket, over the folded tabs, using 3mm Clear Double Sided Adhesive. You now have a complete pocket.
For the pull out tag, cut a piece of Soft Finish Olive Twist Cardstock slightly narrower than the width of the pocket. Use the Tags & More 9-Sparkle die set to die cut the design on the top. Use a corner rounder to round off the edges. Cut off the bottom off this piece so that only part of the design shows (see picture) when the tag is inside the pocket.
Use a piece of the Olive Twist cardstock, that was cut off the bottom of the tag, to create a pocket on the bottom of the tag. To create a decorative edge on the top edge, use the Dotted Scallop Rectangle die to die cut only the top edge of this small piece. Cut a piece of black card stock for a narrow border under the scalloped edge so it shows up well. Attach pocket along the outer edges of tag with 3mm Clear Double Sided Adhesive.
You now have a tag with a pocket to add either a gift card or money for that special person.
Links to the products used are below.
Links to the products used are below.


4 comments:
This is lovely. I can't wait to make a card with the same look. Thank you for sharing the details.
Your tag is absolutely beautiful!
Gorgeous as always!
Love the simplicity of the colors you have chosen for this tag...very pleasing on the eyes.
Post a Comment