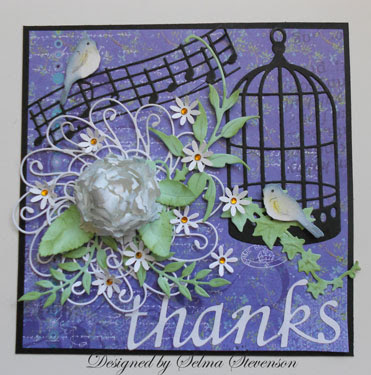
This week at Joan's Gardens we have something different for the challenge. It is about time to start thinking about cards for Halloween so we thought you would have fun creating a cute card for someone special, using a Jack-o-Lantern as the main theme. Be sure to go over to Joan's Gardens to read all the details about the challenge. We look forward to seeing your beautiful cards.
I always have a lot of fun creating a scene with die cuts. First I will tell you about the products used on this card then I will give you a tutorial below on how I die cut and colored the pumpkin.
I used the Memory Box Great Pumpkin Stamp and die for the Jack-o-Lantern. The face is also a Memory Box die called "Perky Pumpkin Face". The other Memory Box dies I used are the: Swooping Bats; Ghost Trio; and Estate Fence. I die cut the ghosts and added a small piece of black card stock behind the faces to make the eyes and mouth dark. They were attached with dimensional dots. The bats were also attached with dimensional dots. The tree is the new Cheery Lynn "Spooky Fence". Perfect for a Halloween card, don't you think! The design paper I used is from the Graphic 45 "Happy Haunting". It has little spiders all over it. I sponged on "Rusty Hinge" Distress Ink around the edges. To ground the pumpkin, I add two rows of the Cheery Lynn "Grass Border". I thought this card needed a few little flowers so pulled some completed flowers out of my "flower box". Okay now for the tutorial.
TUTORIAL FOR GREAT PUMPKIN
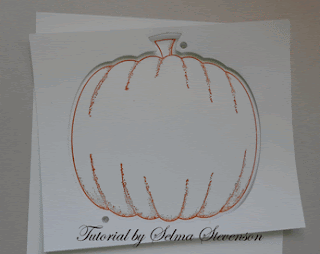
This is a picture of the Memory Box Great Pumpkin stamp and die.
To start, you need to die cut the pumpkin and save the out side piece as a template. Stamp the pumpkin on card stock. I used "Rusty Hinge" Distress Ink to stamp the pumpkin on Glossy Card Stock. I used the LaBlanche Specialty Stamping Paper.
Next you need to line the template up around the stamped image. There are two little holes, one on top and one on bottom, of the template. Use a pencil to fill in these little holes once your template is centered around the image.
Now you can place the die over the stamped image and match up the filled in circles with the holes in the die. This will give you a perfectly cut out image.
This is how your die cut image will look.
I thought I would show you the way I colored my pumpkin. I stared by sponging on "Squeezed Lemonade" Distress Ink, adding only to the center.
Next I sponged on "Wild Honey" Distress Ink, leaving the center yellow.
To add an orange color, I sponged on "Rusty Hinge" Distress Ink, again leaving some of the lighter color in the center.
To give it an even darker pumpkin color, I sponged "Aged Mahogany" Distress Ink around the edges. You can then go over it again blending in all the colors with the lighter inks. I wanted to have a speckled look to my pumpkin so I spritzed it with a light spray of water. You have to let it sit for a couple of minutes to see the "speckles" so don't add too much. You can always add more water if you need to. After it dried, I went back over it with the "Rusty Hinge" ink to darken it up. I like the texture this gave the pumpkin.
All these products can be purchased from Joan's Gardens:
Memory Box "Great Pumpkin" stamp (G1882)
Memory Box "Great Pumpkin" die (98423)
Memory Box "Swooping Bats (set of 3) (98409)
Memory Box "Ghost Trio" (98376)
Memory Box "Estate Fence (98285)
Cheery Lynn "Spooky Tree" (B191)
Cheery Lynn "Grass Border" (B126)
Graphic 45 "Happy Haunting" Paper Pad
Distress Inks: Aged Mahogany, Rusty Hinge, Wild Honey, Squeezed Lemonade
7327969


 Memory Box "Flutter Vine" (98334)


