Thursday, September 17, 2020

Chrysanthemums


Good Morning paper gardener friends.   I am happy you are visiting my blog again today to see another card I created using Susan's Autumn Floral die sets.   Today I used her Button/Daisy Chrysanthemum  die set.  This flower is so easy to create and it was hard for me to stop making these pretty little flowers, because there are so many different colors you can create them in. 

Something new with Susan's die sets is that Spellbinders has printed the number of die cuts you need for the flower, right on the die.  This takes all the guess work away from how many to die cut.  This particular die set has dies for two different flowers - you can create the Daisy Chrysanthemum, or the Button Chrysanthemum as I have done today.  

This is a 6x6 inch card, which is my favorite size for creating  floral bouquets.  For the background I used Nuvo Meteorite Shower Shimmer Powder.  You just lightly mist the card stock, sprinkle on some of the shimmer powder, then mist again for a really pretty background.  The card stock was cut down to fit on the front of the card.  I like to score around the edges, 1/8th inch  from the edge, just to give it a finished appearance.  

The pretty oval behind the flowers was die cut using the Spellbinders, Amazing Grace Picot Petite Oval Etched die set.  It was attached using double sided foam tape.

Three colors of Button Chrysanthemums were created.  As usual, I die cut the flowers using white card stock and sponge on color.  For the pinkish mum, I sponged on Altenew Razzelberry ink then in the center sponged on Midnight Violet.  For the purple mum, GinaK Lovely Lavender ink was sponged on then Wild Lilac ink sponged in the center.  I did not have a dark maroon ink pad so I used an alcohol marker to color it.  The leaves were die cut using white card stock,  veins drawn in with the Leaf Tool, sponged green,  then shaped with the ball stylus on the molding pad.  The mums and leaves were arranged on the Oval die cut.

Included with Susan's new release is her Autumn Quotes stamp set.  One of the stamps was stamped, using VersaFine Ink, then cut out and backed with a piece of black card stock.  It was attached at the bottom of the flower arrangement. 

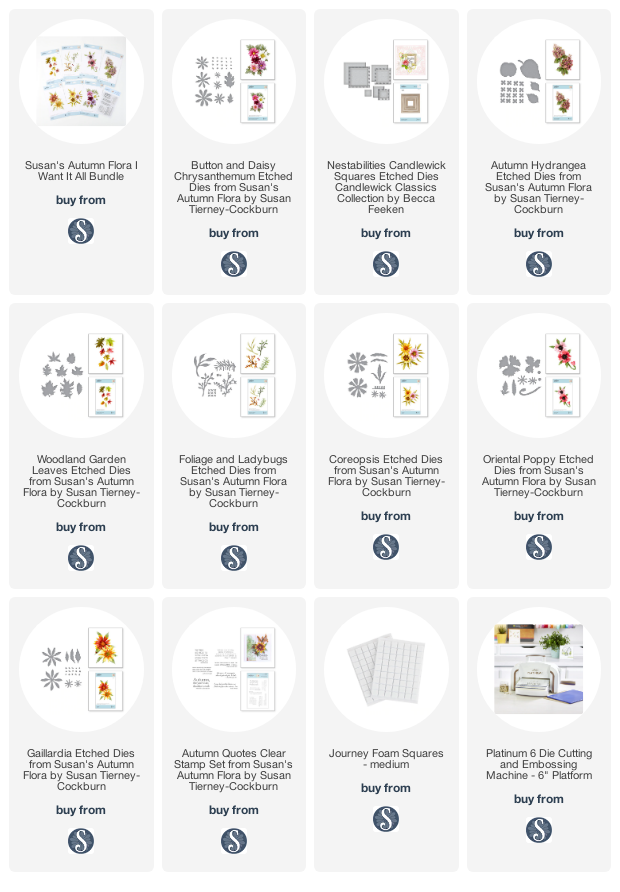
Thank you for visiting my blog today.  Below are links to the products used.  

Wednesday, September 16, 2020

Rustic Gaillardia Arrangement


I hope you are enjoying all the cards Susan's Design Team has been posting for her new Spellbinders Autumn Floral die sets.  

Today I used the Gaillardia,  Bittersweet, Rosemary, and Woodland Garden Leaves dies to complete the Fall arrangement on my card. 

This is a 5x7 inch card.  I used a piece of burlap, that is frayed around the edges, for the background, over the cream colored card stock.  It was attached using a tape runner, or you could use double sided tape.  Attach it at an angle.

Using the Foliage & Ladybug die set, four Berry Branches were die cut using white card stock.  Brown ink was sponged on the branches then sponged again lightly with green ink,  on the front and back.  Die cut the covering for the bittersweet using pale yellow card stock.

Use the Foliage & Ladybug die set and die cut two Eucalyptus leaf branches, using white card stock.  Sponge green ink on the front and back.  Use maroon PanPastel to brush the tips of each leaf.  

Create three Gaillardia flowers using Susan's  Gaillardia die set.  The petals were sponged with a dark yellow ink , front and back, then a brick red ink sponged on the lower (base) part of the petals.  Create the stamen using brown card stock for the die cuts.  Add pollen to the tips. Die cut the leaves, color and shape the Gaillardia leaves.

Use the Foliage & Ladybug die set to die cut several Rosemary sprigs.  Color and shape with the Leaf Tool.

Use the Woodland Garden Leaves die set and create a few leaves to scatter around the arrangement.  I colored them with Distress Inks.

Arrange the Bittersweet, Eucalyptus leaves and Rosemary over the background  Attach three Gaillardia flowers over in the leaves and branches.  Tuck in a few Woodland Garden Leaves.

Thanks for your visit.  See you tomorrow with another creation.  


Monday, September 14, 2020

Woodland Garden Maple Leaves


Autumn is in the air!  The maple leaves are already falling, so today I wanted to share a card I designed using the maple leaf die from Susan's Woodland Garden Leaves die set.

This is a 6x6 inch card.  On the white panel, I used a stencil to add a sunburst design on the left side.  Most of this design ended up being covered, but does give some texture.  In the center of the Spellbinders Shapabilities Floral Oval, I added one of the quotes from Susan's new Autumn Quotes stamp set.  This was attached with dimensional foam squares.

The Foliage & Ladybug die set was used to create berry branches.  Die cut the berry branches using white card stock and color them green.  You can use Nuvo Autumn Red Crystal Drops for the berries.

The Woodland Garden Leaves die set was used to die cut a lot of leaves, using white card stock. I have die cut all the different leaves, but I like to work on one variety of leaves at a time to create similar coloring on each. Below I will show you how I colored the maple leaves.


l.  Use a small sponge dauber and apply Fossilized Amber Distress Ink on both the front and back of each leaf.  Vary the darkness of the ink, leaving some areas a little lighter.  


2.  Randomly sponge on Barn Door, Vintage Photo, Rusty Hinge, and/or Shabby Shutters Distress inks, varying placement of the different colors on each leaf.  The leaves in the lower right side of the photo only have Fossilized Amber with Barn Door Distress Ink.  Additional ink colors were sponged over these colors.  Once the leaves are colored, use the leaf tool and draw in veins.  Next bend each point of the leaf toward the center vein and sponge Aged Mahogany Distress Ink along each fold.  This will help bring out the detail in the veins.


3.  To give the leaves a little more realistic appearance, I used an old dotted background stamp, to add dark brown spots to a small portion of each leaf.  


4.  In this closeup, you can see the mix of colors sponged on each leaf.  In the lower right corner, you can see how the leaves look without the added spots.  I left a few leaves without the spots, but most all have them.


5.  To give the leaves a shiny coating, I brushed on a clear glaze.  Once the glaze was dry, the leaves were shaped with the tweezers and ball stylus.

I hope this tutorial helps you color your maple leaves and helps you see how I added the veining highlights.

Thanks for visiting my blog today.  I have included links to the products I used below.


Coreopsis


Good Morning!   Today I have a card for you designed with Susan's Coreopsis and Foliage die sets.  

This is a 5x7 inch card.  A piece of copper metallic card stock was attached to a dark brown card front.  On top of that, I used the Spellbinders, Amazing Paper Grace, Shapeabilities Cannetille Rectangle die set, to die cut the pretty lacy background.

Three yellow Coreopsis were created using Susan's Coreopsis die set. The Foliage die set was used to die cut three berry branches for the bittersweet branches, and four sprigs of rosemary.

Susan's Woodland Garden Leaves die set was used to create six autumn Leaves.  The leaves were sponged with Distress Inks. 

Susan's new Autumn Quotes stamp set, which has seven quotes, was used to stamp the quote, using VersaMark ink, then embossed with copper embossing powder.  

To finish the card, brown pearls were added to the corners.

Do you have a favorite die set in Susan's new Spellbinder Autumn Floral release?

Spellbinders still has a Bundle price, which is a great savings, for the Autumn Floral release.  Links are provided below.

Have fun creating your flowers!


Sunday, September 13, 2020

Chrysanthemum and Berry Branches


Today I have had fun creating berry branches and a chrysanthemum for my card.  

This is a 6x6 inch card.  A piece of rust colored gingham design paper was used for the background.  In the center I die cut a piece of textured gold card stock using Spellbinders, Amazing Grace, Candlewick Square die set.  Around the outside of the gold square I added a narrow black frame.  You just use two square dies taped down on the cardstock to die cut a narrow frame.  

Use the Garden Club Foliage & Ladybug die set and die cut 8 leafy branches.  Sponge green ink on the branches, then sponge a rust ink over the edges of the leaves to give it a feeling of Autumn.  These were attached in the upper left corner of the gold die cut square.

Use the Garden Club Foliage & Ladybug die set and die cut two or three berry branches.  Sponge the branches light brown then sponge green over the brown.  Add red berries.  You can use drops, such as Nuvo Crystal Drops for the berries.  


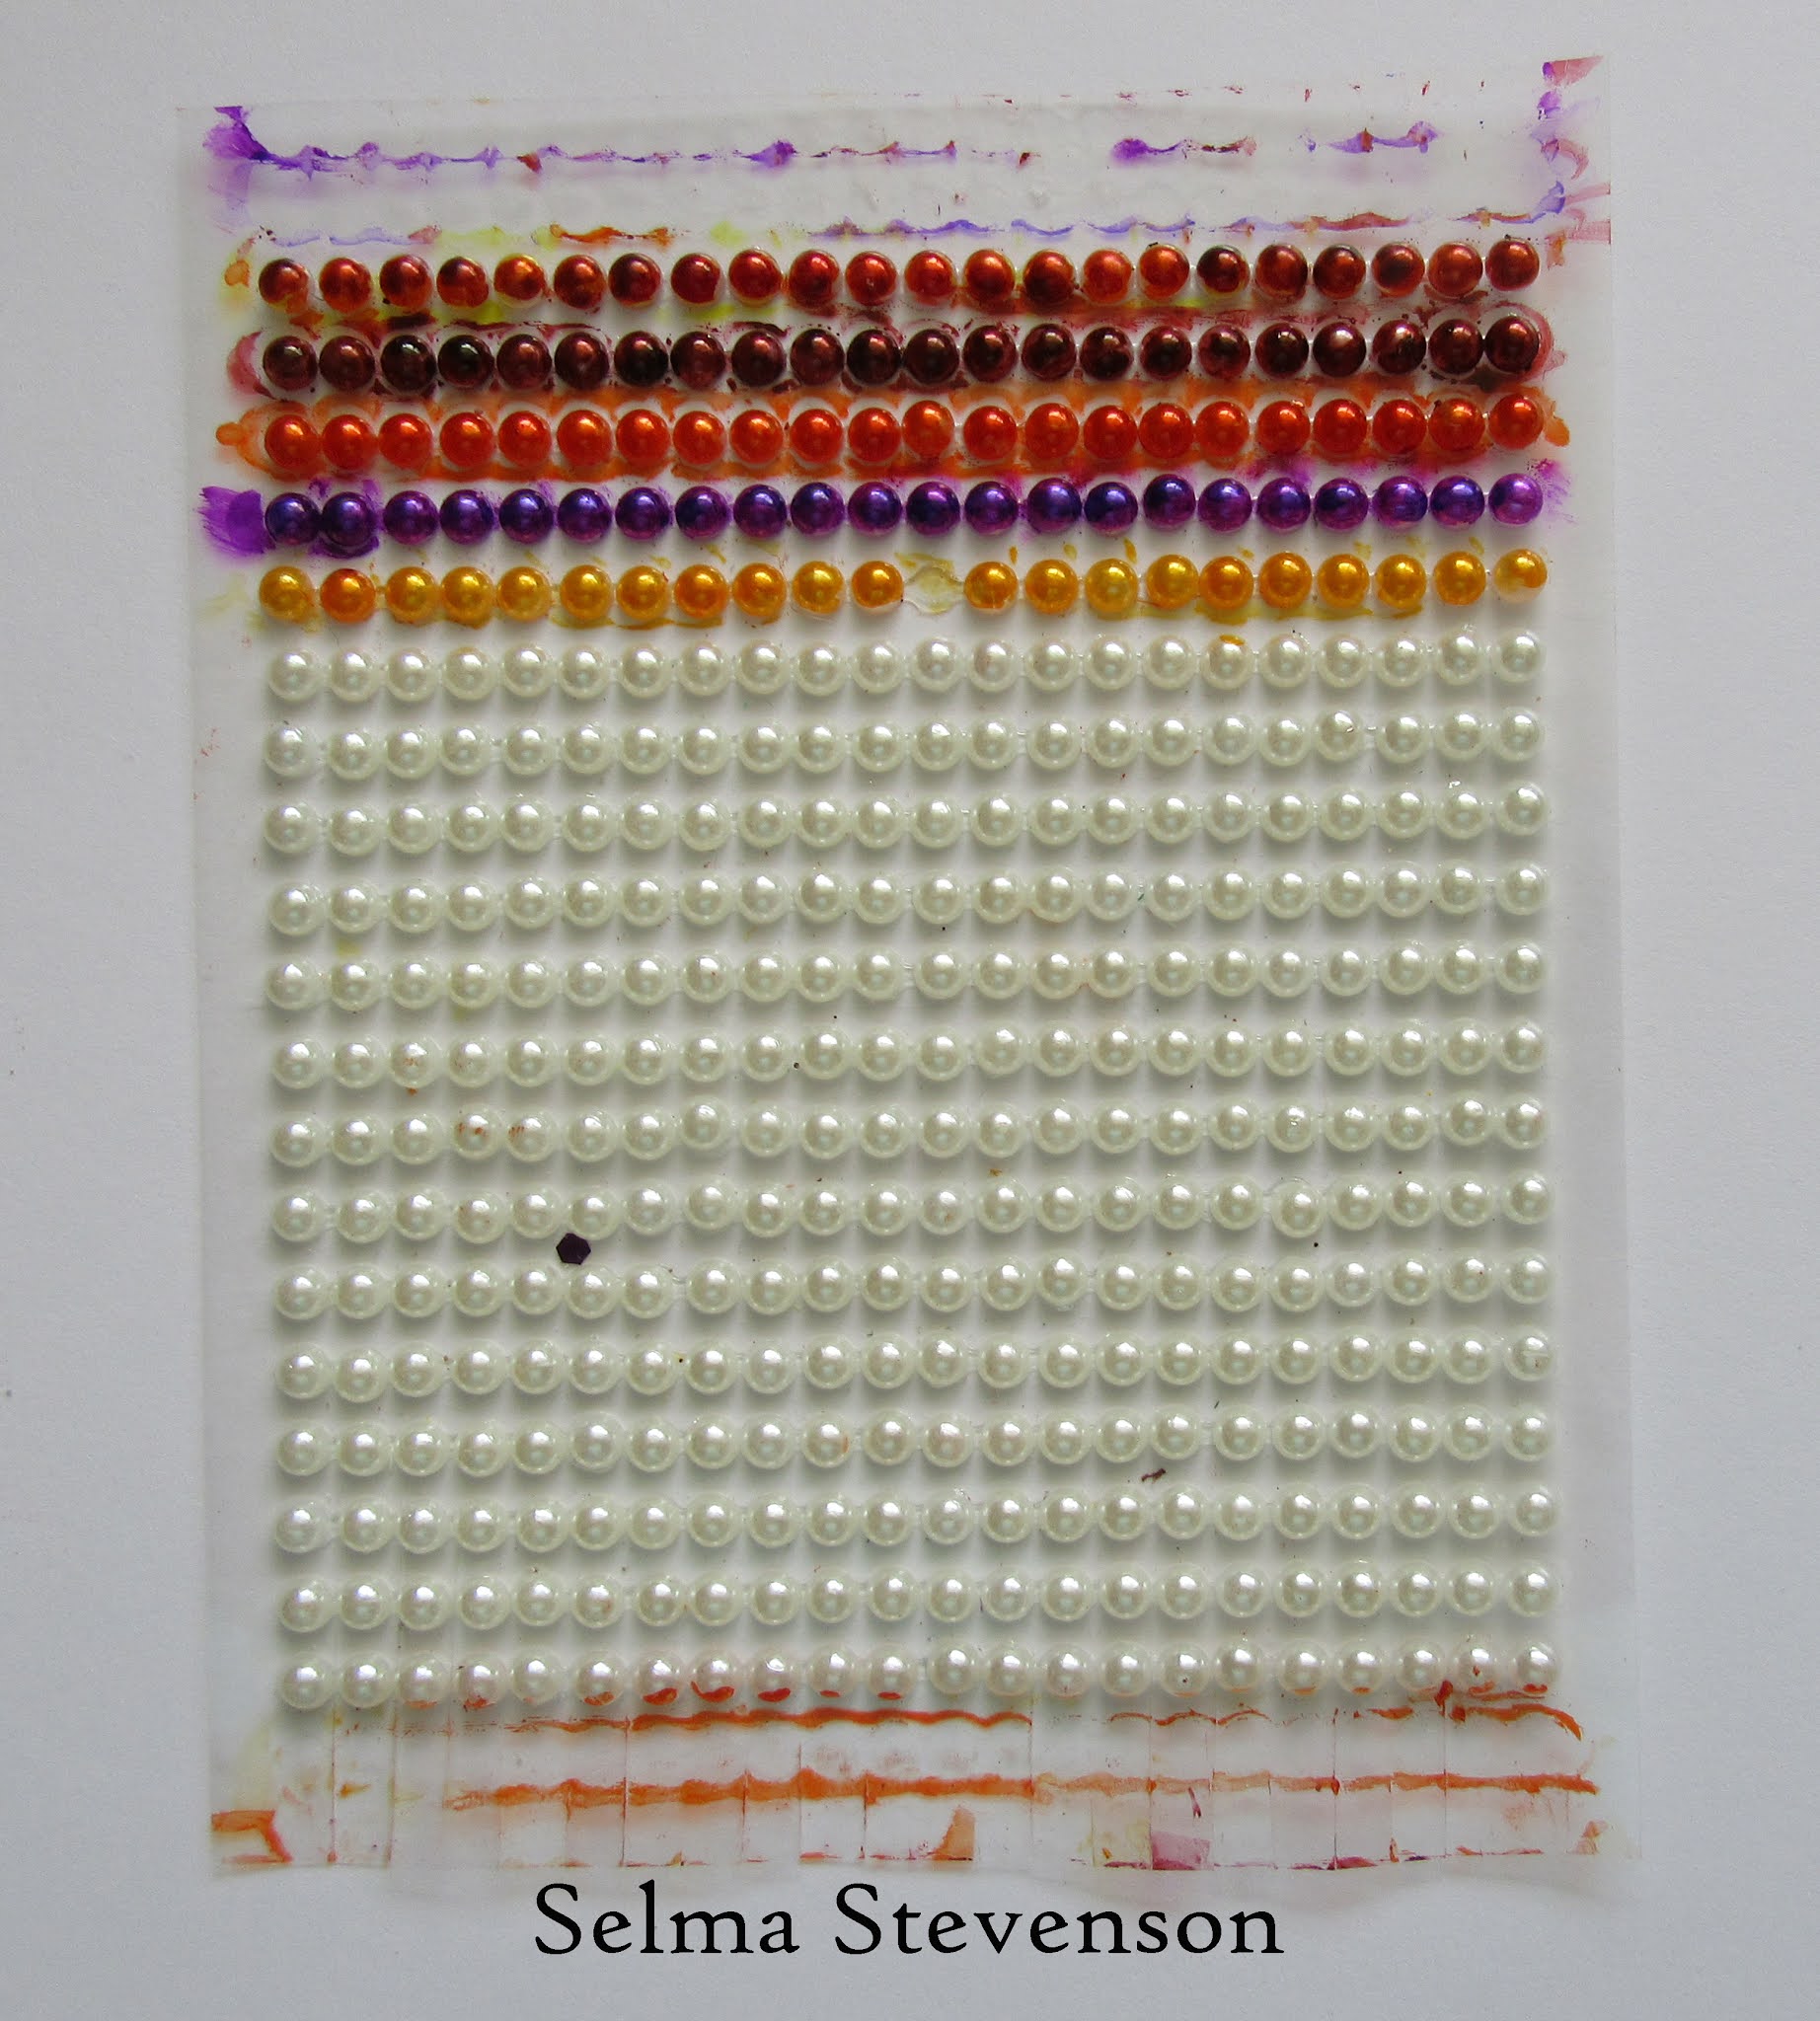
Today I decided to try something different for the berries.  I had a sheet of white flat backed pearls that come on a piece of acetate.  I used a red Copic marker and colored the pearls.  I brushed the marker all over the pearls, being sure to color the sides too. (In the photo above I have different colors of pearls ready to use for other projects.) The pearls had a sticky back, but I added a small dot of glue to the berry branch, then pressed the pearl down.  I liked using the pearls because I could place the berries close together without them running together like they do with drops and each berry is perfectly shaped.   Another advantage to using pearls was that I didn't have to wait for the drops to dry!   Attach the berry branches over the leafy branches.

Use the Garden Club Foliage & Ladybug die set to die cut a ladybug.  Color it red, add the black detail, then cup it on the back for a rounded appearance.  Attach to the chrysanthem mum with a dot of glue.  Add a dot of clear glaze to the ladybug and brush it around to completely cover it.  I like to die cut a bunch of these ladybugs, color, shape and even add glaze (working on a non-stick sheet).  Once they are dry, I store them in a small container so they are ready to use.

Use the Garden Club Button/Daisy Chrysanthemum die set and create a  rust colored chrysanthemum, to match the design paper,  and two chrysanthemum leaves.  

At the top corner, over the ends of the leafy branches and berry branches, I added a black twine bow.  I just wrapped the twine around my fingers and tied it in the middle.  It was attached with a large glue dot.  Over the bow, attach the Chrysanthemum and leaves.  I found a glue dot helped hold the flower in place.    

Using the ladybug die in the Foliage & Ladybug die set, die cut the ladybug, color red and add black markings with a fine line pen.  Attach to the Chrysanthemum leaf with a dot of glue.

I have provided links to these products below.  If you order your products through the links below, I will receive a small commission to help replenish supplies.  There will be no additional charges to you.  Thank you for your support. 


Saturday, September 12, 2020

Purple Button Chrysanthemums


I have been working with Susan for years and it is so amazing, how with each release, the flowers are not only easier to assemble, but look even more realistic.  The  Button Chrysanthemums in this new Spellbinders release look like you just picked them from the garden.  

Today I covered a 6x6 inch card with a piece of First Edition Paper-Gardenia design paper.  I found this design paper at JoAnn's Craft Store.

To create the oval background, I used die cuts from Spellbinders Fancy Edged Ovals and Picot Petite Oval Etched die sets by Becca Feeken.  The white oval was attached with Foam Squares.

Using the Foliage & Ladybug die set, five eucalyptus stems were die cut using white card stock. Using green ink, they were sponged dark on the stem end and lighter on the tips of the leaves.  A rust ink was lightly sponged at the base of the leaves.  

In the Foliage & Ladybug die set, there is a berry branch die.  That was die cut once, colored green and berries added.  I used white pearls for the berries.  They were colored with a mix of deep red and dark purple Alcohol markers.  I first used the purple marker then swiped the red over the purple to kind of give it a two tone appearance.  A dot of glue was placed on the branch, then a berry added.  

Susan's Button & Daisy Chrysanthemum die set was used to create three different shades of purple chrysanthemums.  Through Spellbinders, Susan has YouTube Videos showing how to create her Autumn Floral flowers.  Here is the LINK for the Button Chrysanthemum YouTube Video.  

It has been a lot of fun using Susan's new Autumn Floral die sets from Spellbinders.  I hope you are enjoying seeing all the beautiful floral arrangements you can create.  

I have included links to the products I used below.  I appreciate your support in ordering through my blog.

Happy Crafting!

Friday, September 11, 2020

Autumn Hydrangea


Yesterday was an exciting day!  It was the first day you could order Susan's new Spellbinder Autumn Floral products.  You can order individual die sets, but check out the special bundle price, which is a great savings.  

For this  card I used Susan's Autumn Hydrangea die set.  This beautiful flower is easy to create.   It takes a  little time to shape all the little flowers, but so worth it to see this beautiful flower come to life!

The card base is brown card stock. For the background, I used a piece of textured gold metallic card stock.

For the decorative background, the Spellbinders Amazing  Grace (S5-327) Anabelle's Trousseau Layering Frame Medium die set was used.  It was die cut using a matching brown cardstock.

To create the floral arrangement, Susan's Foliage & Ladybug die set was used for the eucalyptus leaves at the top of the arrangement.  They were die cut using white card stock, sponged with green ink, shaped with Susan's leaf tool, tweezers and ball stylus, then highlighted with Nuvo Cosmic Brown Mousse brushed lightly over the ends of each leaf.

To create the berry branches, the berry branch in Susan's Foliage & Ladybug die set was die cut using white card stock and sponged with a mixture of green and brown inks.  To create the berries, Bubblegum Blush Nuvo drops were used.  These branches should be prepared in advance to creating your card, so that the drops are dry before assembling the arrangement. 

The beautiful flowers were created using Susan's Spellbinders Autumn Hydrangea die set.  Below is a tutorial on how these flowers were created.  At the time I was creating these flowers, I had only received the Spellbinder Garden Club dies  --  I had not received any of the other Spellbinder Garden Club products, so I am using older tools.  There is a delay in shipping Susan's Tools to Spellbinders, because of Covid-19.  The tools may not be available until January.

On Susan's Garden Club Live Facebook video, she shows how to form the base for the flower and how she colored the petals.  I used a different method of coloring, for the hydrangeas on my card today.
 

Using the Autumn Hydrangea die set, die cut all the pieces using off-white card stock.  When I die cut the pieces, I always die cut more than I may need so I don't have to go back and die cut and color more after I get started, so you will see many in the photo.  

To achieve a muted effect on the pink petals, leave the die cuts in the die. Turn the die over and roughly color the back of the petals with a pink alcohol marker.  When you turn the petal right side up, only part of the petals will be colored, which is what you want for this flower.  


Once the petals are colored, push the die cut petals out of the die and place onto a piece of paper towel or cloth.  I have found that by lightly spritzing the petals with water, they will hold their shape better.  It just takes a light mist of water.
  

Working on the backside of the petals, use a ball stylus, approximately the same size as one of the petals, and lightly press down to slightly cup each one, on the molding mat.  Don't press so hard that it wrinkles the petals. 


While still working on the molding mat, turn each flower petal over.  This will be the side that has the lighter pink showing.  Using a small ball stylus, press down in the very center of each die cut.  This will cup the four petals. Shape all the petals then attach to the base.  For instructions on how to assemble the base, watch Susan's Garden Club Live Facebook video.  In this video, you will see how she colored the petals, using PanPastels.


Here is a close up of how the flower looks once all the petals are attach to the base.  I added some flowers over each other, for added fullness.  That dome over the base really helps to give the flower a pretty, natural shape.   To finish the flower, a yellow Prill was glued to the center of each flower.  I found it easiest to have some glue on my non-stick mat,  pick up one Prill with the tweezers, and dip lightly into the glue, then place in the center of the flower.

For the Foliage, use the Garden Club Foliage & Ladybug die set.  Die cut the Eucalyptus branch three or four times, using white card stock.  Sponge green ink on the stem and up toward the tip of the leaf, leaving the tip just barely sponged.  Shape with the leaf tool and tweezers.  

For the Berry Branch, use the Garden Club Foliage & Ladybug die set.  Die cut the branch, using white card stock.  Sponge the branch brown, then again with green ink sponged over the brown ink.  Add Bubblegum Blush Nuvo Crystal Drops for the berries.  Allow the berries to dry before adding to the arrangement.  I cut the berry branches apart and glued smaller branches behind the flowers.

The Foliage, Berry Branches, Hydrangeas and Hydrangea leaves were arranged on the front of the card.  One of Susan's new Autumn Quotes was added below the arrangement.

To finish it, fine gold cording was used to create a bow and was placed at the bottom of the arrangement.

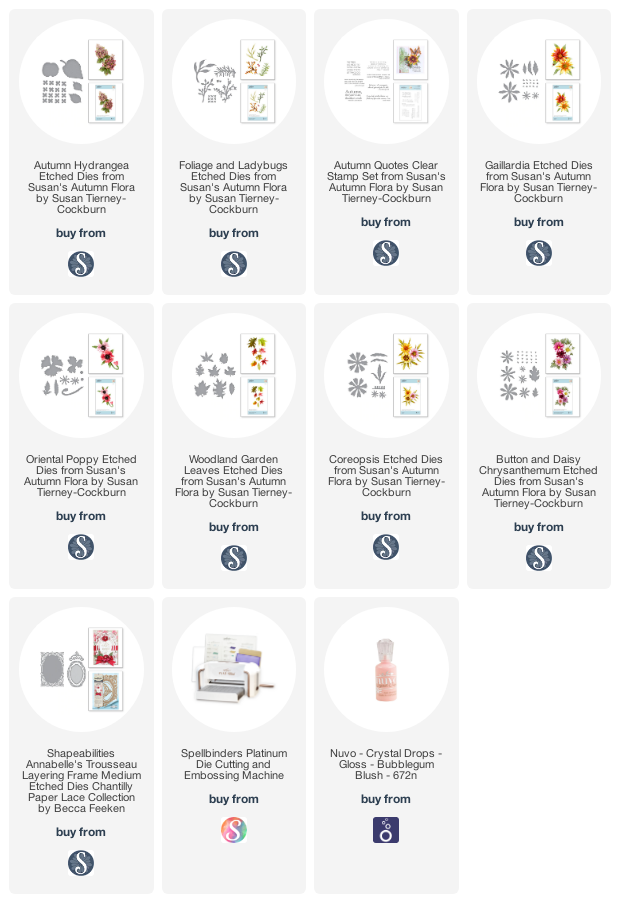
Below are links to Autumn Floral die sets and new stamp set.  I appreciate your support when you order from my links.  There is no additional charge to you.
 
Thank you for visiting my blog today.

Thursday, September 10, 2020

Gaillardia


Today is the day so many of you have been waiting for.   All of Susan's new Autumn Floral die sets and stamps are available at Spellbinders at a special bundle price.  I have links below for her products.

It is so funny now that I am on Susan's Design Team, how many flowers I recognize when I walk through the garden shops.  I don't think I had ever noticed a Gaillardia and since I have been creating them with Susan's new dies, I spotted several pots of them recently, and knew right away what they were.  They really are beautiful flowers.  They come in different colors but I really love this wine color with orange tips.

I used a piece of design paper from my stash on the front of this 6x6 card.  For a container for the bouquet, I used the Spellbinders Zen Garden Welcome die set.  The piece I used, is actually a piece you don't use with the intended die cut, but I thought it was the perfect size for all these flowers.  It was die cut using metallic mirror card stock. To dress it up a little, I cut a strip of black glossy card stock and glued it down about 1/8 inch below the top edge.  It was glued to the bottom of the card.
Shapeabilities Zen Garden Welcome Etched Dies Destination Japan by Lene Lok

This is the Zen Garden Welcome die set.  I used the die cut piece that is the large white area shown in the die on the left.  That piece is not used for this die cut but was perfect for my container.

Gaillardia Etched Dies from Susan's Autumn Flora by Susan Tierney-Cockburn
The Garden Club Gaillardia die set was used to die cut enough petals for 6 flowers.  They were die cut using white card stock, sponged red, then orange PanPastel rubbed over the tips of the petals.  The little tiny flowers for the center were die cut using yellow cardstock. They were pressed down in the center on the molding mat.  A black dot was added to the center with a black marker.  The frilly part of the stamen was die cut and colored red.  Pollen was added to the tips.  The Gaillardia leaves were die cut, colored and shaped with the leaf tool and tweezers.


Besides seeing a similar Gaillardia at the nursery, here is a picture of the Gaillardia I got my inspiration from.

The Foliage & Ladybug die set was used to die cut four leafy branches.  They were colored green then lightly sponged on the tips of the leaves with dark red ink.  Two Berry Branches were also die cut using this same die set.  Red pearls were added for the berries.  One of the ladybugs was die cut, colored and added to one of the leaves of the Gaillardia. 

The Spellbinders Amazing Grace Anabelle's Trousseau Layering Frame die set was used to die two corners out of metallic mirror gold card stock, to match the flower container.

I have provided links below for all Susan's new Autumn Floral release die sets and stamps.  Today Spellbinders is offering a bundle price for Susan's new release.  


Wednesday, September 9, 2020

Japanese Maple Leaves


Susan's new Spellbinders Autumn Floral die sets and her Autumn Quotes stamps are now available from Spellbinders.  I have furnished links below for you to go shopping.

I loved creating this card.    Susan has had Woodland Leaves die sets before, but with the Spellbinders Woodland Garden Leaves die set, she has included two new types of leaves.  The new leaf I used today is the Japanese Maple .

This is a 6x6 inch card.  To create the oval opening on the right side of the card, I used the largest oval outline die in the Spellbinders, Amazing Grace, Candlewick Oval die set. Die cut the oval in a piece of wood grain design paper.   On another piece of white 6x6 inch card stock, use the decorative Candlewick die to die cut just the Candlewick design into the white card stock - don't use the outline line to die cut it out.  Here is how to do it -- Place the wood grain oval die cut over the white card stock and center the decorative die inside the die cut oval.  Tape  the die down and run through the die cutting machine.  Attach the white card stock onto the front of the card, then attach the wood grain piece on top, being sure the die cut design is centered.  Die cut a smaller oval from the same die set.  Sponge gray ink around the edges.  Use the Autumn Quotes stamp set and stamp the quote, using black ink.  Attach with dimensional tape.

Use the Foliage & Ladybug die set and die cut around 20 Japanese Maple leaves. Use the Leaf Tool to draw veins on the leaves.  Sponge two shades of red ink on the leaves - first sponge on the lighter red, then sponge around the tip of the leaves with the darker red.  Try to vary the shades of red on different leaves.     I used a brown fine line pen to draw veins again, over the veins drawn with the Leaf Tool.  Use a medium ball stylus and press down on the ends of the leaf, on the molding mat, to shape them curled up slightly.   Add a clear glaze over the leaves if you would like a more vivid red color.


Use the Foliage & Ladybug die set and die cut 3 berry branches. I posted this picture so you can see how I arranged the berry branches down the left side of the die cut oval.   Sponge brown ink on the branches.  Arrange the berry branches along the left side of the die cut oval.  Glue the Japanese Maple Leaves to the branches, trying to cover the areas where normally the berries are added.  

There are many ways to use all the different leaves in the Woodland Garden Leaves set.  

I have linked to all of Susan's new die sets and stamps, as well as other products I use, down below this post.  If you purchase items from my links, I will receive a small commission at no extra charge to you.  I appreciate your support.

Tuesday, September 8, 2020

Exciting News!


Today I am very excited to announce that Susan Tierney-Cockburn is with Spellbinders Paper Arts and has a new Susan's Garden Club Autumn Flora release.  I have been working with Susan for over 10 years and very happy to continue on her design team.   Susan is a true master at creating realistic floral die sets.  She not only designs the dies, but to be sure we all understand how to create very realistic colored and shaped flowers, she has step-by-step YouTube instructional videos for each of her new Garden Club die sets, plus every Wednesday she does an one hour Susan's Garden Club Live Facebook video for very detailed instructions and fun shaped card ideas.  

 Susan's new Spellbinders  Autumn Flora release consists of seven new die sets:  Autumn Hydrangea, Button/Daisy Chrysanthemum, Coreopsis, Gaillardia, Oriental Poppy, Foliage & Ladybug, and Woodland Garden Leaves.  In this release she also has a new 'Autumn Quotes' stamp set.  There will be links at the end of my blog posts to help you shop for these products as soon as the products are available.   If you use these links to purchase products, I will receive a small commission, which helps me purchase supplies, at no additional cost to you.  I appreciate your support.

I have designed a lot of cards with these new Garden Club die sets and excited to share them with you.   Today I used the new Button/Daisy Chrysanthemum and Foliage & Ladybug die sets.  I love having foliage to fill in behind beautiful flowers and Susan has added some new foliage in this release.  I have shared my ideas below on how to create the Rosemary and Bittersweet.  Susan will have YouTube Videos and Susan's Garden Club Live Facebook Videos for all her new  Spellbinder die sets.

Today I have designed a 6x6 inch card using the Garden Club Button/Daisy Chrysanthemum and Foliage & Ladybug die sets.  The design paper on front of my card is a piece from my stash --  First Edition Paper - Gardenia.  

Susan's new Autumn Quotes stamp set (STP-024) was used for the quote.  It was stamped with VersaMark Ink and white embossed; die cut the  quote using the Spellbinders, Amazing Grace, Picot Petite Oval Etched Die set.   

To create the flowers, use the Button/Daisy Chrysanthemum die set.  The flowers were die cut using white card stock and sponged with two shades of orange ink, on both the front and back.  To imitate the center of the Daisy, yellow Prills were added.  The leaves were also die cut using white card stock, sponged with green ink and maroon PanPastel brushed on the tips of some of the leaves.  They were shaped using the flower tool kit.  Susan's new Spellbinders Tool Kit will be out in January.  Shipment of the tools to Spellbinders has been delayed because of Covid 19.  


The Garden Club Rosemary  die, from the Foliage & Ladybug die set, was used to die cut two sprigs for each finished Rosemary branch.  They were die cut using white card stock and sponged green on both the front and the back. I colored one sprig darker green than the other for depth when glued together.  The Leaf Tool was used to draw lines down the center of the sprig and out on each of the leaves.  This helps make it look more realistic.  


Rosemary is a 'frilly' branch, so I layered two die cut branches together, putting just a thin line of glue down the center of the stem, slightly offset the branches and layer the two stems.  Use a small ball stylus and press down the center along the length of the sprig on the molding mat, then pull up on the leaves to make it look full.  

There is a plate in the Foliage & Ladybug die set that is to be used for the covering for Bittersweet (shown below).  You can die cut these, using white card stock, and use a marker to color the tips light blue - leave the center white.  I used a fine line black marker and added a dot to the center of each flower.  Place the flowers on the molding mat and press down in the center with a small ball stylus.  These flowers can be glued to the Rosemary stem.  I will be posting a card later with flowers on the Rosemary.

Since I used the die intended for the Bittersweet to create flowers for the Rosemary, I thought I would show you how to create the Bittersweet too.


To create the Bittersweet, use the Berry Branch from the Foliage & Ladybug die set.  I die cut it using white card stock and sponged on brown ink then on top sponged on green.  That doesn't show up very well in the photo.  Using the die in this set, die cut the berry coverings, using pale yellow card stock. Slightly press down in the center of each one with a small ball stylus.   Add the berries in Fall colors, pinch some of the yellow coverings over the berries.  This covering in nature covers the berry then splits and opens up.   You can add some berries on the branch without the yellow covering.  I pressed the covering up more around the berries in the above picture, before adding the branch to my card.  To create the berries, you can use drops, such as Nuvo Crystal Drops, but I used small white, flat back, pearls.  I colored the pearls using orange, yellow and red Copic markers.  I found that using pearls was easier than using drops to create perfect berries.  A dot of glue was added to the  center of the berry covering/branch, then attached the pearl.  


There is a lot of dimension on this card, but it will fit nicely into the clear acrylic boxes that will also be available from Spellbinders.

Be sure to check out the cards Susan's other design team members have posted today using dies from Susan's new Autumn Floral  release from Spellbinders:

Christine Pooler -  christinepooler.com

 I am sure you will be anxious to start creating beautiful cards with these new, easy to use Garden Club floral dies from Spellbinders.

Don't forget -- Susan will have YouTube videos very soon for each of her new Spellbinders die sets.  Also, tune in on Wednesday morning at 10:00 AM Pacific time for her Garden Club Facebook Live videos.
 
Be sure to check back frequently as I plan to post a lot of cards using Susan's new Autumn Floral release.  

I have provided links below for Susan's new Autumn Floral release from Spellbinders.   I appreciate you visiting my blog and appreciate your support.


Happy Crafting!


Monday, August 31, 2020

LinkWithin

Related Posts with Thumbnails