

Today I have had fun creating berry branches and a chrysanthemum for my card.
This is a 6x6 inch card. A piece of rust colored gingham design paper was used for the background. In the center I die cut a piece of textured gold card stock using Spellbinders, Amazing Grace, Candlewick Square die set. Around the outside of the gold square I added a narrow black frame. You just use two square dies taped down on the cardstock to die cut a narrow frame.
Use the Garden Club Foliage & Ladybug die set and die cut 8 leafy branches. Sponge green ink on the branches, then sponge a rust ink over the edges of the leaves to give it a feeling of Autumn. These were attached in the upper left corner of the gold die cut square.
Use the Garden Club Foliage & Ladybug die set and die cut two or three berry branches. Sponge the branches light brown then sponge green over the brown. Add red berries. You can use drops, such as Nuvo Crystal Drops for the berries.
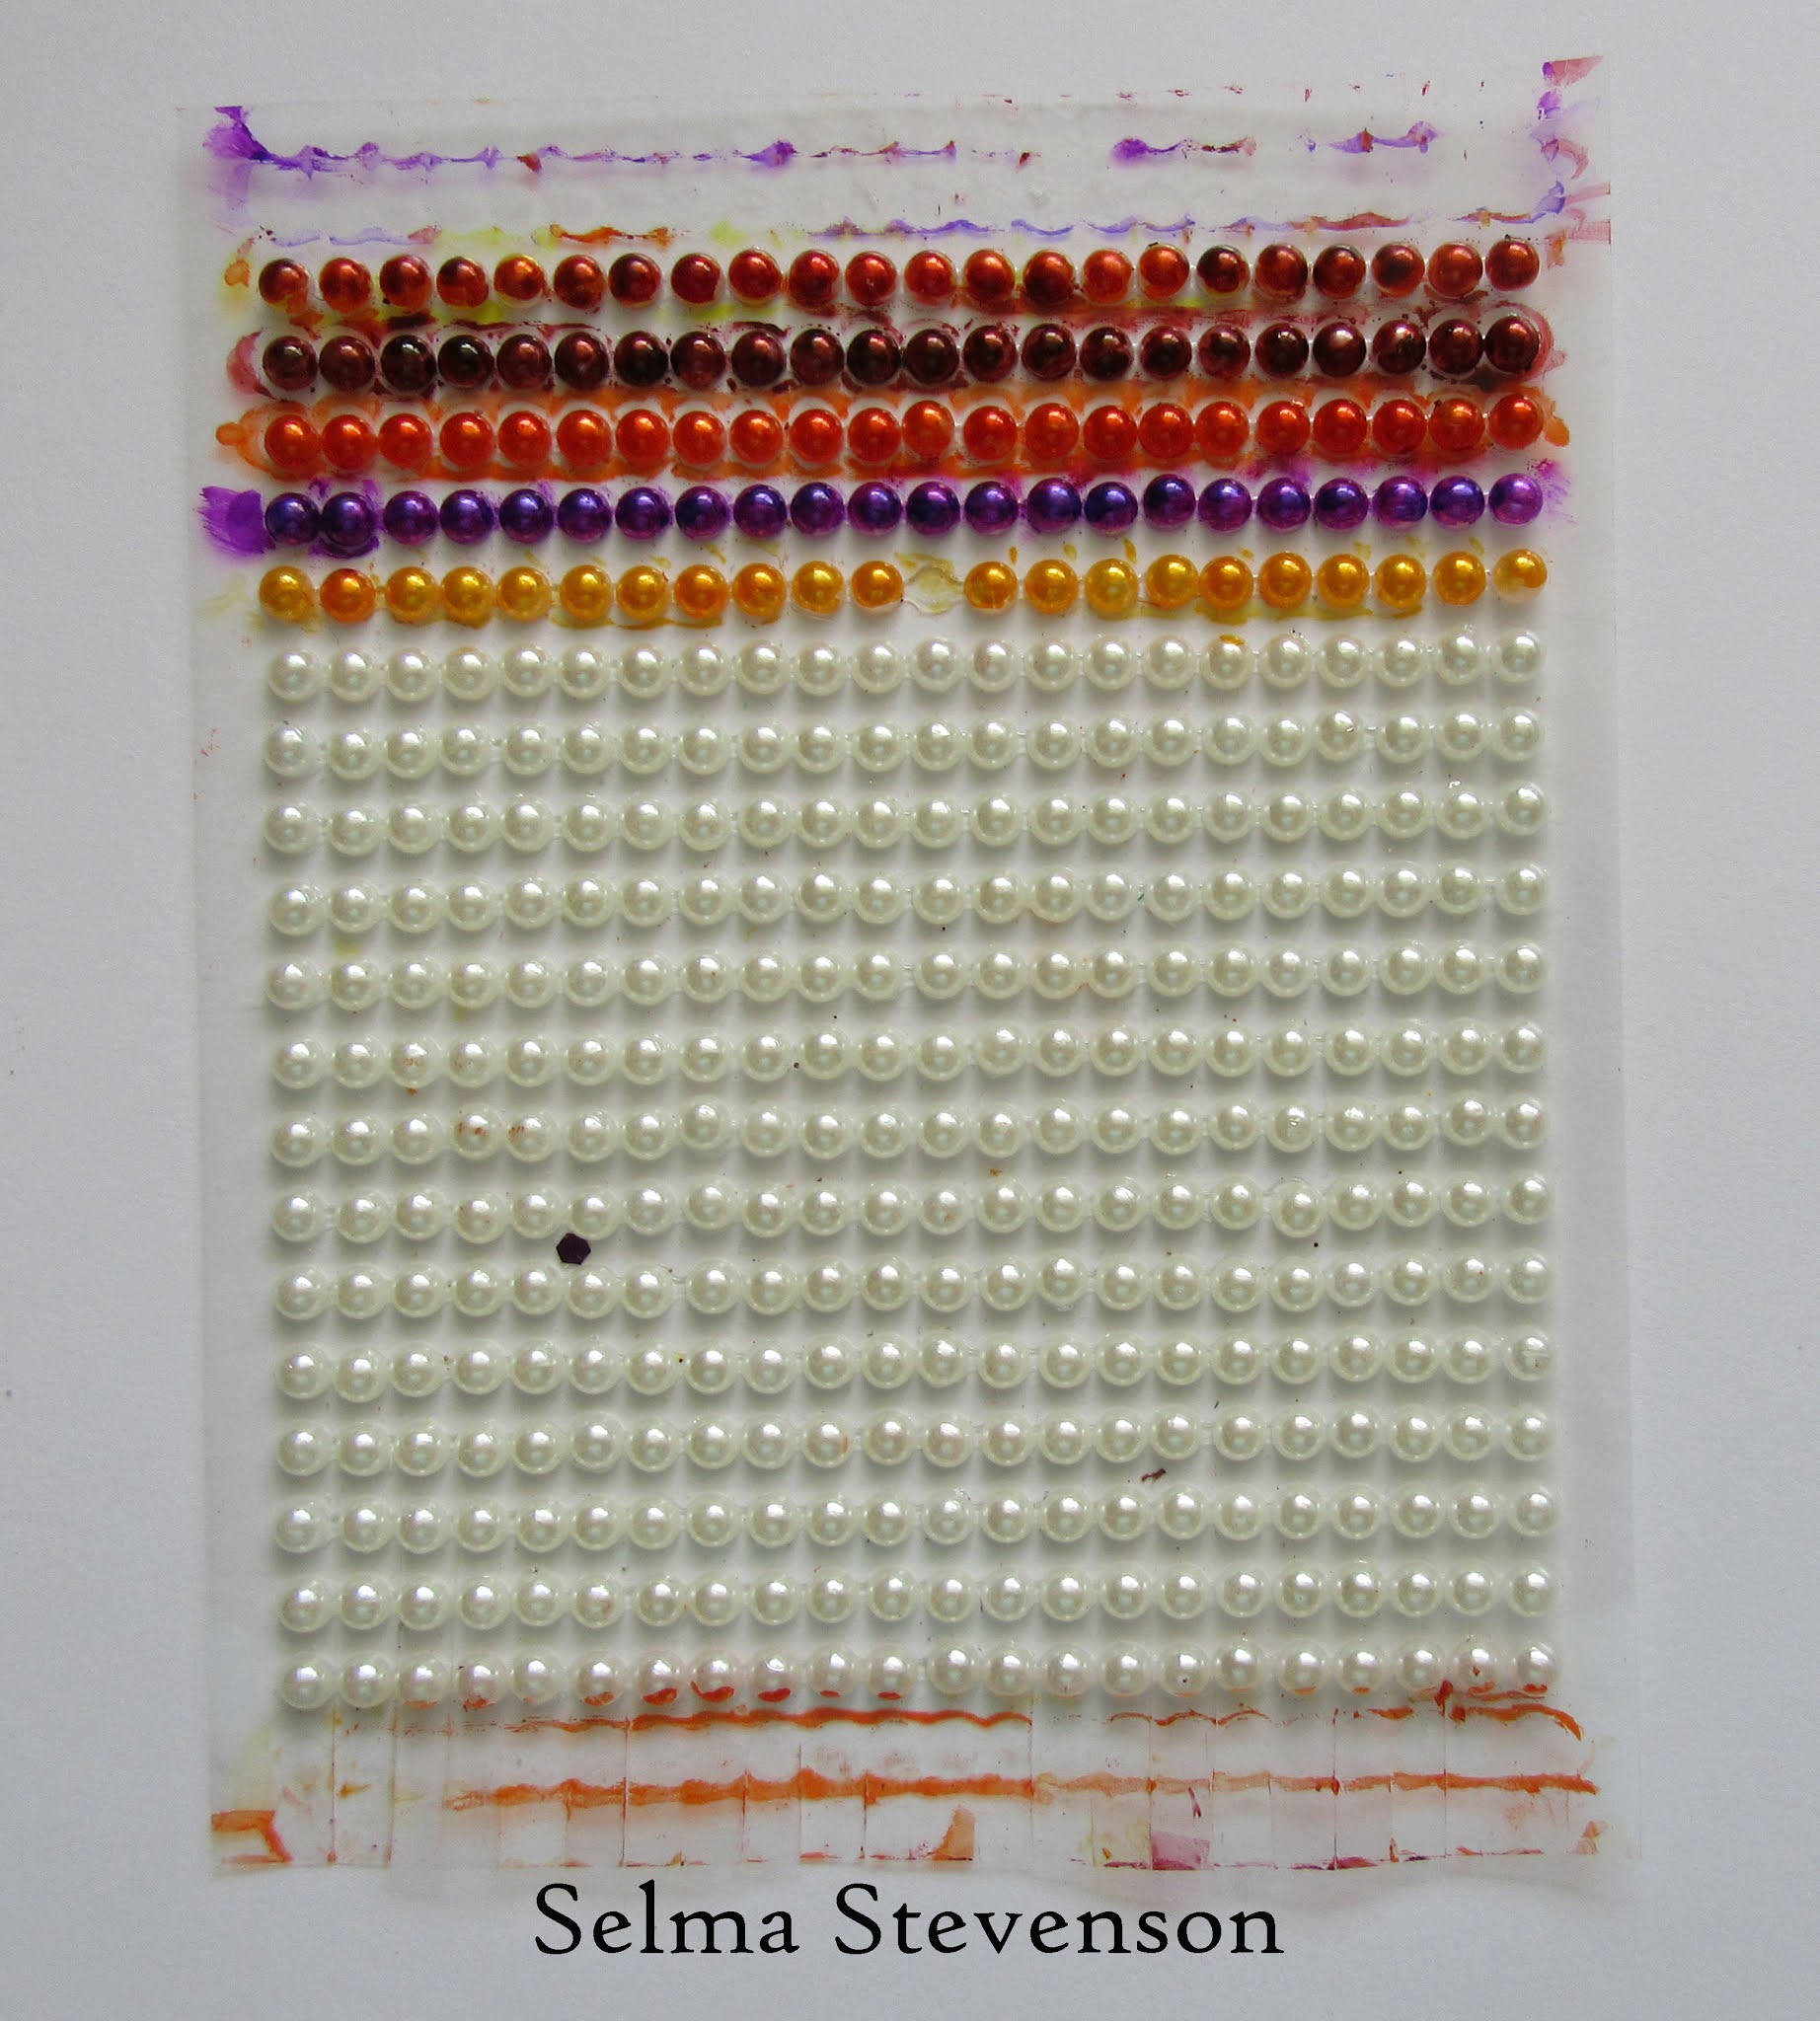
Today I decided to try something different for the berries. I had a sheet of white flat backed pearls that come on a piece of acetate. I used a red Copic marker and colored the pearls. I brushed the marker all over the pearls, being sure to color the sides too. (In the photo above I have different colors of pearls ready to use for other projects.) The pearls had a sticky back, but I added a small dot of glue to the berry branch, then pressed the pearl down. I liked using the pearls because I could place the berries close together without them running together like they do with drops and each berry is perfectly shaped. Another advantage to using pearls was that I didn't have to wait for the drops to dry! Attach the berry branches over the leafy branches.
Use the Garden Club Foliage & Ladybug die set to die cut a ladybug. Color it red, add the black detail, then cup it on the back for a rounded appearance. Attach to the chrysanthem mum with a dot of glue. Add a dot of clear glaze to the ladybug and brush it around to completely cover it. I like to die cut a bunch of these ladybugs, color, shape and even add glaze (working on a non-stick sheet). Once they are dry, I store them in a small container so they are ready to use.
Use the Garden Club Button/Daisy Chrysanthemum die set and create a rust colored chrysanthemum, to match the design paper, and two chrysanthemum leaves.
At the top corner, over the ends of the leafy branches and berry branches, I added a black twine bow. I just wrapped the twine around my fingers and tied it in the middle. It was attached with a large glue dot. Over the bow, attach the Chrysanthemum and leaves. I found a glue dot helped hold the flower in place.
Using the ladybug die in the Foliage & Ladybug die set, die cut the ladybug, color red and add black markings with a fine line pen. Attach to the Chrysanthemum leaf with a dot of glue.
I have provided links to these products below. If you order your products through the links below, I will receive a small commission to help replenish supplies. There will be no additional charges to you. Thank you for your support.


No comments:
Post a Comment