Wednesday, August 22, 2018

Be the Sunshine


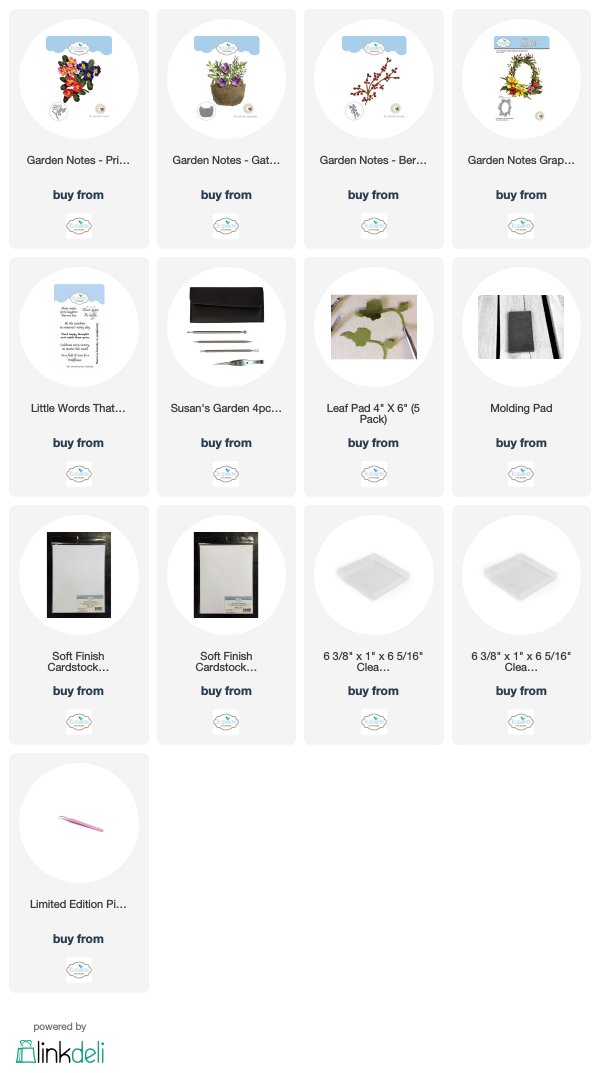
Today my inspiration came from watching Susan's Garden Club Video entitled "Spring Fever".  In this video Susan created the basket with the Grapevine handle, Primrose, Berry Branch, Ivy, and Lavender.  You can watch this step-by-step video at this LINK.

I don't like to copy anyone else's work, but after watching Susan's video I wanted to create all the items in the Spring Fever video. My card is similar to Susan's.   One of the most valuable tips I learned from this video was the correct arrangement of gluing the petals of the Primrose together.  I had been assembling the petals by gluing the two petal die cut on top of the three petal die cut.  They just didn't look right.  So, I learned that the correct layering of petals is very important in order to create the most accurate looking flower.  Sometimes we may think all the little details in creating flowers is not important, but in the end - it is important!  Susan has videos showing how to create just about all of her Garden Notes Flowers in her Facebook Garden Club page.  If you are interested in creating realistic flowers, you will find Susan's video most helpful.  She always shows step-by-step instructions to make it easy for us to learn this wonderful craft.  

Since I followed Susan's video for instructions, and have linked the video above, I won't go into detail about this card.

I have linked all the products used below.


Tuesday, August 21, 2018

Season's Greetings

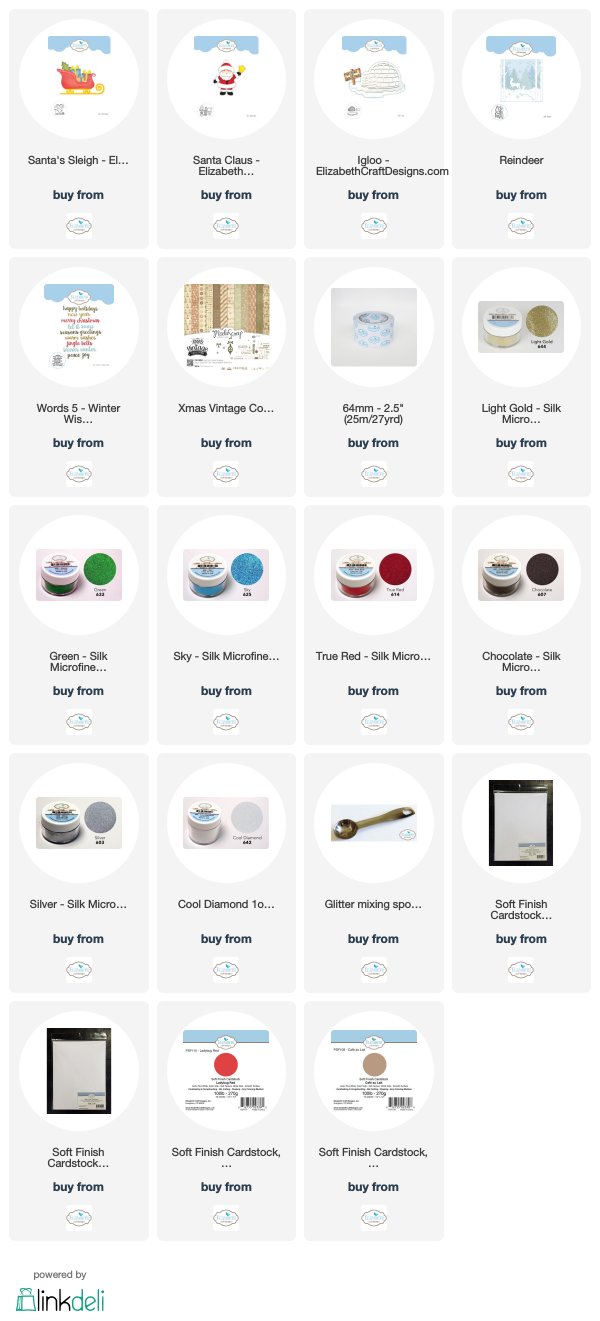
This month the theme for the design team is Christmas Fun with Character Dies.  The Elizabeth Craft Design team is challenged to make a Christmas card using the new Joset Designs Character dies that were released this month.  This card was designed using the Santa Clause die set as well as the new Santa's Sleigh die set.  You can view all the cards created by the design team on the Elizabeth Craft Design Blog at this LINK.

This is a 6-inch card.  A piece of the ModaScrap Christmas Vintage Collection design paper was used to cover the front of the card.  The Words 5 - Winter Wishes die set was used to die cut the sentiment out of brown card stock.

Use the Reindeer die set and die cut one snow bank.  Use a piece of white card stock that has Clear Double Sided Adhesive on top.  Sprinkle Cool Diamond Glitter to the adhesive and polish with your fingers.  Attach to the bottom of the card.

The Sleigh was die cut two times using white card stock that was covered with Clear Double Sided Adhesive.  The bottom portion of the sleigh was cut off one of the die cut pieces and covered with Light Gold Silk Microfine Glitter.  The top edge of the sleigh was cut off that same sleigh and also covered with the same Glitter.  The other sleigh was covered with Chocolate Silk Microfine Glitter.  The Gold pieces were glued to the Chocolate Sleigh.  The Sleigh was attach to the card only around the sides and bottom, leaving the top open in order to tuck in the tree and gifts.

The tree and gifts/ribbons were die cut with Clear Double Sided Adhesive on top.  They were glittered using Silk Microfine Glitters.  The bows were attach to the gifts.

Santa Claus

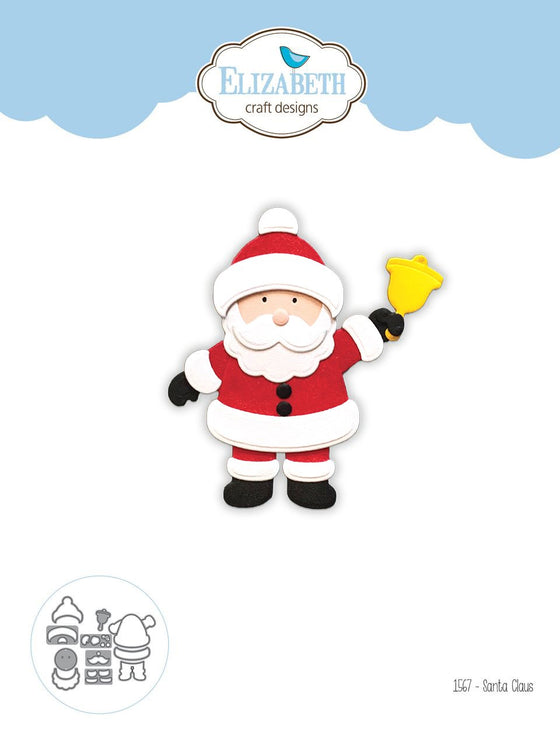
The Santa die set was used for Santa.  He was assembled as shown on the die cut package. The bell was die cut using gold metallic card stock.  To add a belt, use Santa's white head band for the hat.  Die cut the band using shiny black card stock.   Cut it in half and trim off the ends to fit around Santa's waist.  Cut a piece of gold card stock for the little square buckle.  Use a black marker to draw a black square in the center of the buckle.  Attach to the front of the belt.  

Attach Santa in front of the Sleigh as shown.  Attach the gifts and tree as shown.

Use the Igloo die set and die cut the sign.  Use the Cute Winter Sentiments stamp set and stamp "Welcome to the North Pole" on the sign.  Attach the sign in the Sleigh. 

I hope the design team has given you a lot of Inspiration to start your Christmas cards.

You can shop for the products I used by clicking on the links below.


You're Cool

This month the theme for the design team is Christmas Fun with Character Dies.  The Elizabeth Craft Design team is challenged to make a Christmas card using the new Joset Designs Character dies that were released this month.  You can view all the cards on the Elizabeth Craft Designs blog at this LINK.

It was a hard decision on which character die to use today --all the Christmas Character die sets are so cute.  For this card, I chose to use the Polar Bear die set.  One of the other new die sets is the Igloo.

This is a 6-inch square card.  A piece of white card stock, cut 5 1/2 inches square was used to create an opening for the mountain scene.  Use the Garden Notes Frame It/Stitched Circle die to create the opening.  Tape down the die in the center of the square.  Place the end of the cutting pad so it covers only 3/4 of the die.  When run through the die cutting machine, it will only cut a partial circle.  Use scissors to cut a straight line across the bottom of the circle.

From the Ski die set use and the mountain die to die cut the mountains, using white card stock.  Attach this die cut to the back of the half circle opening.  Attach this panel to a piece of dark blue card stock, using dimensional tape.  This leaves a little space between the mountains and the sky. Attach this panel to the front of the card 

Use the new Polar Bear die set and create the bear.  Shade the bear using Antique Linen Distress Ink.  

Use the Reindeer die set and die cut two snow banks.  Off set the snow banks and attach to the bottom of the card.  

Use the Igloo die set and die cut one Igloo and glue the pieces together.  

Attach the bear and igloo as shown.

Use the Cute Winter Sentiments stamp set and stamp the sentiment.  Die cut using the Stitched Banner die set.  Attach to the card as shown.

For the small snowflakes, use the Christmas Tree die set.  The second largest die for the tree has small snowflakes in the die cut.  Die cut this piece and use the snowflakes on the front of the card, as shown.

To add glitter to the mountains and snow bank, add a little glue and sprinkle on Cool Diamond Silk Microfine Glitter.  Once dry, polish the glitter with your fingers.  

You can shop for the products used by clicking on the links below.


Sunday, August 19, 2018

There is Beauty in Simplicity


I love to go through my die sets and discover a different way to use or combine them.  


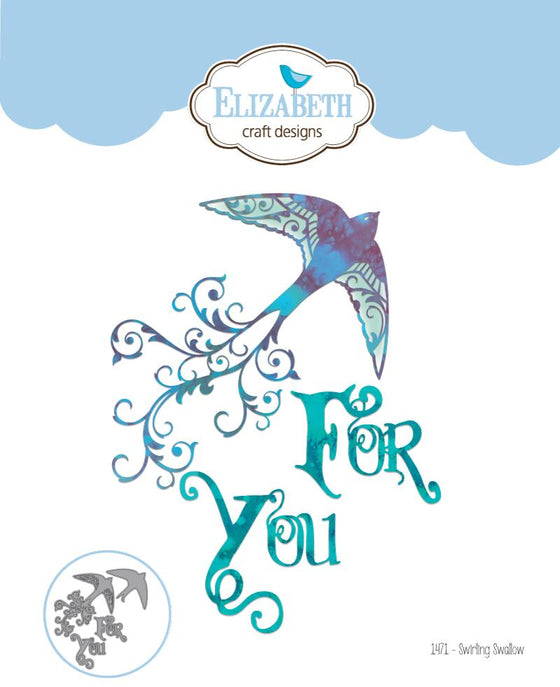
Swirling Swallow

The Swirling Swallow is a beautiful die set.  I especially love the beautiful flourish on the bird.  I decided to use this die and use only the flourish on a card with Shasta Daisies.

Wood Effect

To cover the front of my card, I used the ModaScrap Wood Effects design paper.  Using the second largest rectangle from the Stitched Rectangle die set, the design in the paper was die cut at an angle.  To frame this piece, the largest Stitched Rectangle was used to cut a gray piece that was attached behind the wood design.  

Use Susan's Little Words That Mean A Lot stamp set and stamp the sentiment at the bottom of the card, using VersaFine Black Ink.  Clear Emboss.  Attach the background panel above the sentiment.

Use the Swirling Swallow die set and die cut the Swallow, using White Soft Finish Cardstock.  Trim the flourish off the bird.  Attach to the front of the card at an angle, as shown in the photo.

Use the Free As A Bird die set and die cut one white bird.  Shade the edges with light gray ink.  Use a pencil to add light detail lines and a fine tip marker to add an eye and color the beak.  Attach at the top of the card.

Garden Notes - Frosty Fern

Use the Garden Notes Frosty Fern die set and die cut both Ferns, using white card stock.  Color the ferns with a light green marker, leaving the tips white.  Shape the ferns using the Flower Tool Kit.  Cut the Ferns apart so they can be placed behind the flower.

Garden Notes - Shasta Daisy

Use the Garden Notes Shasta Daisy die set and create three white daisies.  Shape the flowers and leaves with the Flower Tool Kit, and assemble using the Kids Choice Glue.  Add yellow pollen to the center of the flowers.  Attach the daisies over the Frosty Ferns.  I like to add the flowers to a dimensional glue dot and attach to the card then glue the Ferns under the flowers.  By adding the flowers with a dimensional glue dot, it raises them off the card and give them more dimension.  Glue the daisy leaves around the flowers.

This card can be mailed in one of the clear acrylic boxes.

You can shop for the products used by clicking on the links below.


Saturday, August 18, 2018

Smile


I have been busy working with the new Christmas die sets, just released by Elizabeth Craft Designs, but  today wanted to work with Susan's die sets and create some pretty flowers.  This card was designed using the Garden Notes Shasta Daisy die set.

To create the colorful oval behind the flowers, use a piece of watercolor paper and Distress Oxide Inks.  Use the Dotted Scallop Oval die set to die cut the oval.  Use a black marker to highlight each of the dots in the scallops around it.  Use the Entwined Oval die set and die cut one oval.  Attach to the watercolor oval as shown.  

For the sentiment, use the Smile die set and die cut it using black card stock.  Attach inside the Entwined Oval, as shown.  Attach the Oval to the front of the card, using dimensional tape.

Use the Garden Notes  Shasta Daisy die set and create 5 yellow daisies. Use the yellow orange PanPastels to shade the base of the petals.  Shape the petals and leaves using the Flower Tool Kit. Use Kids Choice Glue to assemble the flower. Add Pollen to the center of each flower.  

Use the Garden Notes Berry Spray die set and die cut two sprays.  Use red Nuvo Crystal Drops for the berries.  These sprays will be cut apart to fit behind the arrangement.

Use the Garden Notes Ostrich Fern die set and die cut two ferns, using tan card stock.  Lightly sponge on rust ink around the edges of the fern.

Use the Leafy Branch die set and die cut two branches.  Shape with the Flower Tool Kit.  Cut these apart to fit behind the arrangement.

Attach the Berry Branches, Berry Spray, Ferns, and the flowers to the lower left corner of the Oval.

All the products are available from Elizabeth Craft Designs and are linked below.


Thursday, August 16, 2018

Poinsettias With Snowflake Border


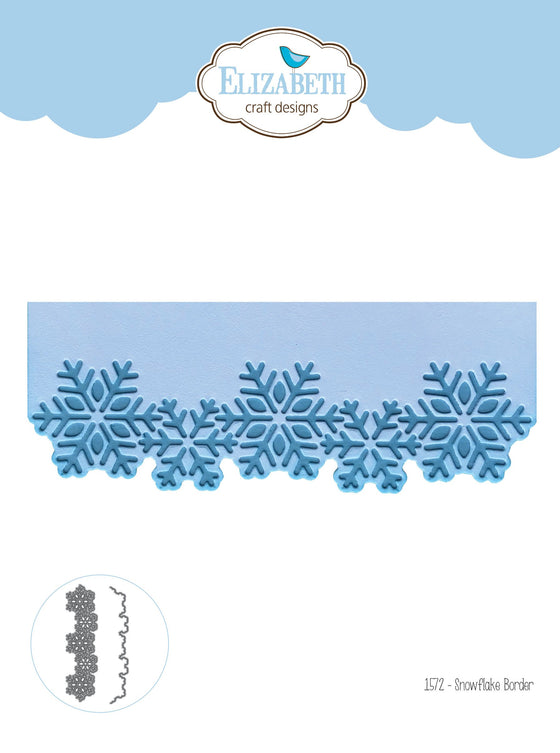
The new Elizabeth Craft Designs Snowflake Border die set by Joset Designs creates a beautiful background for these poinsettias.

This is a 6-inch square card. 

Snowflake Border

This is the Snowflake Border die set used for the background.


Use a 5 1/2 inch square piece of white Soft Finish White Cardstock and cut the Snowflake Border on both the top and bottom - pictured on the right. 

Use a piece of white card stock, covered with Clear Double Sided Adhesive and die cut the outline for the Snowflake Border  See picture above on the left.  Die cut two border pieces, with the adhesive on top, wide enough to fit below the snowflake border on each end of the piece on the right.  Remove the adhesive covering and sprinkle on Silver Sand Soft Finish Glitter.  Polish with your fingers.  


Attach the two glittered borders under the die cut Snowflake Borders, using 6mm Clear Double Sided Adhesive.  In my picture the glittered piece was a little longer than the Snowflake Border.  The edges were trimmed off.  Attach the border piece to the front of the 6-inch square card.


Use the Garden Notes Poinsettia die set and create three red poinsettias.  I used PanPastels to color the leaves red. The poinsettias and leaves were shaped  Green card stock was used for the green leaves.  Prills were used to create the center of each poinsettia.

Use the Garden Notes Whitepine Bough & Pinecone die set to die cut 8 pine boughs, using green card stock.

Use the Garden Notes Berry Spray die set and die cut two brown sprays.  Create berries using red berry Nuvo Crystal Drops.  Cut the sprays in small pieces to be placed behind the arrangement.  

Arrange the Whitepine Boughs, Berry Spray, and Poinsettias, as shown.

Create a silver bow using silver cording.

Add Corner Peel Off Stickers to each corner of the card.  Elizabeth Craft Designs Peel Off Stickers are very in expensive and can add just that perfect finishing touch.  

This card can be mailed out in one of the Clear Acrylic Boxes.


Tuesday, August 14, 2018

Christmas Greetings


I have been having so much fun getting a head start on all my holiday cards using the new Joset Designs holiday die and stamp sets from Elizabeth Craft Designs.  

Today I have a card using the new Santa Sleigh die set.  I love to pull out some of the older die sets from Elizabeth Craft Designs and combine them with the newer die sets.  For this card I also used some of Susan's CountryScape die sets to create the background for this pretty sleigh.

This is a 6-inch square card.  A piece of the ModaScrap White Christmas card stock was used for the blue snowy background.

Use the older Joset Designs Reindeer die set and die cut two of the snow banks, using white card stock.  Alternate the pieces along the bottom of the card.  Trim off any that hang over the end of the card.

Use Susan's CountryScape Woods 1 die set and die cut two white trees.  One tree was attached to the left side of the card.  A few branches needed to be trimmed on the side.  Cut the other tree apart and glue to the right side of the card, as shown.  Trim off any branches that go over the edge.  Use a light gray marker to highlight the embossed marks in the tree.

Use the Santa's Sleigh die set and red velvet paper to die cut the sleigh.  Use dark brown card stock to die cut the runner of the sleigh.  (Place the bottom of the sleigh over the brown card stock to die cut, and trim across the bottom of the sleigh, as shown.)  To give this piece a shine, the brown die cut was pressed into a VersaMark ink pad and then clear embossed.  Attach the brown runner over the bottom of the red sleigh.  Use a piece of gold card stock and die cut the top of the sleigh and trim off the edge to go across the top of the sleigh (see photo).  Glue to the sleigh.  Attach the sleigh to the card using dimensional tape.

Use the Santa's Sleigh die set to die cut the three gifts.  Use white card stock with Clear Double Sided  Adhesive on top to die cut the boxes.  Remove the covering over the adhesive and sprinkle on Silver Silk Microfine Glitter.  Polish with your fingers to bring out the shine.

Use the Santa's Sleigh die set and die cut the three bows, using red velvet paper.  Attach the bows to the silver glittered boxes.  Attach the gifts in the sleigh.

Use the CountryScapes Country Critters and die cut three Cardinals, using red velvet paper.  You can turn one die cut backwards to have birds facing different directions.  Color the beak black with a fine marker and add an eye to each bird.

Use the Winter Sentiments clear stamp set and stamp the sentiment at the top of the card, using black VersaFine ink.

You can shop for the products from Elizabeth Craft Designs by clicking on the links provided below.


Monday, August 13, 2018

Merry Christmas Moose


Today the Elizabeth Craft design team is excited to share cards for the new holiday release by Joset van de Burgt. In this release, there are 13 new die sets and 2 new holiday sentiment stamp sets.  You can see all the creative cards on the Elizabeth Craft Designs Blog at this LINK.

For my I used the new Moose die set.  I love this cute set; it is a set that is great for holiday cards but could be used for a variety of cards, all year long.    

1.  Use a 6-inch card.  Cover the front with a piece of the design paper from the ModaScrap White Christmas paper pack.

2.  Use the Dotted  Scallop Oval die set and die cut one oval for the background for the moose and tree.

3.  Use the Moose die set and die cut all the pieces using white Soft Finish Cardstock.  Sponge on the color.  Assemble the moose using the Kids Choice Glue.

4.  Use the Reindeer die set (which is an older die set) and die cut one evergreen tree, using green card stock. Use the small Elizabeth Craft Designs scissors to cut the branches apart.   Shade the ends of the branches with a darker green ink.  Use the Leaf Tool from the Flower Tool Kit  to shape the tree.  Sponge brown ink down the center.  Attach the tree, using a piece of dimensional tape, just down the center of the tree.  Fluff out the ends of the branches, for dimension.

5.  Attach the Moose, using glue.  

6.  Use the new Classic Christmas Sentiments stamp set and stamp the sentiment, using brown ink.  

7.  Use the snowflake die in the Reindeer die set and die cut 6 snowflakes.  Attach the snowflakes as shown.

I will continue to post cards this week using some of the other new die sets.  Be sure to visit the Elizabeth Craft Designs Blog today for inspiration using all the new products recently available.  

You can shop for the products used on my card by clicking on the product links below.


Thursday, August 9, 2018

Beautiful Cosmos


Today I have a card with a very pretty background.  Strips of Clear Double Sided Adhesive were used to create glittery diagonal strips.  

Start with a 6 inch square card.  Cover the front with a slightly smaller True Green Soft Finish Cardstock.  

Use a 5 1/2 inch square piece of white card stock to use for the background for glitter strips.  Layer 6mm clear double sided adhesive strips across the white card stock, leaving a small space between each strip.  Starting at upper left corner, peel back all adhesive coverings down about 1/3 of the way and sprinkle on Go To Green Silk Microsoft Glitter.  Rub glitter in well with fingers to set.  Brush off excess glitter.  Peel adhesive covering down about 2/3 of the way down and sprinkle on Spring Peridot Silk Microsoft Glitter.  Rub glitter in well, then brush off excess.  Pull off all the adhesive strips and add Soft Green silk microfine glitter.  Rub in glitter and brush off excess.  All the excess glitters can be put back in the glitter jars.  Add this glittered background to the front of the card.

Use the Dotted Scallop Oval die set and die cut one oval.  Use Susan's  Butterfly Is Proof stamp for the sentiment. Stamp with Black VersaFine ink.  Attach to lower left corner of the card.

Use the Garden Notes Cosmos die set and create seven flowers.  Shape the flowers with the Flower Tool Kit and assemble using Kids Choice Glue.  Add yellow pollen to the stamens.

Use the Garden Notes Berry Spray die set.  Die cut two spray with kraft card stockand glue together for stability.   Use purple Nuvo Crystal Drops for the berries.  Cut the Berry Spray in small sprigs to be placed behind the flowers.

Die cut three leaf branches using the Leafy Branch die set.  

Use the A Way With Words Amazing-Beautiful die set to die cut one white 'Beautiful' sentiment.  Attach to the top of the card, as shown.

Use the A Way With Words Butterfly Flourish to die cut the butterfly.  Color with sponges or markers.

Arrange the Leafy Branches, Berry Spray and flowers across the center of the card, as shown.  Attach the butterfly under the sentiment.

This card can be mailed in one of the clear acrylic boxes from Elizabeth Craft Designs.

You can shop for products used by clicking on the links below.


Tuesday, August 7, 2018

Elegant Christmas Tree


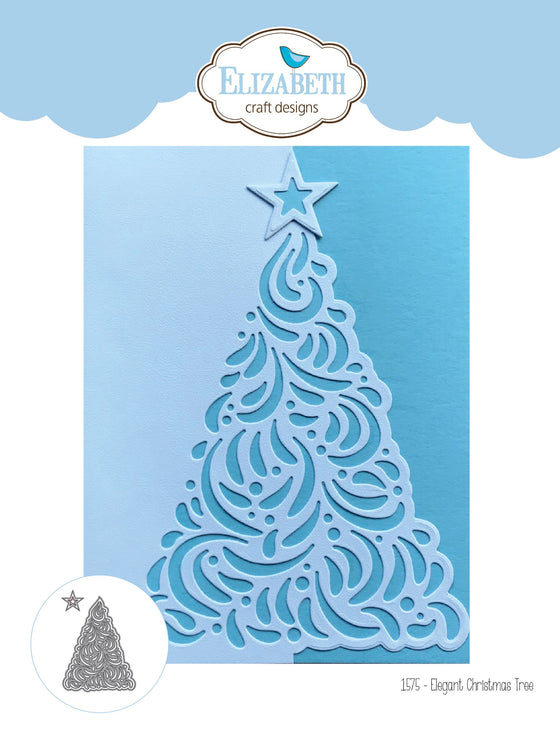
The Joset Designs current release has die sets from cute to elegant for your holiday cards.  Today I used the new Elegant Christmas Tree along with the 'Gift' dies from the Santa's Sleigh die set to create this elegant card.

The card size is 6-inches square.  A piece of Soft Sky Soft Finish card stock was added to the front of the card. 

Using the Garden Scene die set, a white frame was die cut using White Soft Finish Cardstock.  

The largest die from the Garden Notes Frame It/Square die set was taped inside the Garden Scene frame and run through the die cutting machine.  This die cut the open frame, leaving a stitched line around the edge.  I love the stitches along the edge of the frame.  Attach a piece of the Soft Sky Soft Finish Cardstock to the back of the open frame, using 3mm Clear Double Sided Adhesive.  

Elegant Christmas Tree

Use the Elegant Christmas tree die set and die cut the overlay for the tree, using White Soft Finish Cardstock.  Use a piece of card stock that has Clear Double Sided Adhesive attached to the back of it.  This will make it easy to attach it to the solid tree which will be die cut next.

Use a piece of White card stock with Clear Double Sided Adhesive attached to one side to die cut the solid tree.  Place the die on top of the Adhesive side.  Once die cut, peel back the adhesive covering and sprinkle with Silver Sand Soft Microfine Glitter.  Polish the glitter with your fingers. 

Die cut the Stars in the Elegant Christmas Tree die set.  Use white card stock with adhesive on top.  Use the Silver Sand Soft Microfine Glitter over the adhesive.   Polish the glitter.

Attach the Elegant Christmas Tree overlay on top of the solid die cut tree .  Attach the tree to the card front using dimensional tape.  Attach the stars to the top of the tree, using dimensional tape.  

Use the Box and Bow dies from the new Santa's Sleigh die set for the gifts.  Use white card stock that has Clear Double Sided Adhesive attached on top.  The gift boxes and bows are glittered.  Use the Silver Sand Soft Microfine Glitter for all three gifts.  Use Cool Diamond Soft Microfine Glitter for the Bows.  Attach next to the tree, as shown, using dimensional tape for two of the gifts.

Use the Words 5 - Winter Wishes die set and die cut the sentiment.  Use the Soft Sky card stock.  Use a glitter pen and color the sentiment.  Attach to the card as shown.

Use clear rhinestones to decorate the tree and add a few around the tree.  Add a rhinestone to the center of the smallest star.

Attach the framed picture to the front of the card using dimensional tape or a square of Fun Foam on the back of the frame.

You can purchase the products used by clicking on the product links below.


Monday, August 6, 2018

Moose at the Lake


Where I live, we usually see at least one moose each year.  They are my favorite wildlife to see.  Joset has a cute moose in her new release at  Elizabeth Craft Designs and I couldn't resist creating a scene I might see close to home.

Happy Frame XL

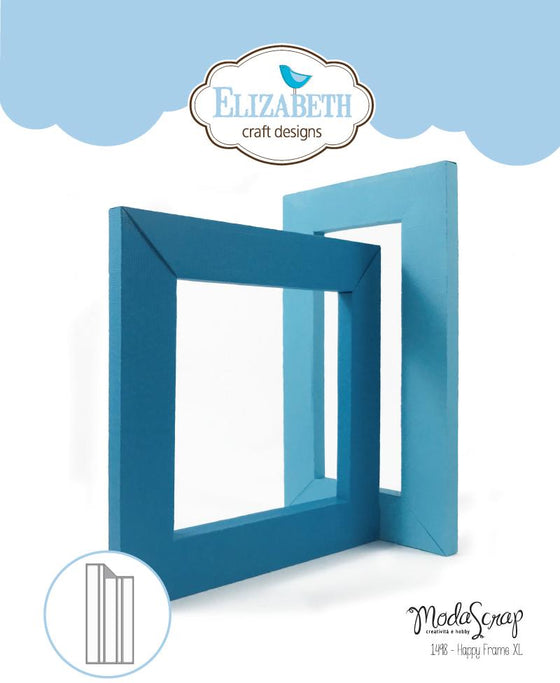
To begin, a frame was created using the ModaScrap Wood Effect design paper and the Happy Frame XL frame set.  A piece of blue card stock was attached to the back of the frame.

Lake Scene

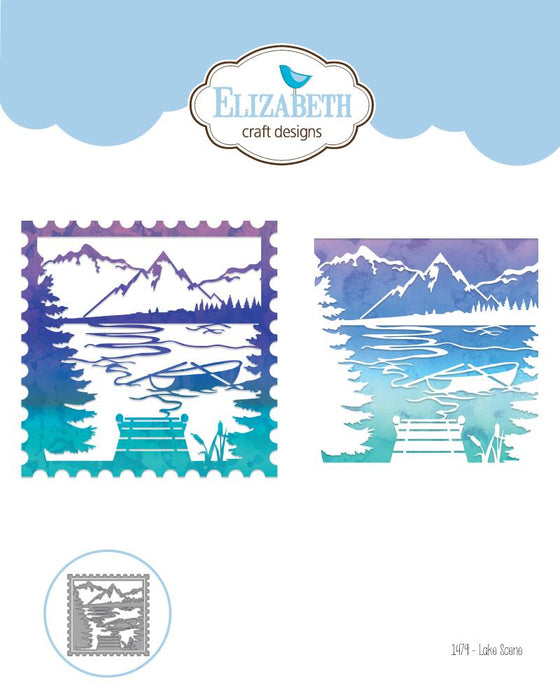
To create the  scene, the Lake Scene die set was used to die cut both the frame and scene, using Soft Finish White Cardstock.  The boat, ramp, and cattails were cut out of the design, using the small Elizabeth Craft Designs scissors.  Sponges were used to color all the elements of the design.  Before sponging on color, a strip of Post-It Note was pressed down around the edges of the frame to avoid getting ink on it.    A piece of white card stock, cut 6 inches square was used for a backing to the die cut scene.  Before attaching to the frame, dark blue was sponged on the top portion for the sky, a lighter blue sponged in the middle for the water in the lake, and brown sponged on the lower portion for the ground.  The die cut scene was glued to the colored backing.   

Moose

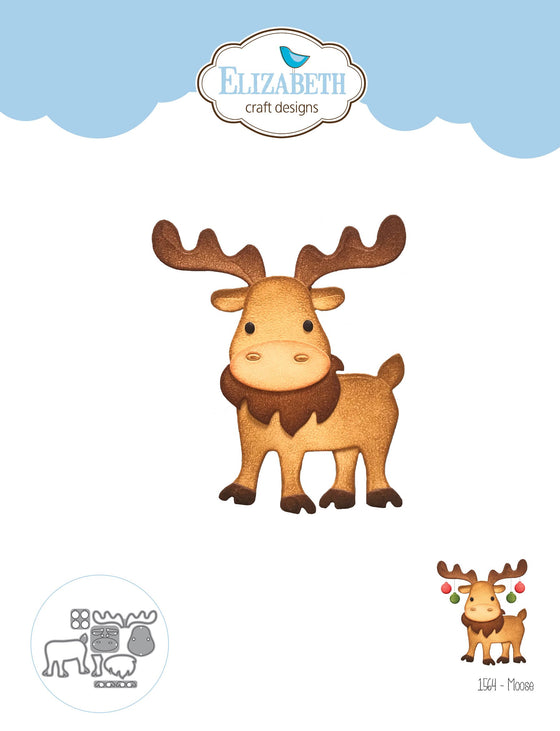
The Moose die set was used to die cut all the pieces, using White Soft Finish Cardstock.  Distress ink was sponged on each piece and then glued together, using Kids Choice Glue.  The moose was attached slightly behind the evergreen tree on the right.  The framed piece was then attached inside the Happy Frame.

This was a very fun project to complete.  A hanger will be attached to the back of this framed piece and will be hung in the bedroom I have decorated will moose items.

Links are provided below for the products used from Elizabeth Craft Designs.


Wednesday, August 1, 2018

Happy Holidays


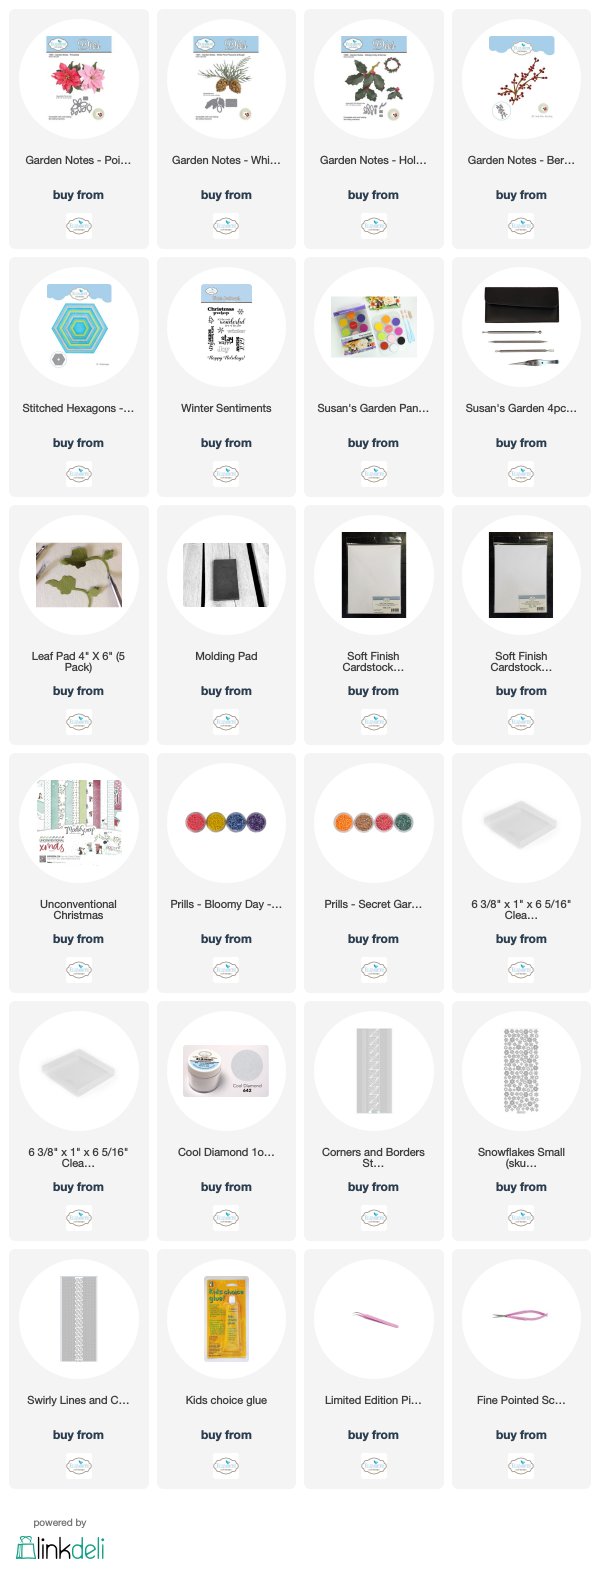
Good Morning. Today I have an early start on Holiday cards.  Recently Susan Tierney-Cockburn had a video on her Susan's Garden Club Facebook page showing how to assemble her Poinsettias using the Garden Notes Poinsettia die set.  You can view this video , at this LINK,  for instructions on how to create this beautiful flower.

The Holidays seem to arrive so fast for most of us.  It is nice to get an early start on holiday cards.  I'm sure there are special people on your mailing list that would love to receive a keepsake card, such as this one.  This card can be mailed out in one of the Clear Acrylic Boxes, attached to the top of a box, front of a gift bag, or even placed inside a gift bag.

Use a six-inch square card.  Cover the front with a piece of the ModaScrap design paper from the Unconditional Christmas paper pack.  Distress the edges before attaching to the card.

Use Silver Line Peel Off Stickers to line the edges of the design paper.

Use the Stitched Hexagon die set to die cut a Hexagon frame and a Stitched Hexagon for the sentiment.  Tape two Hexagon dies down onto  Vanilla card stock and run through the die cutting machine.

Above you see the two pieces that will die cut.

Use Picked Raspberry Distress Ink and sponge lightly around the Hexagon.

Use Joset's Designs Winter Sentiments stamp set for the sentiment.  This is a long sentiment.  Ink only 'Happy' on the stamp and center and stamp, just above the center of the Hexagon.  Clean stamp and ink only 'Holidays' and stamp centered below 'Happy'.  Use VersaFine Black ink to stamp and clear emboss.

Attach the Hexagon and Hexagon Frame down on the upper right side of the card.  Use Silver Line Peel Off Stickers around the die cut Hexagon Frame to help it stand out.  Use Silver Snowflake Peel Off Stickers to decorate around the sentiment.

Use the Garden Notes Whitepine Boughs & Pinecone die set to die cut 10 pineboughs and enough pieces to create one pinecone.  Susan's video will show how to shape the Whitepine Boughs and and how create the Pinecone.  Cool Diamond Silk Microfine Glitter was added to the Whitepine Boughs, for a frosty appearance.

Use the Garden Notes Holiday Holly & Berry die set to create four holly leaves.  Instructions for coloring the holly are also included in Susan's video.

Use the Garden Notes Berry Branch and die cut two pieces.  Color the stems light brown.  Use Pink Nuvo Crystal Drops for the berries


 Use the Garden Notes Poinsettia die set and die cut enough pieces to create 3 poinsettias, using white 85 lb Soft Finish Cardstock.  Color the petals using light and bright pink PanPastels.  Shape the die cut pieces using Susan's Flower Tool Kit and assemble using the Kids Choice Glue.    Create the flower (center) using Yes Glue and Prills.  This technique is also explained in Susan's Video.

 Assemble the pineboughs, berry branches, holly leaves and flowers as shown.

This card can be mailed in one of the clear Acrylic boxes.


LinkWithin

Related Posts with Thumbnails