Monday, December 25, 2017

Merry Christmas


First I want to wish all of you a very Merry Christmas. 

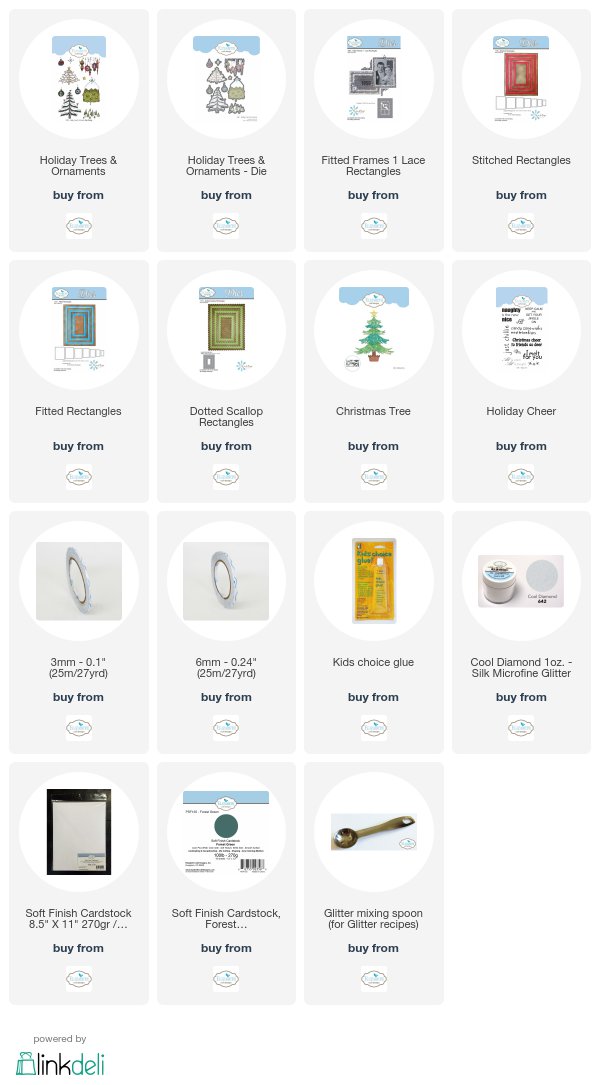
Today I have a card with one of the stamps from the Holiday Trees & Ornaments stamp set.  The frame was created by layering a variety of die cut rectangles (Fitted, Stitched, Fitted Frames, and Dotted Scallop).  This was one of my favorite Christmas cards this year.

You can create a variety of cards by switching the theme and the sentiment and this versatile layout will be useful and fun all year! For example,  from snowflakes, tree and Christmas sentiment to a cupcake and tiny hearts and you'll have a birthday card.

The size of the finished card is 6 1/2 x 5 inches.  It is a card base is from a purchased set of blank cards and envelopes.

Here is how to complete the card:

1.  Stamp the tree with black ink, color with markers. Die cut using the matching die. Add Warm or Cool Diamond Silk Microfine Glitter to the snow on the branches.

2. For the first layer of the frame (the smallest inner layer surrounding the tree) use the Fitted Frames 1 Lace Rectangles die set to cut White Soft Finish Cardstock (SFC). Use the small scalloped frame.

3.  Use the third largest Stitched Rectangles Frames die to cut White SFC.

4.  Use the second largest Fitted Rectangles die to cut Forest Green SFC.

5.  Use the largest Dotted Scallop Rectangles die to cut White SFC. stock.

6.  Using a paper trimmer or craft knife, ruler, and self healing craft mat, hand-cut a Forest Green SFC rectangle 1/8 inch larger than the white Dotted Scallop Rectangle.

7.  Layer and adhere all of the rectangles, starting from the smallest and working outward. Center each frame on top of the next one. (Refer to the project photo.)

8. Attach the frame to the front of the 6 1/2 x 5 inch card front.

9.  Stamp the sentiment with black ink. When ink is dry, trim around the sentiment using scissors to fussy-cut a curvy shape.  Adhere per project photo.

10.  Add the  tree below the sentiment.

11.  For the snowflakes, die cut White Soft Finish Cardstock that has Clear Double Sided Adhesive on the front with the tree branch die that has the small snowflakes (Christmas Tree die set). Cut off the snowflakes, Remove the release sheet to expose the adhesive and cover with Cool Diamond Silk Microfine Glitter (or Warm Diamond if you used Warm Diamond for the snow on the stamped tree). Polish with a fingertip to bring out the maximum sparkle. Glue the snowflakes around the tree, inside the scalloped frame.

The products used from Elizabeth Craft Designs are linked below.


Tuesday, December 19, 2017

Background Challenge


The Elizabeth Craft Designs challenge for the design team this week was to create a background with either dies or stamps.  I chose to use the new Kaleidoscope background die and Gold Mirror cardstock.  To see all the cards/projects created by the design team, go to the Elizabeth Craft Designs Blog at this LINK.

For the Challenge today, Elizabeth Craft Designs is giving away a $20 Gift Card to use on the Elizabeth Craft Designs website to 3 winners. 


To enter, simply leave a comment on the Elizabeth Craft Designs blog post and leave a comment answering this question:   What Elizabeth Craft Designs dies or stamp sets would you use to create a background on something you were creating?
      
Elizabeth Craft Designs will select 3 lucky winners in a random drawing.

The winners will be announced on Friday, December 22, on the Elizabeth Craft Designs blog.

Good Luck!
*******************

Here is how I created my card.

1.  Add a piece of Clear Double  Sided Adhesive to the front and back of a piece of white card stock, slightly larger than the Kaleidoscope die.  Peel off the covering on one side, exposing the adhesive, and attach a piece of gold mirror card stock.  

2.  Attach the Kaleidoscope die on top of the gold card stock, with removable tape, and run through the die cutting machine.  Because there is adhesive on both sides of the white card stock and the gold is attached on top, the die will not cut completely through all thickness if run through just once.  You will have a nice die cut design through the gold card stock.  Do not remove the small die cuts within the design.

3.  Use a 5 x 6 1/2 inch card base.  Cut a piece of white card stock slightly smaller and score around the edges, using a score board,  for a finished look. Attach to the front of the card.

4.  Attach the gold die cut background to front of the card.

5.  Use Gold Peel Off Line Stickers to go around the outside of the die cut piece, as shown.

6. Add Clear Double Sided Adhesive to the front of a large piece of white card stock.  Use the Christmas Tree die set to create the tree.  Die cut the background  pieces and  overlay pieces with the dies on the top of the adhesive.   Die cut all the background pieces again using just white card stock.  You will have one set of background die cuts and two sets of overlay tree die cuts.

7.  Peel off the backing on the adhesive on the background (solid) die cuts and add Cool Diamond Silk Microfine Glitter.  

8.  Peel off the backing of the overlay die cut tree pieces and add Light Gold Silk Microfine Glitter.  Be sure to rub the glitter with your fingers to bring out the shine.

9.  Glue the Light Gold tree die cuts over the Cool Diamond background.  

10.  Attach the white card stock background pieces to the back of the glittered die cut tree pieces so the bottom edges show slightly below the glittered pieces.  See picture.

11.  Die cut the Star from the Christmas Tree die set with Clear Double Sided Adhesive on top.  Add Champagne Silk Microfine Glitter to the star. 

12.  Die cut the tree trunk and the pot for the tree.  Die cut the overlay using silver mirror card stock.  Die cut the background using white card stock.  Attach the silver die cut over the white background.  

13.  Assemble the tree over the gold background, using dimensional tape under each of the tree layers, and the pot.  

14. Glue the glittered snowflakes, from the die cut tree,  around the tree, as shown.  


You can purchased the products used by clinking on the links below.


Tuesday, December 12, 2017

Susan's Garden Challenge - Votive


Today the Elizabeth Craft Design Team was challenged to create a card or project using Susan's Garden die sets in a Christmas Theme.  We are to use traditional Christmas colors -- red, green, gold/silver.  You can see all the design team projects on the Elizabeth Craft Designs Blog at this LINK.

I chose to create a Christmas Votive using Susan's Garden Notes Carolina Window and Shutter die set for the votive and decorated it with Garden Notes Poinsettia die sets.

As with all challenges, Elizabeth Craft Designs is giving you another chance to win a prize.

For the Challenge today, Elizabeth Craft Designs is giving away a $20 Gift Card to use on the Elizabeth Craft Designs website to 3 winners. 


To enter, simply leave a comment on the Elizabeth Craft Designs blog post and leave a comment stating "What Susan Garden products would you like to find under your Christmas tree this year?”
      
Elizabeth Craft Designs will select 3 lucky winners in a random drawing.

The winners will be announced on Friday, December 15, on the Elizabeth Craft Designs blog.

Good Luck!
*******************


Here are the directions for creating the votive:

Start by die cutting four Garden Notes Carolina Windows.  Also cut a long strip of cardstock approximately 1/4 inch wide, that will be used to connect the windows to form the square votive.  Score the long strip down the center.  

Cut four pieces of the long strip, cut the length of the square part of the window.  Add a piece of Clear Double Sided Adhesive along the outside edges of the long pieces.  Attach the pieces to the backside of each die cut window, to create a square box.  

Create a bottom for the votive.  Place the square window, you just completed, on top of a piece of card stock and mark the insides lightly with a pencil.  Remove votive and cut the square with 1/4 inch margins on each side.  Score the square along the pencil lines and crease well.  Cut a slight 'V' shape on each corner, which will help the bottom fit easy inside votive sides.  


Cut two squares the same size as the inside of the square just created.  These will be glued inside, on the bottom, to create a firm bottom base.  (There will be three layers of cardstock on the bottom.)


Die cut four additional windows.  Cut four pieces of acetate the shape of the window.

Attach Clear Double Sided Adhesive around the outside edges of these four windows then attach the acetate.  


Attach Clear Double Sided Adhesive to the outside edges of the bottom square piece.  Attach the bottom piece ito the inside of the square votive.  Be sure bottom piece is even with the lower edge of the die cut windows.  

Peel backing off the extra die cut windows and attach to the inside of the votive making sure all edges are attached evenly.  By adding the extra die cut window pieces inside, it will make the votive strong.  The acetate should be between the two die cut window pieces.


Use the Dotted Scallop Circle die set and die cut three of the largest circles.  Attach the three circles together to create a firm base.


Use the Garden Notes Whitepine Bough & Pinecone die set to die cut 8 pine boughs.  Use the Garden Notes Mistletoe die set to die cut 4 branches.  Attach all these branches around the die cut circle.  Attach the Mistletoe pieces first, then the pine branches on top.

Use the Berry Branch die set and die cut 4 branches.  Use Gold Nuvo Crystal Dots to create berries on the branches.  Let dry thoroughly and attach over the pine boughs.

Add Clear Double Sided Adhesive to the bottom of the votive and attach to the center of the decorated circle.


Use the Garden Notes Poinsettia die set and create four poinsettias, using red card stock.  Attach one poinsettia to each corner of the votive, using dimensional glue dots.  Using gold cording, create 4 bows to be added to each corner, behind the poinsettia.

Use the Snowflake die set and die cut one gold snowflake and attach to the front of the votive.  Add a, battery operated, small candle inside the votive.

Hope you enjoyed my project.  You can shop for the products used by clicking on the products listed below.


Thursday, December 7, 2017

Let It Snow


I love creating cards with snowmen.  I have had  a lot of fun using the Elizabeth Craft Designs Snowman die set.  For this card, I used only part of the snowman's body.

Start  with a 12x6 inch piece of Whisper Blue Soft Finish Cardstock scored across the center to create a 6 inch card. Cut a piece of white card stock 5 3/4 inches square and attach to the front of the card.  Cut a piece of the ModaScrap Let It Snow design cardstock slightly smaller and attach for the background.

Use the third largest die in the Dotted Scallop Rectangle die set and die cut one white rectangle.  Use the fourth largest die in the Stitched Rectangle die set and die cut one rectangle.  Before removing from the die, use Faded Jeans Distress Oxide Ink to sponge on blue ink.  This will leave a white border around the rectangle die cut.  Use a white opaque marker to draw on white snowflakes to coordinate with the design cardstock.  Attach the rectangles together using a piece of dimensional tape between layers.  Attach to the lower right corner on the card.

Use the Stylish Snowman die set and die cut the head and middle section of the snowman.  Die cut the hat, face and scarf.  If you would like a glittery snowman, die cut the pieces using Clear Double Sided Adhesive on top.  Use Basic Black Silk Microfine Glitter for the hat, Cool Diamond for the body, Orange for the nose, and Spring Peridot Silk Microfine Glitter for the scarf.  I cut a narrow piece of cardstock with Clear Double Sided Adhesive to create a hat band and added True Red Silk Microfine Glitter.  To create the polka dots on the scarf, I used a white opague pen.

Assemble the snowman and cut off a portion of the larger body to fit across the bottom of the frame created.  Attach the snowman with dimensional tape.

Use the Els van de Burgt Candle die set and die cut a bunch of the pine boughs using green card stock.  Arrange the pine boughs on the lower left and upper right corners of the framed snowman.  Add berries using Nuvo Crystal Drops.

Use the Holiday Garland die set and die cut one snowflake garland.  Use a piece of white card stock with Clear Double Sided Adhesive on top when you die cut it.  Sprinkle on Cool Diamond Silk Microfine Glitter and rub in with your fingers for a sparkly finish.

Use Susan's Garden Notes Poinsettia die set to create the flower.  Add green and yellow Prills to the center.  Shape the flower and leaves using Susan's Flower Tool Kit.  For instructions on how to shape and create this poinsettia, you can view Susan's Garden Notes Poinsettia Video at this LINK.

Use the Garden Notes Whitepine Bough & Pinecone die set to die cut several pine boughs, using green cardstock.

Attach the Whitepine Boughs on the upper left corner of the card.  Attach the poinsettia on top.  Add red berries.

Cut the Snowflake Garland die cut so you can attach it across the top of the framed snowman and a piece down under the poinsettia.

Use the Winter Sentiments Clear Stamp set to stamp the sentiment on white card stock using black ink.  Cut around the sentiment using scissors.  Pat the sentiment onto a VersaMark Pad and clear emboss.  Attach to the lower left corner.  

How would you like to dress up your snowman?


You can shop for the products used for this card at the links provided below.


Wednesday, December 6, 2017

Pink Marble Poinsettias

Good Morning.  This is  a card designed using Susan's Garden Notes Poinsettia die sets.  I will show you how I painted the petals for this pretty Pink Marble Poinsettia.


1.  Start with a piece of card stock that is 12x6 inches.  Score across the middle to create a 6 inch square card.


2. To create the poinsettias the same way I did, use both the Garden Notes Poinsettia and Garden Notes Poinsettia Small die sets.  Die cut two of the large petal die cut using the Garden Notes Poinsettia die set and die cut one large petal die cut using the Garden Notes Poinsettia Small die set for each flower.   Die cut enough to create three flowers.  That will be 6 die cuts of the larger petals and 3 of the smaller petals. Die cut 5 or 6 leaves, using the larger Poinsettia die set.

3.  Draw the veins on the flower petals and leaves, using Susan's 4-piece Flower Tool Kit.


4.  Use watercolors and a water brush to color the pink on the poinsettia petals.


5.  Load pink watercolor on the water brush.  Start at the base of the petals and draw the color out, feathering the color on, up towards the point.

6.  Use the Flower Tools to shape the petals and leaves.  To assemble the flowers, use two large sets of petals and one small.  Alternate the petals when gluing together.  Use Kids Glue to  attach the petals. Use a mixture of green and yellow prills in the center of each flower.

7.  Use the Beautiful Baubles die set and die cut three pine branches using White Soft Finish Cardstock.  Lightly sponge color the needles using PanPastels.

8.  Use the Lovebirds die set and die cut once.  Lightly sponge on PanPastels to color leaves and bird.  Use a brown marker to color the branches.  Glue on Red Prills to the branches to resemble berries.  To glue the berries on, add a spot of Kids Glue on craft mat or paper plate.  Pick up one red Prill with Elizabeth Craft Designs tweezers.  Lightly touch Prill into glue and place on branch.  This branch will be cut apart to add behind the flowers.

9.  For the background, use the Kaleidoscope Background die to die cut one white background out of White Soft Finish Cardstock.

10.   Use Perfect Pink Soft Finish Cardstock to cut a piece to fit behind the Kaleidoscope Background.  Use 3mm Clear Double Sided Adhesive to attach Background to the pink cardstock.

11.  Cut a piece of White Soft Finish Cardstock 5 1/2 inches square.  Use a Scoreboard and score around the edges for a finish appearance.  Attach to the front of the card.

12.  Attach the Kaleidoscope background to the top portion of the Scored cardstock.

13.  Attach the poinsettia arrangement.  Start by attaching the pine branches.  Second, Attach the poinsettias with dimensional glue dots.

14.  Use the Holiday Garlands 2 die set to die cut the snowflake garland.  Attach it under the flowers.  Add a Clear Glitter Dot Peel Off Sticker to the center of each snowflake and circle on the garland.  Also add Clear Glitter Dots to the corners of the Kaleidoscope frame.

15.  Use the Sentiment 2 - Just Because Clear Stamp Set to stamp the sentiment, using black Archival Ink.  Die cut using the matching die set.  Use the VersaFine Dazzel Ink Pad to cover the sentiment and emboss with clear embossing power.
Products:


Tuesday, November 21, 2017

Pop Up Card Challenge


It is time for another Elizabeth Craft Designs Challenge for the design team.  This month we were challenged to use the General Pop Ups die set for our card.  Pop Up cards are  easy to create and are always so fun to receive because you are not expecting the pop up element.


General Pop Ups

This is a fabulous die set for creating many different types of pop up cards.  Be sure to go over to the Elizabeth Craft Designs Blog to see all the creative cards designed by the design team at this LINK.

As with all challenges, Elizabeth Craft Designs is giving you another chance to win a prize.

For the Challenge today, Elizabeth Craft Designs is giving away a $20 Gift Card to use on the Elizabeth Craft Designs website to 3 winners. 


To enter, simply leave a comment on the Elizabeth Craft Designs blog post and tell them "What Elizabeth Craft Designs dies or stamp sets would you use with the General Pop Ups die set if you were making a Pop Up Card?"  
      
Elizabeth Craft Designs will select 3 lucky winners in a random drawing.

The winners will be announced on Friday, November 24, on the Elizabeth Craft Designs blog.

Good Luck!
*******************


Here is how I created my Pop Up Card.


1.  Use a piece of red card stock 12 x 6 inches and score across the middle to create a 6 inch card.

2.  Cut a piece of the design paper from the White Christmas paper pack and attach to the front of the card.

3.  Use the Dotted Scallop Rectangle die set to die cut one red rectangle and one white rectangle for the front of the card.  

4.  Use the Winter Sentiments stamp set and stamp the sentiment in the center of the white rectangle, using VersaMark Ink.  Emboss using green embossing powder.

5.  Use a piece of dimensional tape to attach the white rectangle over the red one.  Center and attach on the front of the card.


6.  To create the inside, use a piece of white card stock 1/4 inch smaller than the red card stock.  Score down the center.  When folded this piece will be 5 3/4 inches square.


7.  Use the largest pop up die and place the small side tabs right on the fold line.  Tape down.  Use one of the smaller narrow pop up dies and tape on the right of the larger die. Use another small narrow pop up die and tape to the left side of the larger die.   Run through the die cut machine. Push out all the pop up tags and close card and press folds well with a bone folder.

8.  Use the Christmas Tree die set and die cut the tree and assemble.

9.  Use the Snowman & Gifts Clear Stamps and stamp the large gifts.  Color and die cut with the matching dies.  Use the same stamp set and stamp the Snowflakes, color and die cut.

10.  Use the Candy Land stamp set and stamp the candy pieces twice.  Color and die cut using the matching dies.  Add a little glue and sprinkle on Warm Diamond Silk Microfine Glitter for a little shine.  Once the glue is dry, polish the glitter with your fingers. 

11.  Use the A Way With Words Wishing You A and the Merry Christmas die set and die cut the sentiments using red card stock.  Die cut all the words again, twice, using white card stock.  Glue all the words together with the red word on top.  This will give the sentiment some dimension.  

12.  Attach the Christmas Tree with Clear Double Sided Adhesive to the top pop up tab of the large pop up.  Add the Gifts to the lower tab.  Clear Double Sided Adhesive is strong and will hold your die cuts very well.  

13.  Attach the striped peppermint sticks to each side of the large pop up. 

14.  Attach the Sentiments as shown.

15.  Attach the die cut snowflakes to the upper corners of the card. 

16.  Attach the string of peppermint candies to the bottom of the card.   

You can shop for the products used at the links provided below.

Thanks for stopping by and be sure to go over the the Elizabeth Craft Designs blog to view all the great Pop Up cards designed by the design team and also to leave for comment for a chance to win one of the $20 Gift Cards. 


Monday, November 20, 2017

Let It Snow Framed Snowman


I have had so much fun creating cards using the Elizabeth Craft Designs Snowman die set.  Here is a card using a partial snowman in a frame.

Start with a 6 inch square card.  Cover the front with a piece of design paper from the Let It Snow paper pack.  

Use the Snowman die set and die cut the head and middle circle to create the snowman.  Cut a portion off the larger circle so it will fit on the edge of the frame.  Decorate the snowman with accessory pieces in this set.  If you want a glittery snowman, die cut pieces with Clear Double Sided Adhesive on the top of the cardstock.  Add Soft Microfine Glitter and rub with fingers to bring out the shine.  On the scarf, I used a white opaque pen to draw on the polka dots.

Use the Els van de Burgt Studio Candle die set and die cut six pine branches.  

Use the Stitched Rectangles die set and die cut a white frame.  Before removing from the die, sponge on blue ink that matches the design paper on the front of the card.  Use a white opaque pen to draw snowflakes on the background.

Use the Dotted Scalloped Rectangles and die cut a rectangle slightly larger than the Stitched Rectangle.  

Attached the Stitched Rectangle over the Scalloped Rectangle with dimensional tape.

Add the Snowman inside the frame, and add the pine branches in opposite corners.  Add red glittered berries to the branches.

Use the Holiday Garlands 2 die set and die cut one garland.  Use a piece of cardstock that has Clear Double Sided Adhesive on top.  Add Cool Diamond Silk Microfine Glitter to the adhesive side and shine with your fingers.  Attach across the top of the card.

Use Susan's Garden Notes Poinsettia and die cut pieces to create a white poinsettia.  Add green and yellow Prills to the center.  

Use Susan's Whitepine Bough & Pinecone die set to die cut six pine branches.  Attach the branches to the upper left corner then attach the Poinsettia over them.

Use the Winter Sentiments stamp set and stamp the sentiment using VeraFine Black Ink and clear emboss.  Use scissors to trim around the sentiment.  Attach to the lower left corner.

I am sure you will have a lot of fun creating different snowmen using the new Elizabeth Craft Designs Snowman die set!

Thanks for stopping by.

You can shop for the products used by clicking on the links below.


Friday, November 17, 2017

Let it Snow

How are you doing getting all your Christmas cards created?  I am still working on mine.  As I have said many times, I love snowmen and today I want to show you some cute snowmen created with the Snowman die set from Elizabeth Craft Designs.


Here are five different snowmen created with the Snowman die set.  Gosh, there are so many different ways you can dress them up.  I'm sure you will have lots of fun creating your snow people!

This is a 6x6 inch card.  Use a piece of 12x12 card stock cut to measure 6x12 inches and score across the middle to create a 6 inch square card.

For this snowman card, everything is glittered.  You can glitter a piece of white card stock and die cut all the pieces.  You can used different colors of Silk Microfine Glitter or use markers to color Warm Diamond Silk Microfine Glitter. 

The Snowman was die cut using the Snowman die set.  The Trees and Snowbanks were die cut using the Reindeer die set.  The Sentiment was die cut using the A Way With Words 'Let It Snow' die set, and the small snowflakes were die cut using the die from the Christmas Tree die set that has all the snowflakes on the branches.  

For dimension, you can attach the card stock to craft foam with Clear Double Sided Adhesive, and die cut using the Metal Adaptor Plate.

I will design more cards with the remaining snowmen I created, and post them soon.

You can shop for products by clicking on the links below.


Thursday, November 16, 2017

Noel


Today I used the new A Way With Words Flourished Frame die and A Way With Words Noel die sets along with  Susan's Garden Notes Poinsettia and Whitepine Bough & Pine Cone die sets.  

This is a 6 inch square card.  For the background, I used a piece of the White Christmas design cardstock.  

Both the Flourished Frame and Sentiment were die cut with Silver Glittered card stock.

The flower was created using Susan's Garden Notes Poinsettia die set.  PanPastel was used to shade the flower and leaves, then the pieces were shaped using Susan's Flower Tool Kit. I used a mixture of lime green and pale yellow Prills for the center of the flower.

The Garden Notes Whitepine Bough & Pine Cone die set was used to die cut the boughs and pieces for the pine cones.  The pine boughs were die cut using white card stock with Clear Double Sided Adhesive on top.  Sea Foam Silk Microfine Glitter was added.  The Pine Cones were assembled, then the tips of the petals were highlighted using a gold glitter pen.  You can watch Susan's YouTube Whitepine Bough & Pine cone Video at this LINK to learn how to assemble the pine cones.

Attach the Flourished Frame and Sentiment to the lower portion of the card.  Attach the flower arrangement in the upper left corner.  

To finish the card, a silver cord bow and a few clear rhinestones were added.

You can shop the the Elizabeth Craft Designs Products by clicking the links below.


Tuesday, November 14, 2017

Susan's Garden Challenge

Good Morning.  Today the Susan's Garden Design Team was challenged to create  a card using at least three of the new Garden Notes die sets.  I chose to use the Black-Eyed Susan, Wooden Fruit Crate, and Maidenhair Fern die sets. 

To see all the creative cards created by the design team, be sure to visit the Elizabeth Craft Designs Blog at this LINK.

As with all design team challenges, Elizabeth Craft Designs will be give you a chance to win a gift. 

For the Challenge today, Elizabeth Craft Designs is giving away a $20 Gift Card to use on the Elizabeth Craft Designs website to 3 winners. 


To enter, simply leave a comment on the Elizabeth Craft Designs blog post and answer   What products from Susan's new release are at the top of your wish list?" 
      
Elizabeth Craft Designs will select 3 lucky winners in a random drawing.

The winners will be announced on Friday, November 17, on the Elizabeth Craft Designs blog.

Good Luck!
*******************

Here are instructions on how to create my card:

1.  This is a 6 inch square card.  For the background, a piece of design paper from the Sweet Vintage Rose pad was selected and attached to the front of the card.

2.  Use the Garden Notes Black Eyed Susan die set and die cut enough pieces to create four flowers.  Use White Soft Finish cardstock to die cut the pieces and color with PanPastels.  Shape the flowers using the 4 piece Flower Tool Set.  Use Kids Choice glue to attach the die cut pieces together.

3.  Use the Garden Notes Wooden Fruit Crate die set to die cut the crate out of White cardstock. Use PanPastels, or ink, to color the crate. Use a opaque white pen to trace the design in the crate.

4.  Use the Garden Notes Maidenhair Fern die set to die cut three ferns out of green cardstock.  Sponge on a dark in or PanPastel to shade the leaves.  Shape the leaves using the Flower Tool Kit.

5.  Use the Lovebirds die set to die cut the birds on the branches, using white card stock.  Color by either sponging on color or use markers.  I  sponged on color.  

6.  Use the Sentiments 1 Celebration Clear Stamp set for the the sentiment.  Die cut using the matching die.  Sponge yellow around the edge of the sentiment.

7.  Attach the crate to the bottom of the card and attach the flowers and fern as shown.  Cut the Lovebirds die cut piece apart and arrange as shown.

8.  Attach the sentiment with dimensional tape.

9.  To complete the card, add the gold peel off sticker corners to all four corners.

This is a dimensional card.  Below I have provided links to the Clear Boxes you can use to mail dimensional cards.

You can shop for the Elizabeth Craft Designs products from the links provided  below.


LinkWithin

Related Posts with Thumbnails