

Do you like to walk through the rose garden and smell the sweet scent of all the flowers? I have designed a card today, for my Susan's Garden Design Team blog post, using all three roses die sets in the Susan's Garden Club collection. Here is how the card was created.
Start with a 6-inch square card. Add a piece of design paper, of choice, to the front which has been cut to 5 1/2 inches square. Outline the design paper with Black Peel Off Line Stickers.
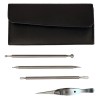
Use Susan's Garden Rose 1 die set to create one large yellow rose. Shape the petals with Susan's Flower Tool Kit and assemble.
Use Susan's Garden Notes Rose 2 die set and die cut enough petals to create three medium roses. Shape with the Flower Tool Kit and assemble.
Use Susan' Garden Notes Rose 3 die set to die cut two enough petals for two small roses. The number of petals you die cut for the roses will depend on how full you want your flower to be.
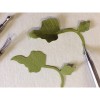
To create three rosebuds, die cut three of the largest double rose petals using the dies in the Garden Notes Rose 3 die set. Shape the double petals to cup up and glue them together, forming a bud.
Use all leaf dies from the three Rose die sets to die cut a variety of rose leaves. (Tip: You can use green card stock for the leaves, but it is also fun to color a piece of white card stock with different shades of green inks. For the leaves on this card, Peeled Paint Distress Oxide Ink was sponged all over the card stock, sprayed with light mist of water, then dried well with a heat tool. Once dry, Peeled Paint Distress Ink was sponged over the Oxide Ink, lightly misted, to mix the color, then dried with a heat tool. The final step was to sponge on Forest Moss Distress Ink, mist with water, and dry again. The finished look will be a very realistic shaded color, perfect for leaves. Once the card stock is completely dry, place all the rose leaves dies on the sheet, and die cut as many leaves as you want for your card.)
Use Susan's Brighten The Lives of Others stamp set to stamp the sentiment, using VersaFine Black Ink, onto white card stock. Die cut the sentiment using the Dotted Scallop Oval die set.
Arrange and attach the roses, with the largest rose in the lower left corner, one each of the Rose 2 flowers on each side, then add the smaller roses. Glue the rose leaves under the flowers. Add the three small rose buds at the top of the arrangement adding some of the smallest green leaves over the buds.
Attach the stamped sentiment as shown on the card. Attach a ribbon on the lower left corner, under the largest rose.
Start with a 6-inch square card. Add a piece of design paper, of choice, to the front which has been cut to 5 1/2 inches square. Outline the design paper with Black Peel Off Line Stickers.
Use Susan's Garden Rose 1 die set to create one large yellow rose. Shape the petals with Susan's Flower Tool Kit and assemble.
Use Susan's Garden Notes Rose 2 die set and die cut enough petals to create three medium roses. Shape with the Flower Tool Kit and assemble.
Use Susan' Garden Notes Rose 3 die set to die cut two enough petals for two small roses. The number of petals you die cut for the roses will depend on how full you want your flower to be.
To create three rosebuds, die cut three of the largest double rose petals using the dies in the Garden Notes Rose 3 die set. Shape the double petals to cup up and glue them together, forming a bud.
Use all leaf dies from the three Rose die sets to die cut a variety of rose leaves. (Tip: You can use green card stock for the leaves, but it is also fun to color a piece of white card stock with different shades of green inks. For the leaves on this card, Peeled Paint Distress Oxide Ink was sponged all over the card stock, sprayed with light mist of water, then dried well with a heat tool. Once dry, Peeled Paint Distress Ink was sponged over the Oxide Ink, lightly misted, to mix the color, then dried with a heat tool. The final step was to sponge on Forest Moss Distress Ink, mist with water, and dry again. The finished look will be a very realistic shaded color, perfect for leaves. Once the card stock is completely dry, place all the rose leaves dies on the sheet, and die cut as many leaves as you want for your card.)
Use Susan's Brighten The Lives of Others stamp set to stamp the sentiment, using VersaFine Black Ink, onto white card stock. Die cut the sentiment using the Dotted Scallop Oval die set.
Arrange and attach the roses, with the largest rose in the lower left corner, one each of the Rose 2 flowers on each side, then add the smaller roses. Glue the rose leaves under the flowers. Add the three small rose buds at the top of the arrangement adding some of the smallest green leaves over the buds.
Attach the stamped sentiment as shown on the card. Attach a ribbon on the lower left corner, under the largest rose.
Susan's Rose dies help you create beautiful, realistic roses. This card would be very pretty to give for Mother's Day.
For Instruction on how to assemble Susan's Roses, you can watch these YouTube Videos:


6 comments:
Selma, your card is simply beautiful. I have made a couple attempts at the rose and have not had any that look like yours, I'm in awe!
Hugs, Sandy
Such beautiful roses!
oh oh my how I love those roses
so so real looking excellent card
Selma- You do roses better than anyone! Super!
Oh my, these flowers and leaves are gorgeous. I love your flowers!!!
My name is Mrs Aisha Usman, am a Citizen Of Singapore. Have you been looking for a loan? Do you need an urgent personal loan or business loan?contact Dr. Mark Thomas FOIRM Ronnie Finance Ltd he help me with a loan of $85,000 some days ago after been scammed of $8,000 from a woman claiming to been a loan lender but i thank God today that i got my loan worth $85,000.Feel free to contact the company for a genuine financial service. Email: markthomasfinanceltd@gmail.com
Whats-App no +919667837169
Dr. Mark Thomas
LOAN APPLICATION DETAILS
Name:…………
Address…………
Loan Amount:……
Loan duration…
Monthly income…………
Nationality……
Country………
Occupation......
State…………
Zip/Code………
Gender…………
Age…………
Marital Status……………
Telephone………………
FORM Ronnie Finance Ltd
Dr. Mark Thomas
Post a Comment