Friday, July 22, 2022

Triangle Easel Card


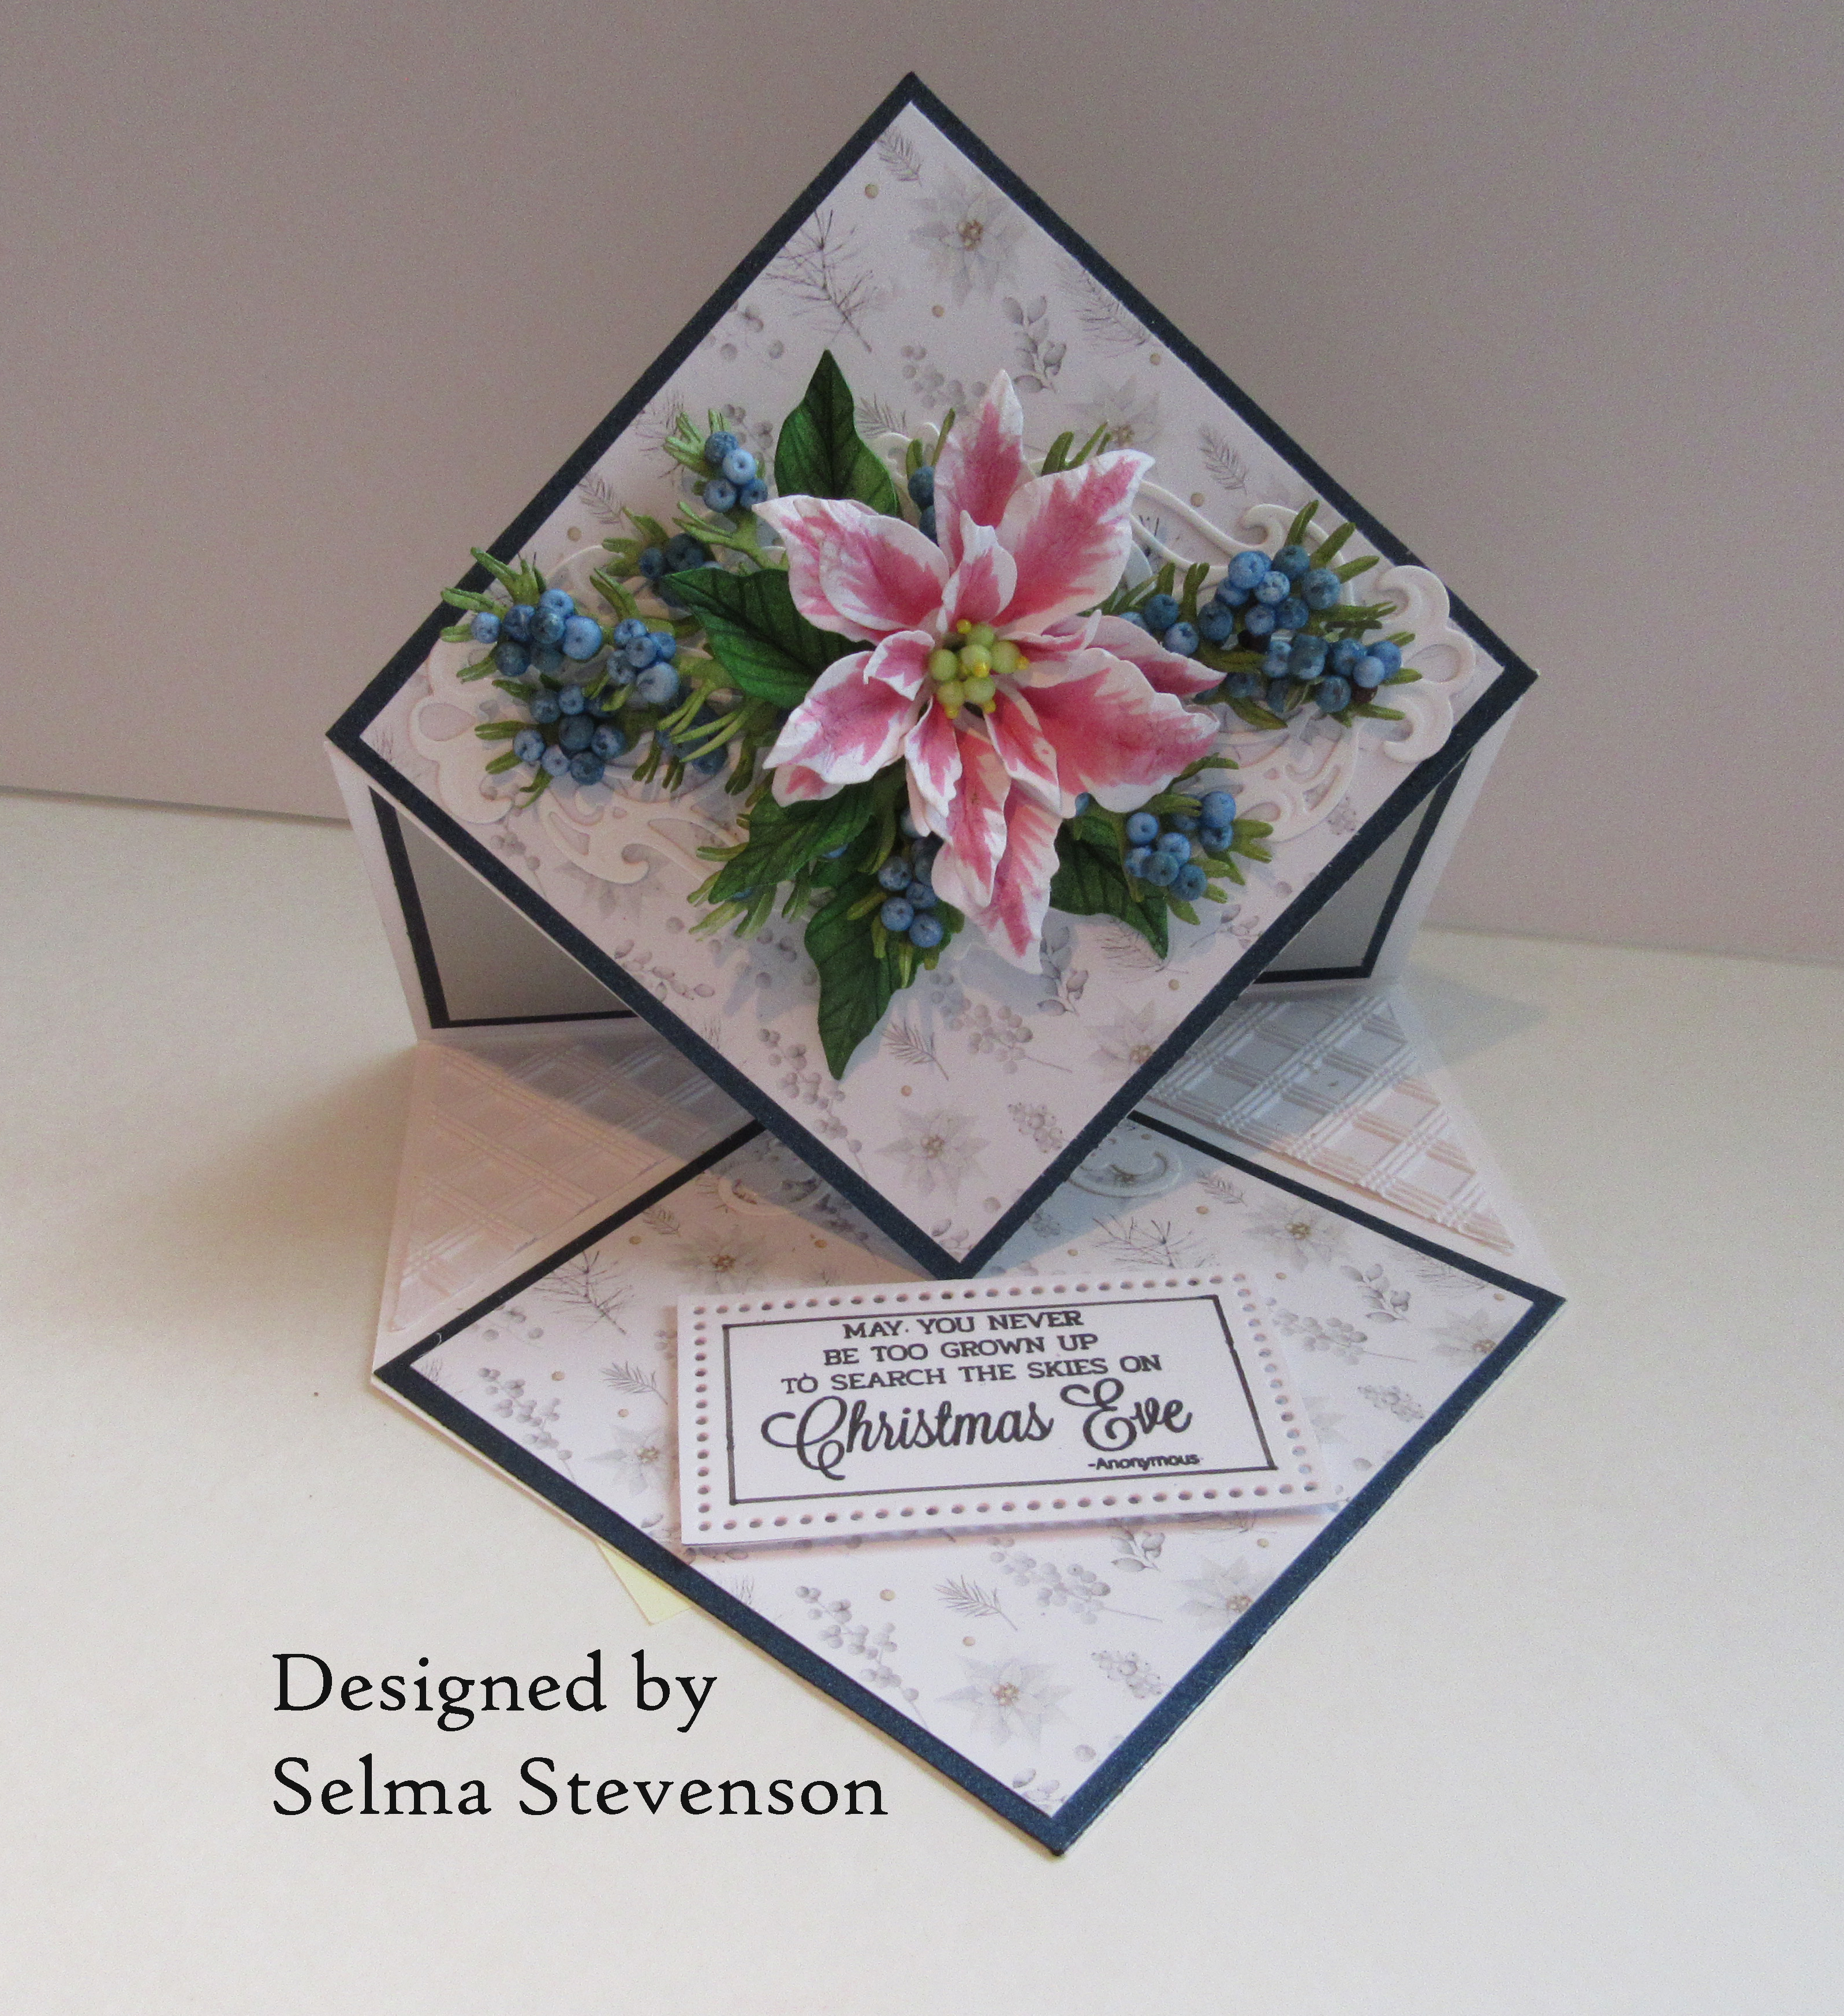
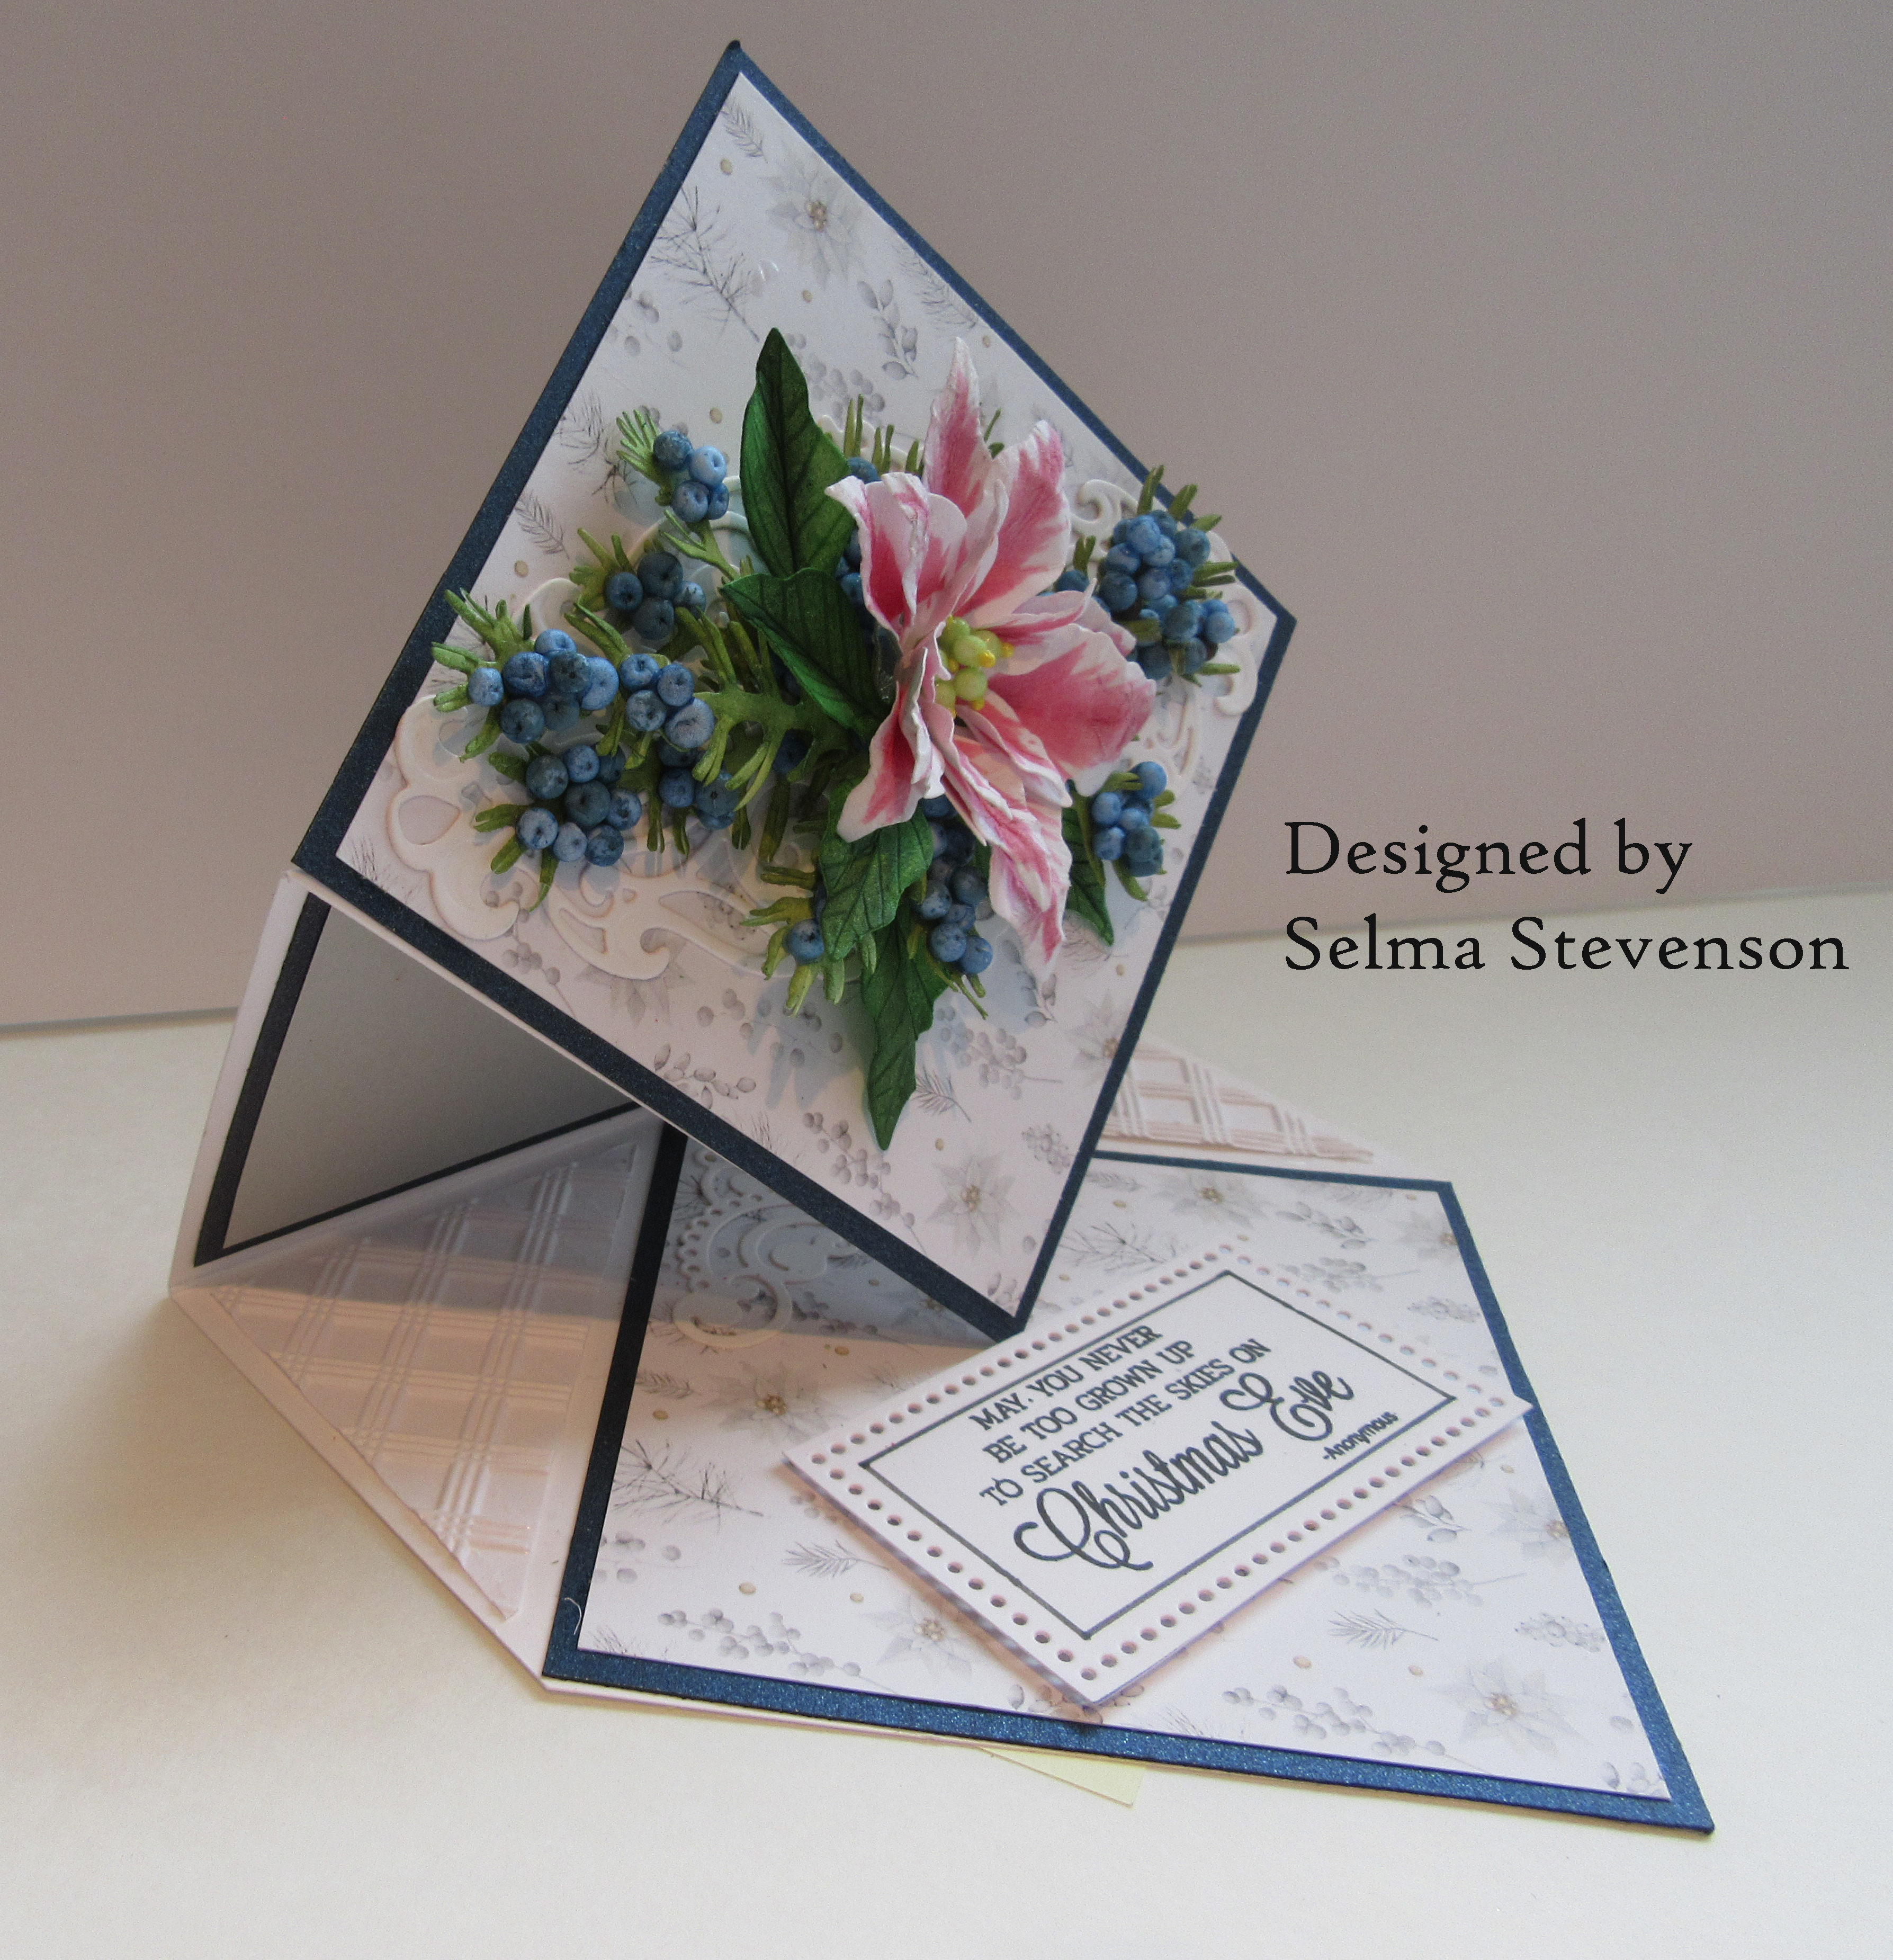
Good Morning.  Today I have a Triangle Easel Card.  There are many tutorials on YouTube on how to create this type card.  This card is a 6x6 inch card base.


To decorate the front panel, I used Susan's Poinsettia die set to create one pink/white poinsettia.  It was die cut using Susan's Specialty Cardstock.  A bright pink marker was used to add the pink coloring, leaving the edges white.  Susan's Flower Tool Kit was used to shape the poinsettia and Bearly Art Glue used to assemble it.  Tiny Styrofoam balls were used for the bracts with a yellow Prill glued on top.  The leaves were die cut using white cardstock, the Leaf Tool from the Flower Tool Kit used to draw in the veins, then placed on the Waffle Flower Media Mat and green ink brushed on using blending brushes.

The Winter Evergreen Foliage die set was used to die cut the  Juniper branches.  The Winter Berry & Mistletoe die set was used to die cut the berry branches.  It was brushed with green ink then tiny Styrofoam blue balls were glued to the branch.  It was added over the Juniper branches.  A fine tip black pen was used to press down on the end of each berry.


The background design paper is from the Paper Heaven - White As Snow - paper pad.  A square die set was used to die cut the squares for the triangles on the front and inside of the card.

The Rectangles were die cut using the Spellbinders Matting Rectangles die set.  

The Altenew Basic Plaid 3-D Embossing Folder was used for the embossed rectangles.  Two squares were cut out of  white card stock, then cut into triangles.  These triangles were placed in the 3-D embossing folder.  You don't ruin any of the embossing if you put the finished size of triangles into the embossing folder.  Sometimes it is hard to cut the embossed design.  

There is a pretty die cut behind the poinsettia arrangement on the front of the card.  It was die cut using the Spellbinders Flourished Fluerit die set.

The sentiment on the inside of the card was stamped using one of the stamps from Susan's Winter Garden Stamp Set  It was die cut using Spellbinders Nestabilities Hemstitch Rectangle Etched Die set.

Thank you for visiting my blog.



Saturday, July 16, 2022

Ice Skates with Mittens


Good Morning.  Today I have another Christmas card designed using Susan's new Ice Skates die set.  

For the background, I used a piece of Kraft card stock cut 6x6 inches to cover the front of the card.  I used the Scor-Pal to score a 1/8th inch border around the edge for a finishing touch.   I used the Spellbinders Fluted Classic Ovals die set to die cut an opening in the upper right corner.  The fluted die was placed down ( which only add the flutted design)  with the thin oval die (which cuts the opening),  on the inside so the opening was inside the embossed fluted edge.  I have the P-13 Cozy Winter design paper pad and cut out the mitten design from one of the  pages and glued it behind the oval opening.  

Using Susan's Ice Skate die set, two skates were die cut.  the heels and soles were colored with a brown marker.  Distress Tea Dye Ink was very lightly brushed (I used a blending brush) around the bottom edges of the white boots and around the toes.  I wanted the ice skates to match the mittens pictured in the oval.    A silver marker was used to color the hooks at the top of the boots.  Brown twine was used for the skate laces.  For the blades, the bottom of the skate die was placed over silver mirror card stock and die cut.  They were trimmed to fit under the skate and glued on.  The ice skates were attached using dimensional tape.  

The Poinsettia die set was used to create a white poinsettia.  A light yellow green PanPastel was used at the base of the petals.  Nuvo drops were used for the bracts of the poinsettia.  I tiny bit of yellow pollen was added over the bracts.  The poinsettia was die cut using Susan's Specialty Cardstock.  It was shaped using Susan's Flower Tool Kit and assembled using Bearly Art Glue.

Susan's Pinecone die set was used to create two pinecones.  Susan has a YouTube video to show how to create the pinecones and poinsettia.  

For a filler in the ice skates, I used Susan's new Winter Evergreen Foliage die set and die cut the Whitepine.  Everything was arranged in the boots then snow added to the whitepine branches.  


Do you have an idea for filling these ice skates for one of your cards?
Below I have added links for products needed to complete this card. 


Thursday, July 14, 2022

Poinsettia with Whitepine


Good Morning.  It is so nice to be creating all my Christmas cards early using Susan's new Winter Garden die sets along with her Holiday release from last year.  These two releases work great together to create beautiful cards.

For this card, I used a piece of Anna Griffith design paper that was sent to me by a sweet friend,  Catherine Baity.  Thank you Catherine.  This is gorgeous design paper that is perfect to add a poinsettia created with Susan's Poinsettia die set.  The poinsettia was die cut using Susan's Specialty cardstock, shaped with her Flower Tool Kit and assembled using Bearly Art Glue.  

One of the new die sets I feel is a must to have, is the Winter Evergreen Foliage.  This die set can be used on just about any Christmas card.  There are three foliage dies  in this set - Whitepine, Cedar, and Juniper.  For this card, I used the Whitepine.  To make it very realistic, each needle was cut in half using the scissors from the Flower Tool Kit.  All the die cut pieces were die cut using white card stock and colored by placing on the Waffle Flower Media Mat and brushing on ink using blending brushes.  This is a quick and easy way to color the cardstock and easy to blend colors for shading.  

Also used was the Winterberry & Mistletoe die set to die cut the Winterberry.  This set also has a die to die cut the piece for berries.  The Winterberry leaves are waxy looking so Crystal Glaze was brushed on them.  The berries are small styrofoam balls colored red, and glued to the berry branch.


The gold die cuts were die cut using a Spellbinders die set that is no longer available.  You can use two ovals of your choice.  The were each attached using dimensional tape.  Small gold rhinestones were added to the smallest gold die cut.

One of the sentiments from Susan's new Winter Garden stamp set was stamped using black ink, die cut using a rectangle die and the corners clipped.  It was attached to a piece of gold metallic cardstock with dimensional tape and the corners clipped.


An optional thing you can do is to add Twinklets Diamond Dust for a frosty appearance.

Susan's newest release is now available from Scrapbook.com.  I have products linked below.

Thanks so much for visiting my blog.


Tuesday, July 12, 2022

Book Flip Card


Good Morning.  Today I designed a Book Flip Card.  For instructions for creating this card, visit Susan's Garden Club FaceBook Video.  Susan not only shows how to create flowers from all her releases, but also give instructions for many different type cards you can create to show off your arrangements.

For the front of the card, I added a backing of white card stock glued to a piece of gold metallic card stock.   I created Gardenias using Susan's Gardenia die set.  I use Susan's Specialty Cardstock for creating all my flowers.  The flowers were shaped using her Flower Tool Kit and Bearly Art Glue.  Susan has videos on YouTube for detailed instructions on how to shape flowers and foliage using her dies.  

Using the new Star Jasmine die set, flowers were die cut, shaped and arranged around the Gardenias

Below the flowers, I used the Winter Evergreen Foliage die set and die cut the White Pine branches.  The Winterberry and Mistletoe die set was used to die cut the Mistletoe.  White berries were added.  I used small bean bag styrofoam balls for the berries and pressed a black pen on the end of each berry.

For final embellishment, I added glue to to the greenery and sprinkled on Twinklets Diamond Dust.


For the inside, I cut four squares from a Paper Heaven Golden Dreams 6x6 pad and glued to each corner.  For the squares and narrow embossed pieces, I first cut the white card stock then placed them inside the Altenew Basic Plaid 3-D Embossing Folder.  The narrow embossed pieced were framed with metallic gold cardstock.  On the square in the center, I used Susan's new Winter Garden Stamp Set and stamped Merry Christmas.  This piece was glued to a piece of gold Metallic cardstock.  On the other center square, I used a design I found in the Paper Heaven White As Snow 6x6 pad.  It was fussy cut and glued to the square.

There are gold metallic embellishments on the card.  These were pieces pushed out of a Spellbinders die that I saved from a delicate die, however I don't remember which one.  Sometimes you find interesting little die cuts that were meant to be discarded, but think they will be good for something later.  I thought these little pieces helped to dress up this card.  

The back panel was also finished by adding a piece of gold metallic cardstock with a piece of white cardstock on top so I can write a personal message


This was a very fun card to create.  Hope you will watch Susan's Garden Club FaceBook Video and create one too.

Thanks for visiting my blog.


Saturday, July 9, 2022

Poinsettia Rocker Card


Today I have a fun card!  This is a Rocker Card.  On June 8th, Susan did a tutorial on how to create a rocker card on her Susan's Garden Club FaceBook Video.  

I do not have large circle dies so I had to use scissors to cut out the largest circle.  You can trace around a plate for a template.  I used a piece of design paper from the Paper Heaven Pad - White As Snow for the design paper.  It was die cut using a scalloped die from my stash.   I used my largest circle die to die cut one circle.  It was smaller than I wanted, so I used the Honey Bee Circle Thin Frames die set to die cut the black circle frames.  This is a very fun die set to use.  It die cut many different thin frames by using just one die.  I have it linked below.  The small scalloped circle was die cut using white card stock then a size down circle used to die cut the design paper.  Black smaller frames were used from the Circle Thin Frame die set.  

At the top, I used a small scallop die set to die cut one of the gold embossed sentiments from Susan's Winter Garden Stamp Set.  Gold rhinestone were glued around the sentiment.  It was glued to the back of the center circle.

Susan's Poinsettia die set, from her Holiday release last year, was used to create a poinsettia.  I used Susan's Specialty Card Stock and brushed on red ink.  I used the Waffle Flower Media Mat and Blending Brushes to color the card stock.  Susan's Flower Tool Kit was used to shape the poinsettia and leaves.  

Behind the poinsettia I added White Pine Branches that were die cut from the Winter Evergreen Foliage Die Set.  The Winterberry and Mistletoe die set was used to die cut the Winterberry.  For the berries, I colored small bean bag styrofoam balls and glued them to the Winterberry.  

Small gold rhinestones were used for embellishments on the two small die cut circles.  Twinklets Diamond Dust was used for the snow on the branches.

The back of this rocker card was finished off nicely with room for a personal message.

Friday, July 8, 2022

Letterbox


Susan's new Winter  Garden Collection will be available very soon from Scrapbook.com and Scrapbookpal.com.  I have the links to these products below.  You can click on the links now and be notified as soon as the products are available for purchase.    If you purchase products by going through links from my blog, I will receive a small commission, and you will not be charged extra for helping me out. 
 
For the background I used the Spellbinders Diamonetta Background Glimmer Plate.  I had to foil it twice to get the extra length for this slimline card.  I used the Spellbinders Glimmer Hot Foil System and Gold Foil.    The glimmered background was die cut using the Spellbinders Fluted Classic Slimline die set.  It was matted on black cardstock.

The Letterbox die set was used to die cut the post for the Letterbox.  I used the Tim Holtz Lumber 3-D Texture embossing folder to obtain the woodgrain.  It was die cut using dark brown cardstock.  To paint it, I rubbed a white pigment ink pad over the raised embossing, then used a dark brown ink pad and rubbed across some of the white to give it shading.  It looks very real.  

For the letterbox, I used black mirror card stock.  For the flag, I used red mirror card stock, and for the handle, I used silver mat cardstock.  Tiny clear diamond rhinestones were added for embellishments on the letterbox lid and flag.

For the greenery around the Letterbox, I used the Winter Evergreen Foliage die set and die cut the white pine branch.  It was cut apart and small pieces glued around the top of the Letterbox.  The Winterberry branch was die cut, colored green then glazed to achieve waxy looking leaves.  The red berries are small styrofoam balls that were colored red.   

At the bottom of the Letterbox post, the Winter Evergreen Foliage die set was used to die cut a Cedar branch.  It was cut apart and glued around the post.  

Thank you for visiting my blog.  I hope I have given you another card for inspiration to create for your holiday cards.  


Wednesday, July 6, 2022

Masculine Skates


What is winter without Ice Skates!   This card designed using Susan's new Ice Skates die set in her Winter Garden release from Spellbinders.  This die set is perfect for creating cards for anyone on your Christmas/Holiday list.  Today, I have used the Skates to create a masculine card.

The background is a piece of design paper from the Mistletoe Lodge pad by The Paper Studio.  A piece of Spellbinders Cranberry Bliss card stock was die cut using Spellbinders Essential Rectangles die set.  The two largest dies were used to die cut the design.

The Ice Skate die set was used to die cut them out of Kraft Cardstock.  I used brown twine for the laces and cut tiny pieces of silver metallic foil for the tips of the shoelaces.  I used a small punch to create the silver lace hooks at the top of the skates.  Gold metallic cardstock was used to die cut the blades of the skates and they were glued on.  The skates were attached with dimensional tape.

The Winter Evergreen Foliage & Ladybug die set was used to die cut the White Pine branches. There are four branches added in this arrangement.   The Winterberry & Mistletoe die set was used with red berries added to the Winterberry branch.  I used small styrofoam balls for the berries.  They were colored with red acrylic paint and a small tip pen used to create the black dot on the end of each berry.  The Winterberry branch was brushed with green ink on the Waffle Flower Media Mat and clear glaze added to the leaves to give them a waxy appearance.

The Winter Bough & Evergreen Shrubs die set was used to die cut the gold metallic branch.

Susan's Winter Garden stamp set was used for the sentiment.  It was stamped with VersaFine Black Ink.  

Spellbinders gold embellishments were added to the upper corners. 


If you are interested in products used, I have supplied links below.  I have added links to both Spellbinders and Scrapbook.com.  

Thanks for visiting my blog.


Tuesday, July 5, 2022

Helleborus and Foiled Tree


Something new from Susan - for this release she has added the Flourished Tree Glimmer Hot Foil Plate in her Winter Garden release from Spellbinders.

This is a 6x6 inch cad.  I used a dot embossing folder for the embossed white background.  A silver glittery card stock used for the frames. 

For the beautiful foiled tree, I first used the Spellbinders new rectangle solid foil plate and Spellbinders Glimmer Hot Foil System.  The glimmer foil used for the rectangle,  is the Crimson Stars.  Once that was foiled I used a piece of Prism glimmer hot foil and Susan's Flourished Tree glimmer plate to add over the red foiled rectangle.  


The new Helleborus die set was used to create the three white flowers.  They were die cut using Susan's Specialty Card Stock.  A red fine tip marker was used to add the speckled design on each petal.  The petals were shaped using Susan's Flower Tool Kit and assembled using Bearly Art Glue. A tiny bit of yellow pollen was added to the tips of stamens.   The leaves were die cut using white card stock and brushed with green ink on the Waffle Flower Media Mat.  I used a Blending Brush to apply ink.

The Winter Evergreen Foliage Die Set was used to die cut the Juniper Branches and blue juniper berries added.  I colored small bean bag Styrofoam balls blue, with acrylic paint, to create the berries.

The new Winter Garden release will be available soon in the US.  I have them linked below.

Saturday, July 2, 2022

White Letterbox


Christmas card time!    Susan Tierney-Cockburn has a new release, Winter Garden, from  Spellbinders so we can start working on our Christmas/Holiday cards.  This release includes: Winter Evergreen Foliage -(White Pine, Cedar and Juniper); Star Jasmine, Helleborus, Ice Skates, Letterbox, and Holiday Stamps, plus a beautiful Flourished Tree glimmer hot plate.

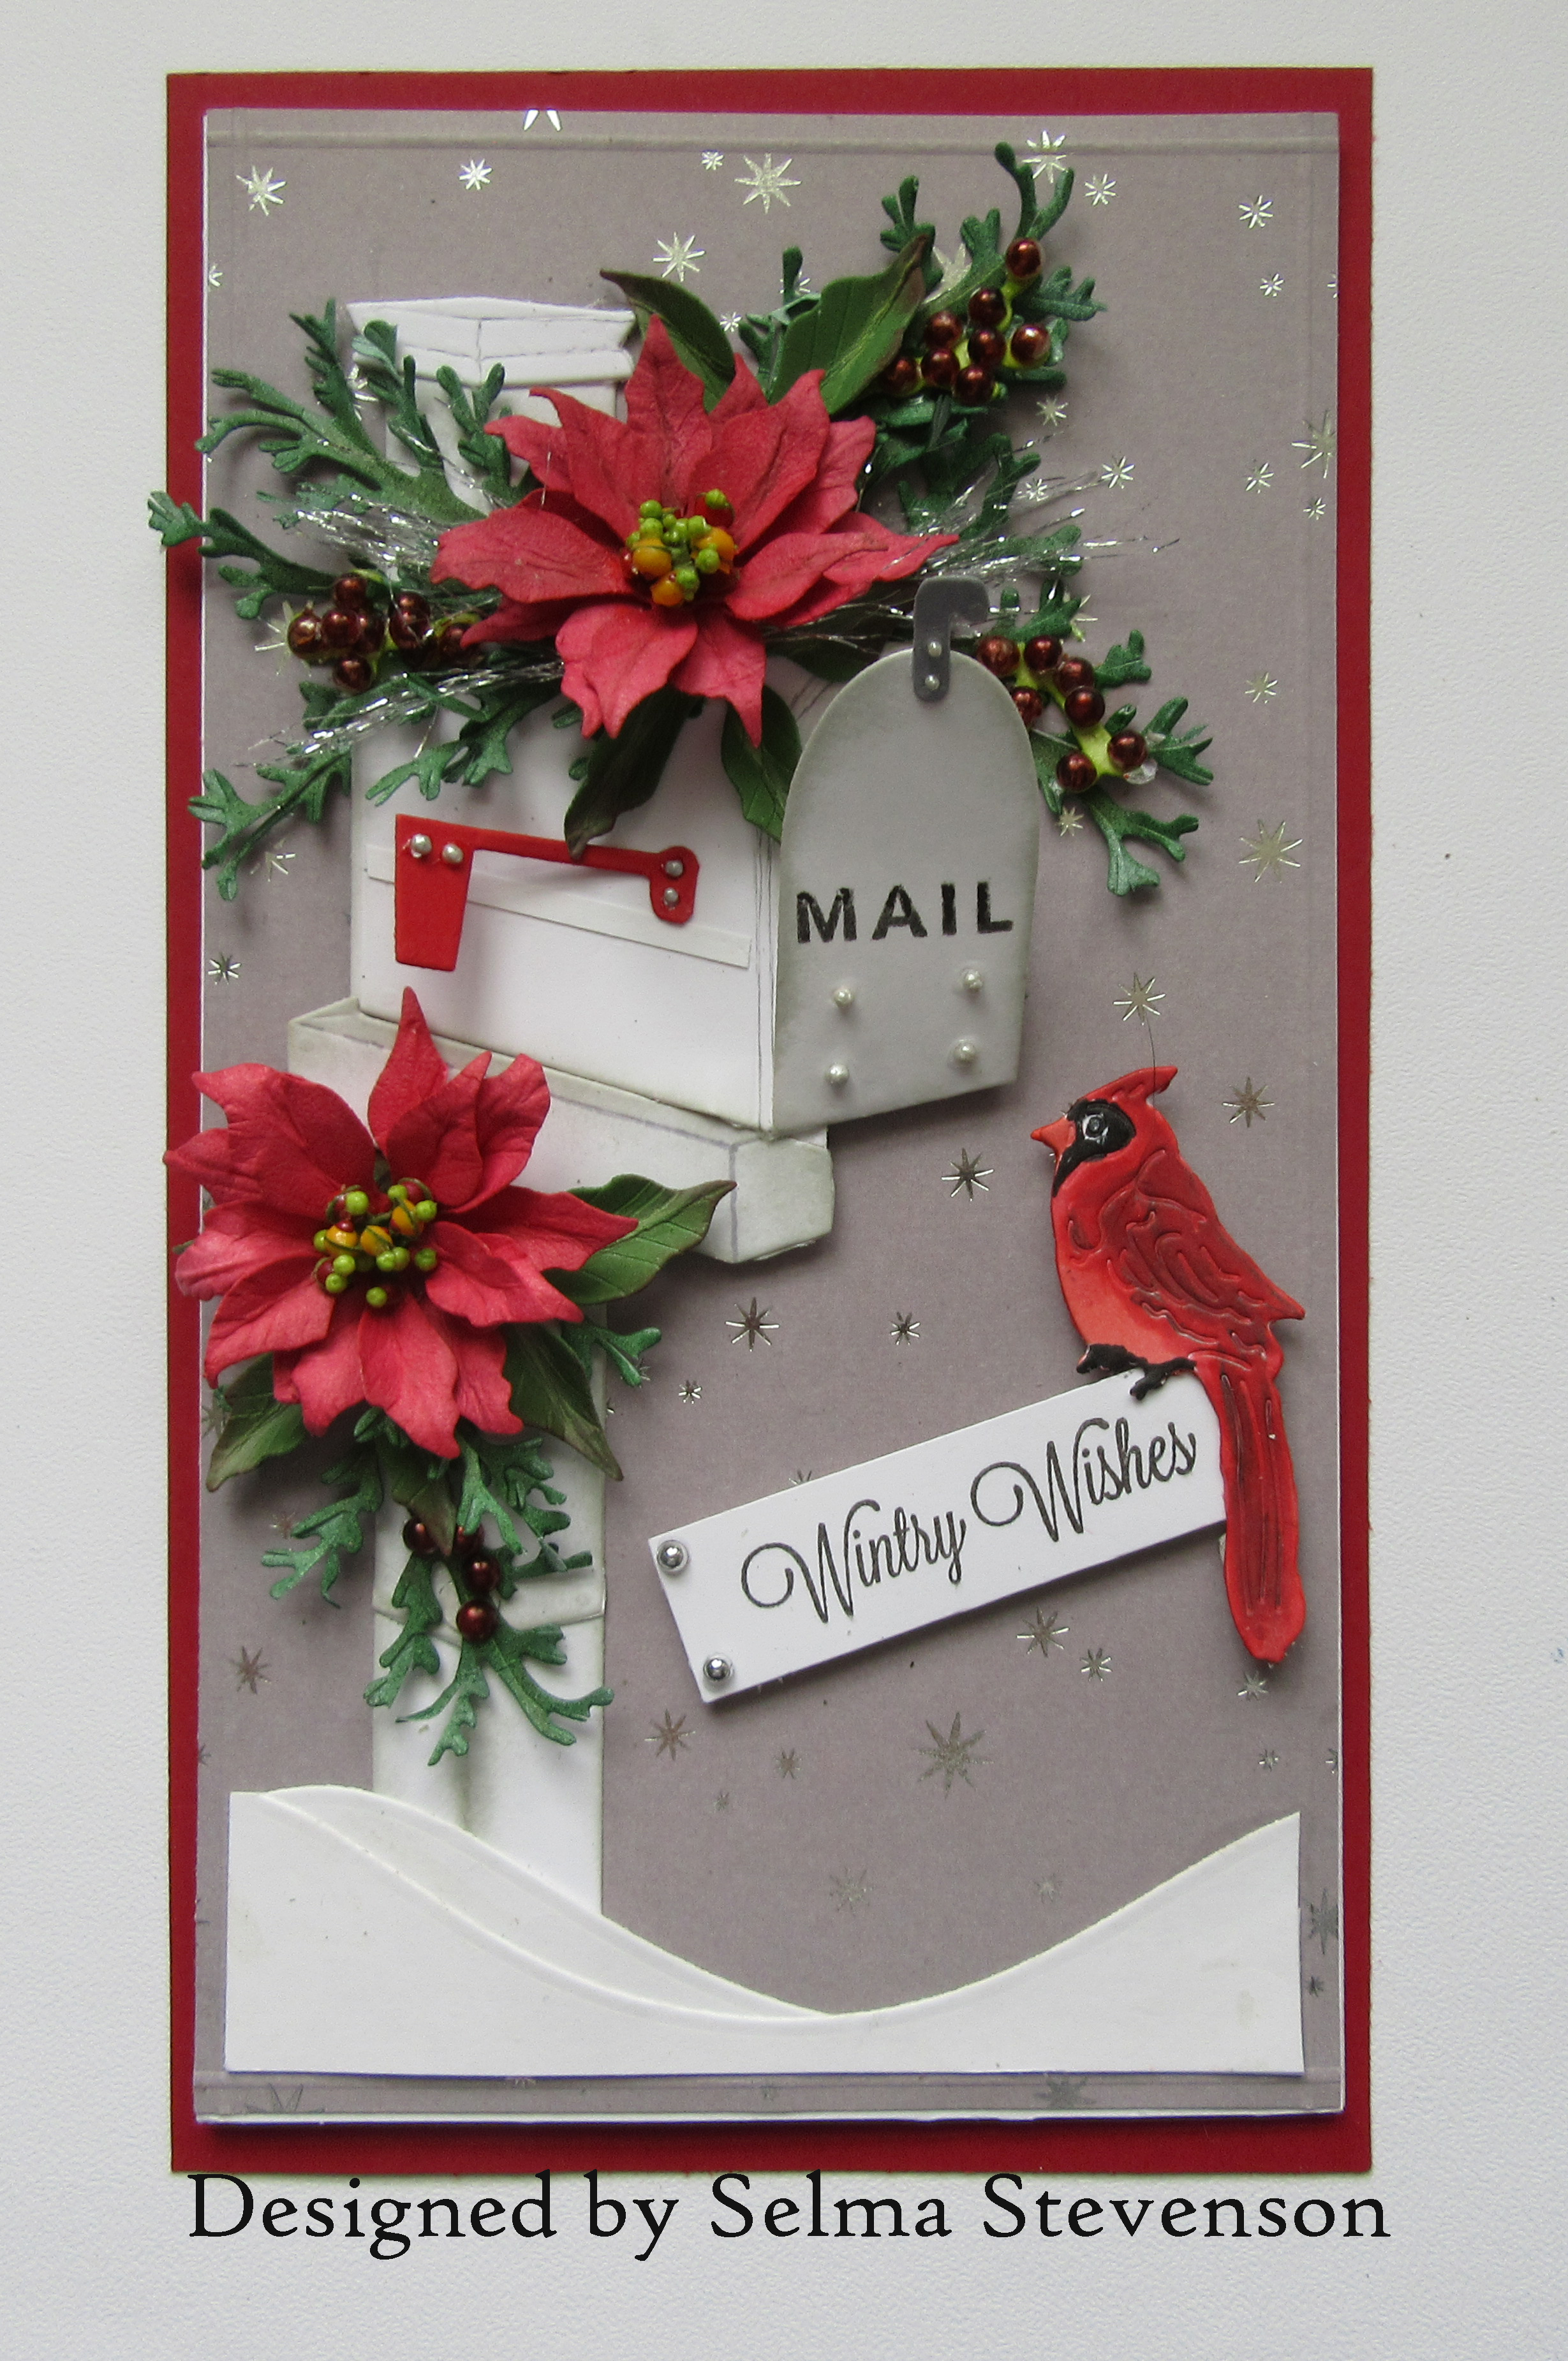
This is a 4 1/4 x 7 inch slimline card.  A piece of gray design paper with silver snowflakes, from the Recollections Shimmer Noel Paper, was used for the background.

The Letterbox die set was used to die cut the letterbox out of 120 lb cardstock. I wanted a longer post, so I die cut the post twice and glued the second one at the bottom to add the height I wanted.   The edges and seams were re-scored and sponged lightly with light gray ink.  A pencil was used to lightly draw over the scored details in the post and letterbox.  I used a stamp (from my stash)  and VersaFine black ink to stamp "MAIL".  The flag was die cut using red cardstock and the handle (on the lid) was die cut using silver cardstock.  Little silver Prills were added on the flag, handle, and bottom of the lid.  At the bottom of the pole, two pieces of white cardstock were cut to resemble snow.  

To decorate the top of the letterbox, I used the Cedar die, from the Winter Evergreen Foliage & Ladybugs die set,  for the evergreens.  The berry branch, from the Foliage & Ladybug die set,  was used and pearls colored with a red Copic marker used for the berries.

The Poinsettia die set, from the Holiday Flora Collection, was used to die cut the smallest petals to create the small poinsettias.  Susan's Specialty Cardstock was used and the Flower Tool Kit used to shape the petals.  Bearly Art Glue was used to assemble them.   Nuvo drops and Prills were used for the center  of the poinsettia.  I used the Waffle Flower Media Mat and Blending Brushs to color the poinsettias, leaves and Cedar branches.  

 Silver sparkly thread was cut in short pieces and placed under the poinsettia on top of the Letterbox. 

Susan's Winter Garden Stamp set was used for the sentiment.  It was added with dimensional tape.  On the side I added two silver embellishments from Spellbinders.   The Woodland Wreath & Feathered Friends die set was used for the Cardinal.    

Below I have linked Susan's new release from both Scrapbookpal.com, and from Spellbinders, along with other products you may be interested in for completing your cards.

I appreciate you visiting my blog.


Monday, June 27, 2022

Skates with Pink Helleborus


Good Morning Friends.  Today Susan's new Winter Garden release from Spellbinders is available from Craft & Craft TV in the UK.  Susan's design team will be posting samples today of this beautiful new release.

Today I have a card designed using the Skate, Helleborus, and White Pine dies.  

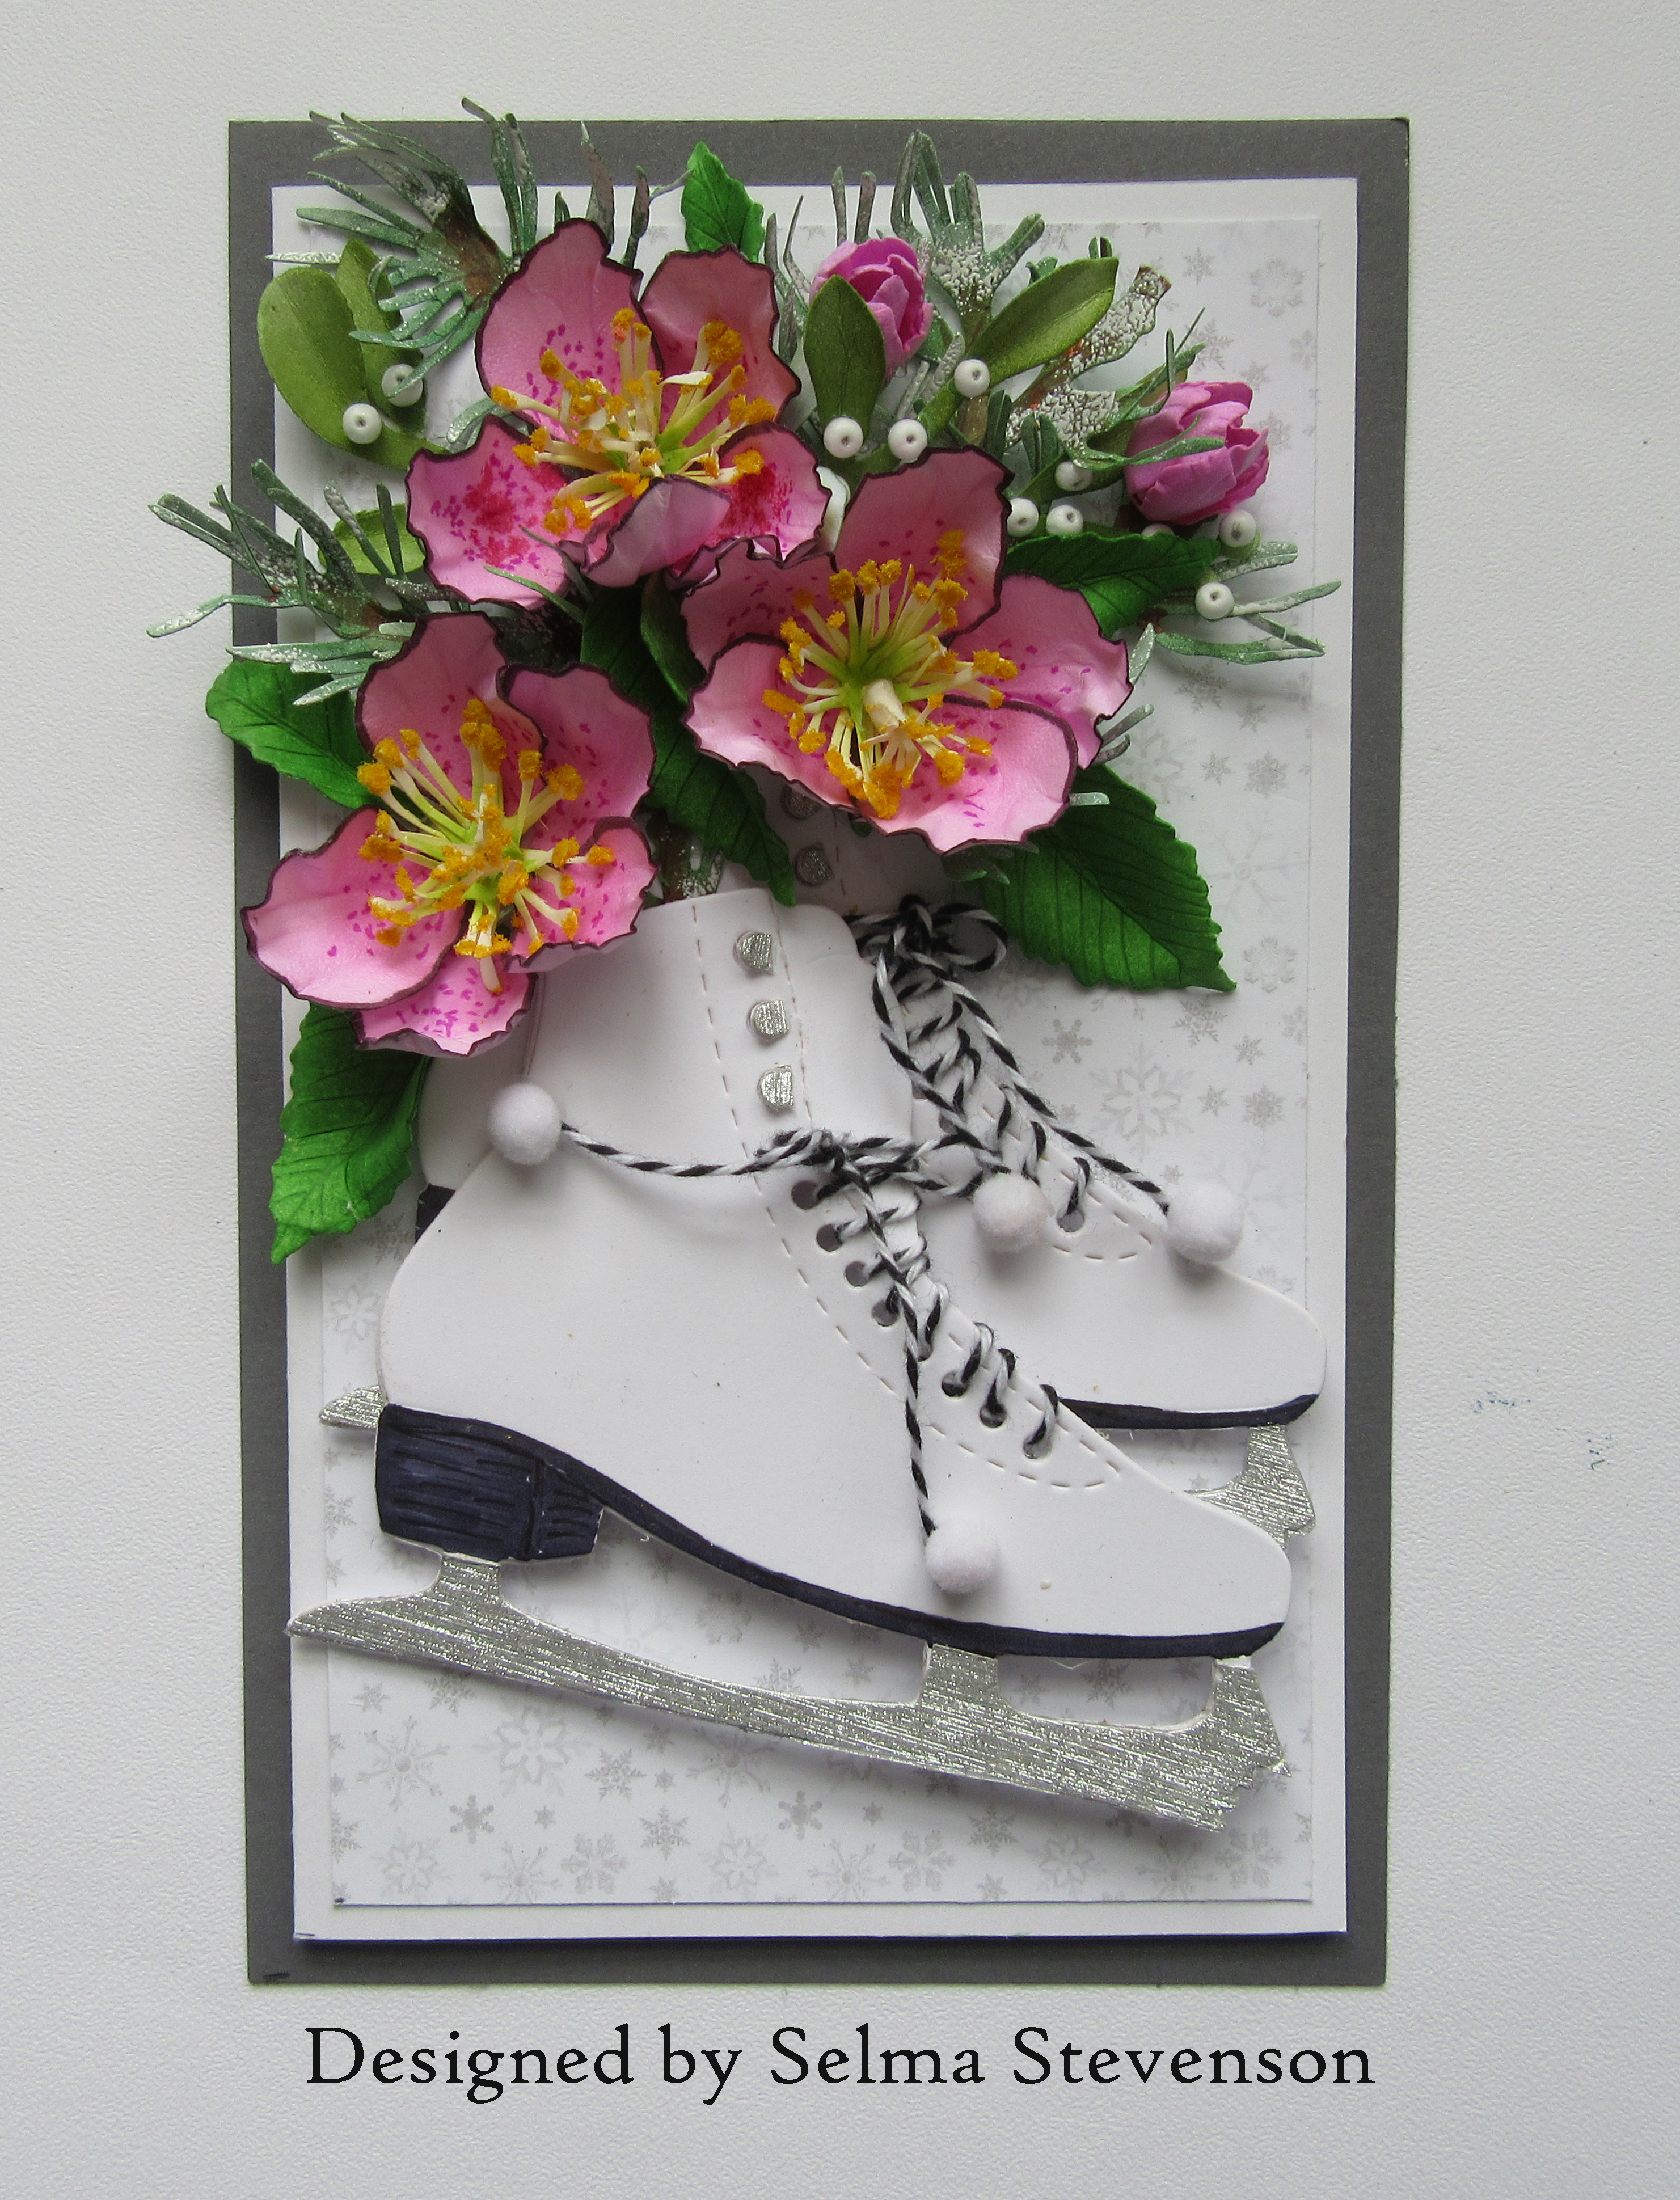
This is a mini slimline card.  I used a piece of design paper from the Paper Heaven White As Snow 6x6 paper pad, which a sweet friend sent to me.  Thank you Catherine.  

The Skates die set was used to die cut two skates.  I used a heavy weight white card stock.  The soles of the skates were colored with a black Copic marker then a fine line black pen used to draw detail lines in the heals.  Black and white twine was used to create the laces.  I have a variety of pretty twines linked below that can be used for laces.  On the ends of the laces, I glued on a small white pom pom.  For the blades of the skates, I used a piece of brushed silver cardstock and die cut only the blades out of this cardstock.  The top edges were trimmed and the silver blades glued over the white blades of the skate die cut.  Using the same silver cardstock, I used a 1/8 circle punch and punched out three circles and glued them to the top of the boot lacing, pulling them out for dimension.  

To fill the skates, I used the Helleborus die set and die cut pieces for three flowers and two buds.  These pieces were die cut using Susan's Specialty Cardstock.  The flower petals were put on the Waffle Flower Media Mat and pink ink brushed on both the top and bottom, using blending brushes.  Using Waffle Flower Shading Brushes, bright pink ink was brushed on at the base of the petals.  Using a fine tip dark pink marker, small dots were added to the base of each petal.  A dark purple marker was used to add ink to the outside edges of the petals. The stamens were die cut using a soft yellow card stock.  Lime green ink was brushed at the base of the stamens, then each stamen cut in half, for fullness.  The tips of the stamens were dipped in glue and a tiny bit of yellow Pollen added.    Susan's Flower Tool Kit was used to shape the flowers and leaves.  Two buds were created with one of the die cut flower petals.  

The new Winter Evergreen Foliage die set was used to die cut the White Pine branches.  Eucalyptus branches from Susan's Holiday Flora release were die cut and white berries added.  The berries are small white bean bag styrofoam balls.  A black pen was used to add dot on end of each berry.  

You can view products I use from the links provided below.  
  

Sunday, June 19, 2022

Pink Floribunda Rose


Good Morning.  As you know, I love creating roses with Susan's die sets.  Today I have a pretty floribunda rose on an embossed folder.

This i a 6x6 inch card.  For the background, I used the Altenew Gentle Butterfly 3-D embossing folder to emboss a light green metallic piece of card stock.  Once it was embossed, I used a craft sanding block to rub off some of the metallic, leaving the design white.  Using a Scor-Pal, an 1/8th inch line was scored around the edges of this metallic piece.

Using Susan's Floribunda Rose die set, one rose was die cut using Susan's Specialty Cardstock.  The petals and leaves were colored by using the Waffle Flower Media Mat and Blending Brushes to brush on two shades of pink ink.  They were shaped using Susan's Flower Tool Kit, then assembled using Bearly Art Glue.

The Foliage & Ladybug die set was used to die cut the leafy branches.  Small white Styrofoam balls were used for the berries.  They were glued on the leafy branches using Bearly Art Glue.  Once dry, a black fine tip pen was used to push down on the top of each berry.  

One of the stamps from Susan's Through The Garden Gate Stamp Set was used for the sentiment.  It was die cut using the Spellbinders A2-Mattic Basics A die set. It was attached using dimensional foam tabs. 

Using the 3-D embossing folder on metallic cardstock, and sanding off some of the raised portion, was a fun technique and a beautiful background for the pretty rose.


Saturday, May 28, 2022

Bee Blossom and Rose


Good Morning Paper Gardeners.  Today I have a card created using Susan's Bee Blossom and Floribunda Rose die sets from Spellbinders.

This is a 5x7 inch card.  The die cut doily is the Spellbinders Bella Ovalette die set which was the die of the month March 2022.  A piece of pearl embossed cardstock was die cut with a rectangle die and glued to the center.

Susan's Bee Blossom die set was used to create the pretty pink flowers.  They were die cut using Susan's Specialty Cardstock and brushed with pink ink on the Waffle Flower Media Mat.  A brighter pink ink was brushed on at the base of the petals.  The flowers and leaves were shaped using Susan's Flower Tool Kit and assembled using Bearly Art Glue.

The Floribunda Rose die set was used to create the white rose.  It was also die cut using Susan's Specialty Cardstock and shaped using the Loop Tool in the Flower Tool Kit.  I love how realistic the flowers are when using Susan's die sets.  

The sentiment is from Susan's Through The Garden Gate Stamp Set.  It was stamped using VersaFine Black Ink and clear embossed.  I fussy cut around it and glued to the die cut rectangle.  


Tuesday, May 3, 2022

Yellow Floribunda Rose


Today I have another card created using Susan's new Floribunda Rose die set.  

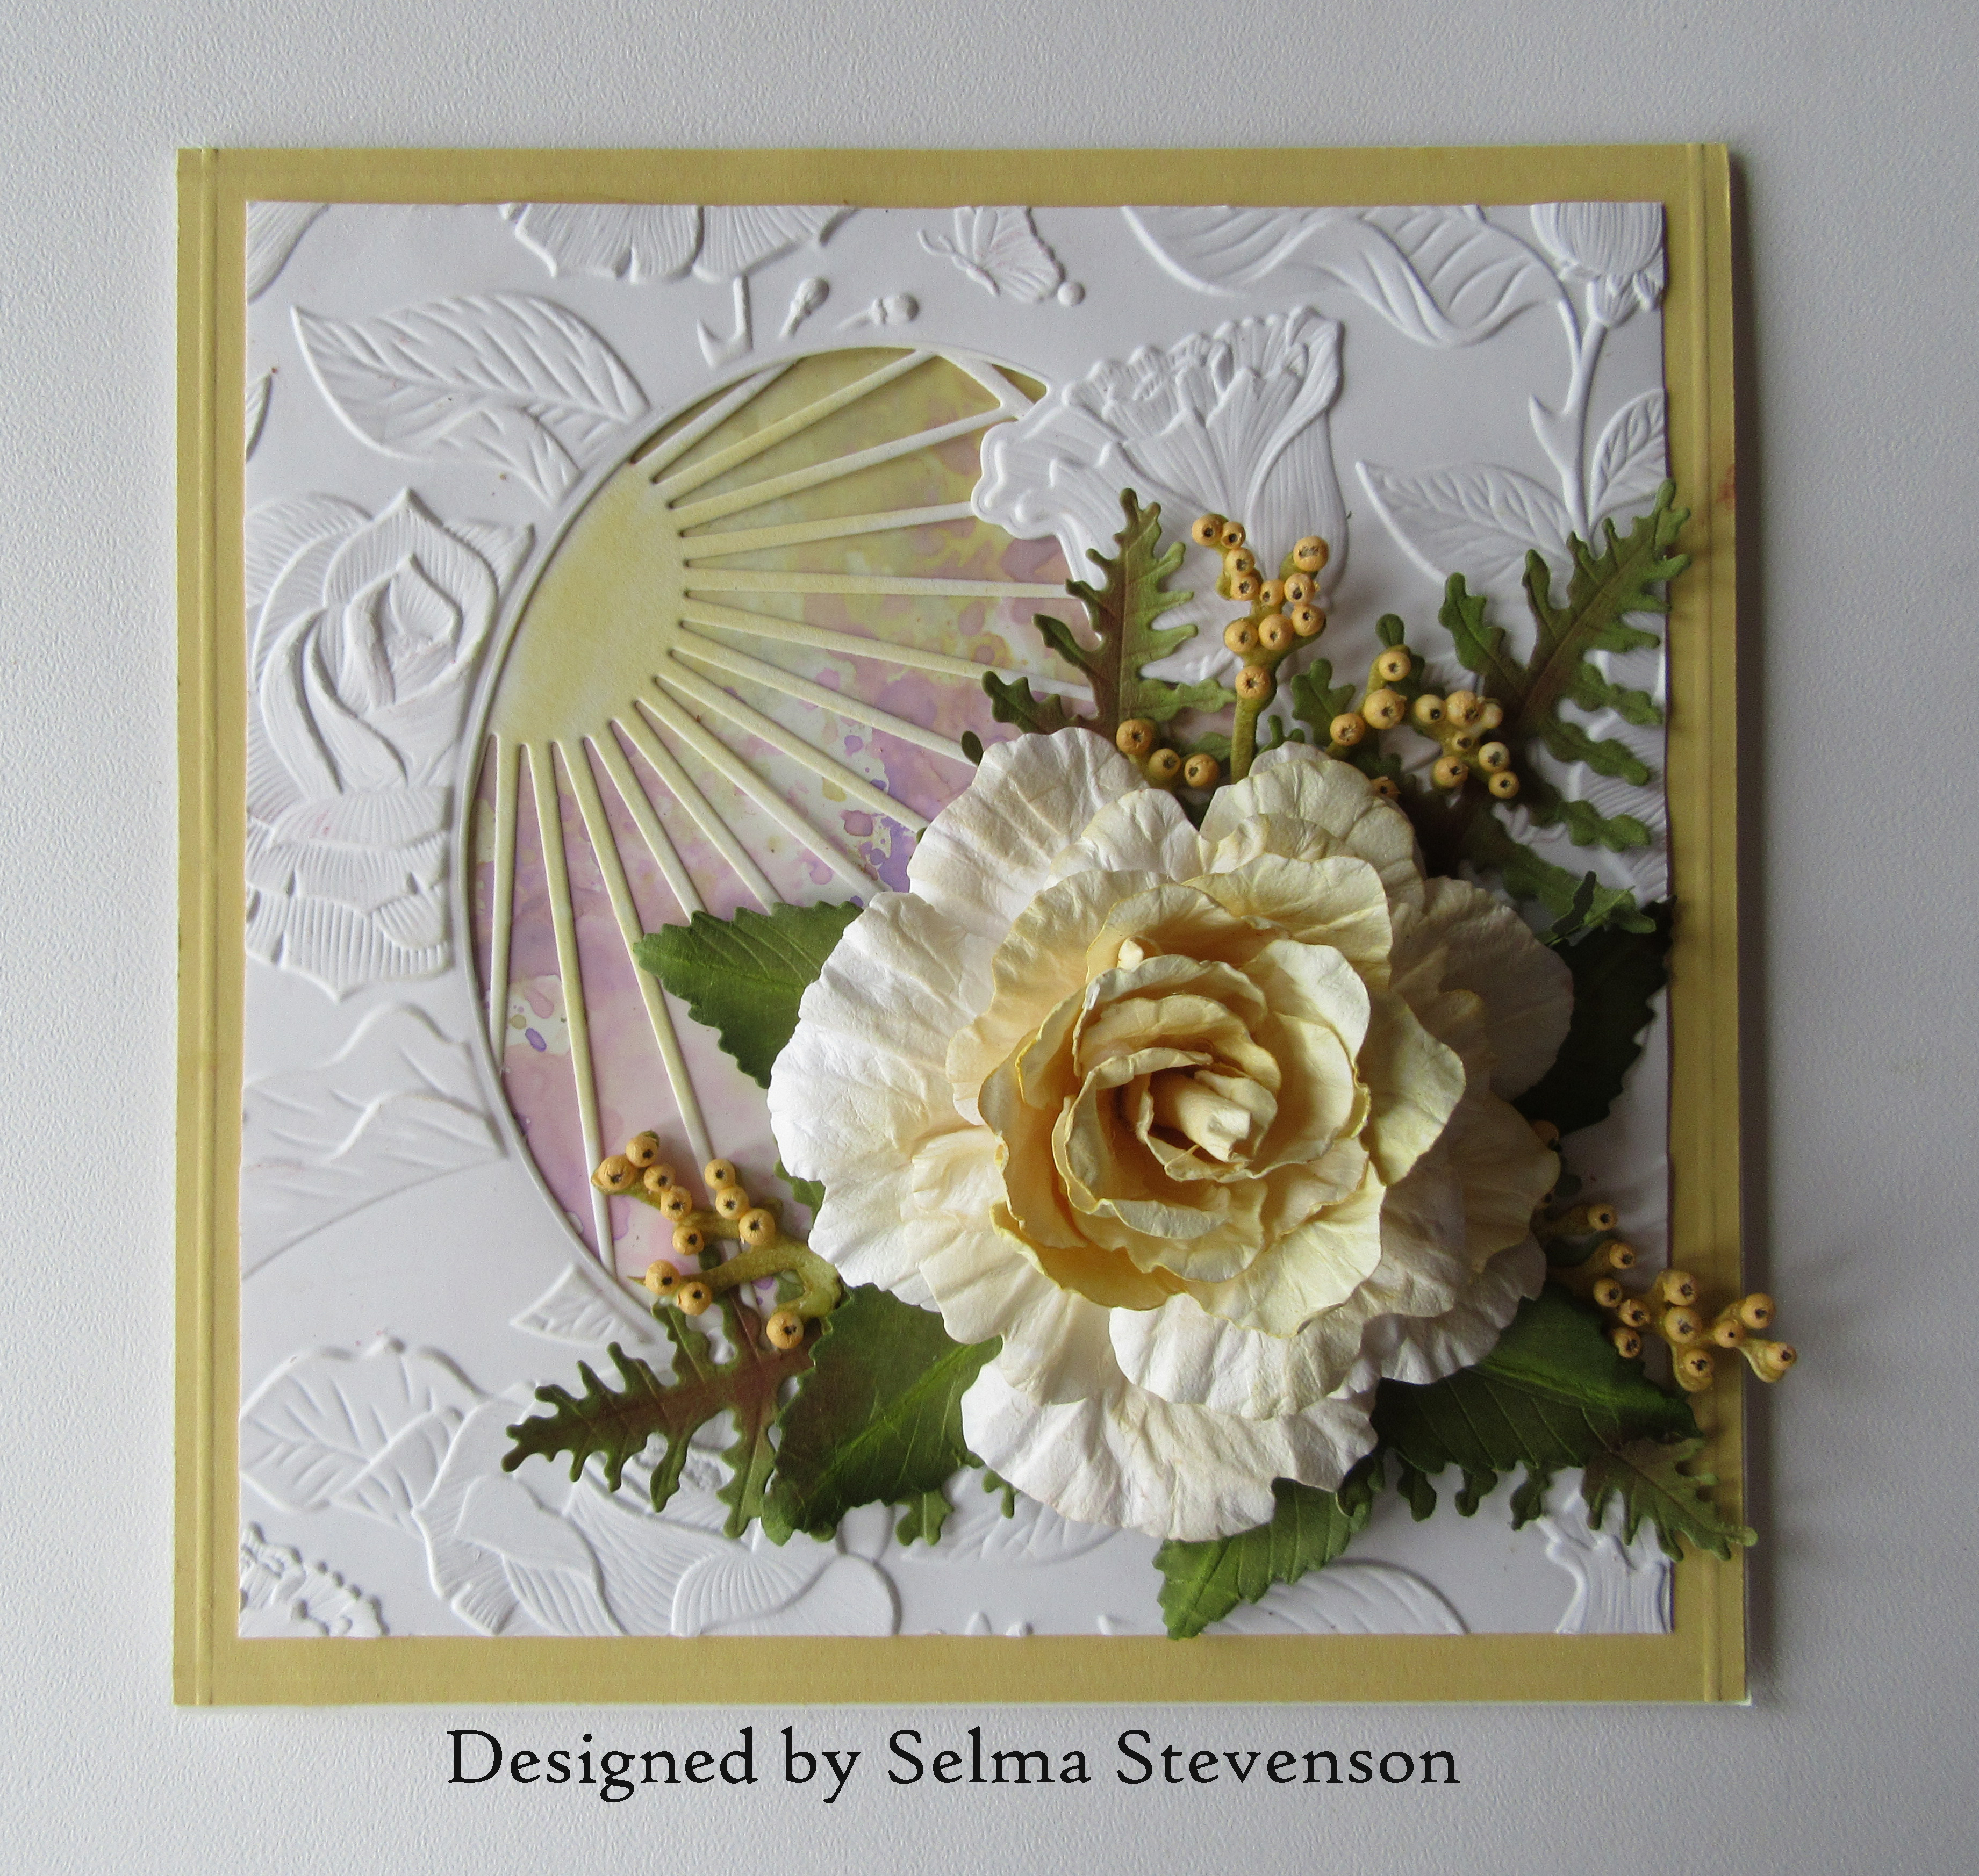
This is a 6x6 inch card.  For the background I used Lisa Horton's Shower of Roses 3-D embossing folder.  This embossing folder has a die cut opening.  I used Mica Powders to create a marbled background on a piece of glossy card stock.  On top of that I used the Spellbinders Radiant Oval.  These pieces were glued behind the die cut opening in the embossed piece.  The completed background was glued to a piece of yellow cardstock.

The Floribunda Rose die set was used to die cut the flower using Susan's Specialty Cardstock.  Different shades of yellow ink was brushed on the rose petals.    It was shaped using the Flower Tool Kit and assembled using Bearly Art Glue.

The Fern & Ivy die set was used to die cut the ferns.  The Winterberry & Mistletoe die set was used for the berry branch.  I used small bean bag styrofoam balls for the berries.  They were colored with light yellow acrylic paint.  A black fine tip pen was used for the black dot on the end of each berry.

If you need help in knowing how to assemble the Floribunda Rose, you will find Susan's instruction on the Spellbinders YouTube Video.


Monday, May 2, 2022

Orange Floribunda Rose


Good Morning.  Today I have a slimline card.  I used Susan's Floribunda Rose, Forget Me Not, and Coreopsis die sets.

For the background, I used the Spellbinders Flute Classics Slimline Etched die set.  Two different sizes were die cut and layered.

The Floribunda Rose die set, from Through The Garden Gate release,  was used for the orange rose.  It was die cut using Susan's White Specialty Card Stock and brushed with orange ink on the Waffle Flower Media Mat. the petals were shaped using the Flower Tool Kit and assembled using Bearly Art Glue.

The Coreopsis die set, from the Autumn Flora Release, was used to create the blue Bachelor Button Flowers.

The new Forget Me Not die set was used to create the small blue flowers.  A small black Prill was glued to the center of each flower.

One of the stamps from Susan's Through The Garden Gate stamp set was used for the sentiment.

LinkWithin

Related Posts with Thumbnails