Selma's Stamping Corner and Floral Designs

Welcome to my Creative Corner. I love to spend my spare time designing cards and especially enjoy creating beautiful flowers using Susan's Garden Club die sets. I love sharing my work and tutorials with you and really appreciate you taking time to visit my blog. Hope I can inspire you to create something beautiful.

Friday, September 30, 2016

Noel


Combining a beautiful scripted sentiment with a beautiful poinsettia always creates a beautiful Christmas card.  

Today I have used Suzanne Cannon's A Way With Words - Noel die cut for the sentiment.  It was die cut using green Green Shimmer Sheetz.  To frame it, Els van de Burgt Studio Stitched Rectangle and Dotted Scallop Rectangle die sets were used.  The Dotted Scallop Rectangle was die cut using Green Shimmer Sheetz.

This is a 6x6" card.  Using the largest Dotted Scallop Square die, a white frame was die cut.  A Tim Holtz Alterations die was used to die cut the fancy corner, on the left of this piece. Red Shimmer Sheetz was attached behind the die cut.  The largest Stitched Square was die cut to go behind the Dotted Scallop Square.  They were attached together with dimensional tape.

At Christmas time I always love to create Susan's Garden Notes Poinsettias.  This is the large poinsettia.  The center of the flower was created using a combination of Viva Paper Pen dots and Prills.  Behind the flower are boughs die cut using Susan's Garden Notes Whitepine Boughs & Pinecone die set.   A few red berries from my stash were also added.  A few snowflakes were die cut using dies from Karen Burniston's Sleigh Gift Card Holder PopUp die set.

The following products can be purchased from Elizabeth Craft Designs:

A Way With Words - Noel
Shimmer Sheets
Garden Notes Poinsettia
Garden Notes Whitepine Boughs & Pinecones
Prills
Soft Finish Cardstock
Dotted Scallop Squares
Stitched Squares
Stitched Rectangles
Dotted Scallop Rectangles
Sleigh Gift Card Holder PopUP


Posted by Selma at 7:11 AM 6 comments
Labels: A Way With Words, Christmas, Elizabeth Craft Designs, Els van de Burgt Studio, Garden Notes, Susan's Garden

Wednesday, September 28, 2016

Gift Card Sleigh Pop Up


Sometimes you know someone who prefers to receive a Gift Card at Christmas time but you would also like to give them something else special.  You can do that when you create this cute Christmas card using Karen Burniston's Sleigh Gift Card Holder Pop Up die set.  Karen gives very clear instructions on her YouTube Sleigh Gift Card Holder Pop Up Video at this LINK.  I'm sure you will love creating this card for your gift cards.

You could leave the Pop Up Sleigh as a simple card, or you can add any embellishments you would like.  I have used Karen's Rudy the Reindeer die set, Outdoor Edges (at bottom of the card), Merry Christmas Pop Up and Iron Fence Pop Up die sets.  It is easy to use the die cut pieces from Pop Up Sets for other things other than just creating pop up cards.  The sentiment was stamped using two stamps from Karen's Merry & Bright Clear Stamp Set.   The Christmas tree was die cut using Els van de Burgt Studio 5-Part Pine die set and decorated with Peel Off Stickers.  Glitter Peel Off Stickers were also added along the bottom of the card across design paper..   


This is a side view so you can see how the Sleigh pops up.  The die cut also includes tabs to hold a gift card to hold it secure.


For the front of the card, I added a piece of design paper from a Christmas pad I have had in my stash.   I used the A Way With Words Merry Christmas die for the sentiment.  It was die cut with Clear Double Sided Adhesive on top of the card stock and Cool Diamond Silk MicroSoft Glitter added.


On the bottom of the card I added one of Els van de Burgt Studio Holiday Garlands 1 die cuts.  This is a string of Christmas lights so I wanted to add glitter to the lights.  A piece of Clear Double Sided Adhesive was used on top of White Soft Finish Cardstock and the Holiday Garland was die cut.  

There are two Elizabeth Craft Tools that are a MUST HAVE for all my card creations; they are the Fine Pointed Scissors and the Fine Pointed Tweezers.  I really don't know how I ever got along without them.  

To glitter the Christmas lights red, I used the Fine Pointed Tweezers to lift the the covering up off the light bulbs and snipped that piece off, leaving just the adhesive over the light bulbs exposed.  I did that for all the bulbs on one side.  I then sprinkled the Ruby Silk Microfine Glitter over the adhesive, then rubbed it in well.   


The same process was done on the other side, having glitter on all the light bulbs. Make sure to rub the glitter with your fingers to bring out the shine. Next I used the Fine Pointed Tweezers to pull the center covering off the string of lights and added Regal Green Silk Microfine Glitter.  The String of Lights was added to the bottom of the card.

The following products can be purchased from Elizabeth Craft Designs:

Pop Up Sleigh Gift Card Holder
Rudy the Reindeer
Outdoor Edges
Merry Christmas Pop Up
Iron Fence Pop Up
Merry & Bright Clear Stamp Set
5-Part Pine
Holiday Garlands 1
Peel Off Stickers
Silk Microfine Glitter
Clear Double Sided Adhesive
Soft Finish Cardstock
Fine Pointed Tweezers
Fine Pointed Scissors


Posted by Selma at 9:45 AM 4 comments
Labels: Christmas, Elizabeth Craft Designs, Els van de Burgt Studio, Karen Burniston, Pop Up Cards

Tuesday, September 27, 2016

Witches Brew


Pop Up Cards are always so fun.  Today I created a Halloween card using Karen Burniston's Flower Pot Pop Stand die set.


Flower Pot Pop Stand

This Pop Up Flower Pot is so easy to assemble.  You can watch Karen's YouTube Flower Pot Pop Stand Video at this LINK for easy assembly.  If you follow Karen Burniston on FaceBook, you will see a lot of inspiration for using this die set.


Props 9

For my card, I started with a 6x6 inch card.  I covered the inside with design paper.  After creating the box, following Karen's instructions, and attaching it to the inside of my card, I used several of her new die sets to create the Halloween Scene.  

I decided to go "wild" and created a witch falling down into a pot of boiling "something".  I used the dies in the Props 9 die set.  Once the hat was die cut and assembled, I attached it to a strip of clear acetate to attach it to the inside of the box.  Since I wanted it to look like the witch fell in the pot, I attached the shoes to two strips of design paper and glued the "legs" to the shoes.  They were attached on the right side in the Pop Up box.  The broom was put together and attached at the back of the box behind the Witch Hat.   All these pieces were die cut twice and glued together to make them sturdier.


 Now, I had to figure out what to use to make it look like "steam" was coming out around the witch.  I decided to use fluffy white feathers. I'm sorry that the picture does not look as good as the card.  Feathers were attached down in the box and is full of "steam", which does not show well in the pictures. 


Halloween Scene

I used the Graveyard die for the bottom of the card,  I used the Halloween Scene die set, using gray card stock.  A white opaque pen was used to decorate the grave stones.  Four trees from this set were die cut and glittered with Black Silk Microfine Glitter.  (The trees were die cut using Clear Double Sided Adhesive.)  The trees were tucked down behind the grave stones.  Two bats were also die cut, using this die set.  A "moon" was die cut using Els Van de Burgt Studio Fitted Circles.  It has Gold Silk Microfine Glitter added.


Iron Fence Pop-Up

For the Fence, I used Karen's Iron Fence Pop Up die set.


Three fences had to be die cut to fit across the bottom of the card; the bottom of the fence was trimmed off.  Two Crows were die cut and added to the fence.


This is the front of the card.  

Labels & Circles

Karen's Labels and Circles die set was used for the frame on the front of the card.  

 Halloween Clear Stamp

The sentiments used on the card were stamped using Black VersaFine Ink, and stamps from Karen's Halloween Clear Stamp Set.

This card will fold flat and fit into a 6x6 inch envelope.

The following products can be purchased from Elizabeth Craft Designs: 

Flower Pot Pop Stand
Props 9
Halloween Scene
Fitted Circles
Labels & Circles
Halloween  Stamps
Silk Microfine Glitter
Clear Double Sided Adhesive
Soft Finish Card Stock

Posted by Selma at 11:11 AM 7 comments
Labels: Elizabeth Craft Designs, Els van de Burgt Studio, Halloween, Karen Burniston, Pop Up Cards

Saturday, September 24, 2016

Peace


Good Morning.   Today I have a card that has a variety of dies from the new releases at Elizabeth Craft Designs.

The beautiful sentiment is one of Suzanne Cannon's A Way With Words die cuts. To back the gold die cut sentiment, I used one of the Els van de Burgt Studio Stitched Ovals dies, and die cut a piece of white card stock with Clear Double Sided Adhesive on top.  The adhesive covering was pulled off and Cool Diamond Silk Microsoft Glitter added.  The Peace sentiment was attached in the center of the oval, then Red Glitter Peel Off Sticker Dots added around the outside edge.

For the background, the largest Els van de Burgt Studio Stitched Frame was die cut, using white card stock.  The red layer on top, is the Postage Stamp Rectangle die cut.  The pretty heart design is the Els van de Burgt Studio Heart Background die cut.  Isn't it beautiful! It was glued on top of the Postage Stamp Rectangle.  Around the outside of the Heart Background, I used Els Holiday Garlands 1 die set to die cut the holly border out of green card stock - 4 garlands were die cut. Red Glitter Peel Off Stickers were added between the Holly Leaves.

The flower was created using the new Susan's Garden Notes Small Poinsettia dies.  Prills were added to the center of the flower. 

 The products used can be purchased from Elizabeth Craft Designs:

A Way With Words - Peace (new)
Heart Background (Coming Soon)
Stitched Ovals
Postage Stamp Rectangles (Coming Soon)
Stitched Rectangles
Holiday Garlands 1 (Coming Soon)
Garden Notes Small Poinsettia (new)
Prills
Clear Double Sided Adhesive
Cool Diamond Silk Microfine Glitter
Gold Shimmer Sheetz
Soft Finish Cardstock
Pan Pastels
Susan's Flower Tool Kit
Red Glitter Peel Off Stickers

Posted by Selma at 6:23 AM 2 comments
Labels: A Way With Words, Christmas, Elizabeth Craft Designs, Els van de Burgt Studio, Garden Notes, Susan's Garden

Thursday, September 22, 2016

Warm & Cozy


When it is cold  what is nicer than a nice warm sweater! I have been posting a lot of different sweaters I have created using Joset Designs Winter Sweater die set, but this one was especially fun. 


In my stash (for years) I had a spool of red trim and did not know what to do with it.  When I was thinking of ways to create fun sweaters, this trim came to mind and it was actually pretty easy to use to create this sweater.  The Winter Sweater was die cut with a piece of Clear Double Sided Adhesive on white card stock.  The Adhesive covering was cut with scissors up along the sleeve line, so I would working with just the body of the sweater to begin with.  There is a string along the top edge of this trim that I layered going across the body of the sweater.  When you use the Clear Double Sided Adhesive, it makes it easy to attach.  Each row was trimmed just as wide as the body of the sweater.  Once the body was filled in with the trim, the covering over the Adhesive was pulled off the arms and trim added the same way.  The cuffs were die cut using white card stock with Clear Double Sided Adhesive, and Cool Diamond Silk Microfine Glitter added.  The cuffs were added after the red trim was all attached.  You can trim the length of some of the red trim, when needed to stay within the die cut.  Three small white pom poms were added down the front.

Three of Suzanne Cannon's  A Way With Words die sets were used for the sentiment;  Warm Thoughts, Calligraphic Elements 2 and Cozy. They were die cut using Gold  Shimmer Sheetz.  

The Els van de Burgt Studio new Holiday Garlands 2 die set was used to die cut the border along the bottom of the card. 

How many ways can you think of to decorate this cute Winter Sweater die cut?

The products you can purchase from Elizabeth Craft Designs:

Joset Designs Winter Sweater
A Way With Words Warm Thoughts
A Way With Words Calligraphic Elements 2
A Way With Words Cozy
Holiday Garlands 2
Shimmer Sheetz
Clear Double Sided Adhesive
Cool Diamond Silk Microfine Glitter


Posted by Selma at 11:01 AM 8 comments
Labels: A Way With Words, Christmas, Elizabeth Craft Designs, Els van de Burgt Studio, Joset Designs

Wednesday, September 21, 2016

Cherish


It always makes me happy to create a card using Suzanne Cannon's Quietfire Creations, A Way With Words dies along with Susan Tierney-Cockburn's flower dies.

Today I have the card I designed for my Quietfire Creations Design Team Blog Post,   using the A Way With Words - Cherish die. To give dimension to the beautiful sentiment, it was die cut four times and all four glued together.  

This is a 6x6 inch card.  I used a piece of ScrapBerry's Happily Ever After Design Paper I received from a friend in the Netherlands for the background.  To frame the sentiment, I used Els van de Burgt Studio Entwined Oval die set.  This die will be Coming Soon from Elizabeth Craft Designs.

To match the flowers in the design paper, I used Susan's Garden Notes Peony and Garden Notes Hydrangea die sets.  The corners were die cut using the Els van de Burgt Studio Corners 1 die set.  To complete the card, a few white pearls were used on the Entwined Oval and under the sentiment.

Be sure to check out all the Quietfire Creations, A Way With Words die sets at this LINK to help you create beautiful cards and projects.

The Elizabeth Craft Designs dies can be found at this Link.

Els van de Burgt Studio Entwined Ovals (Coming Soon Tab)
Els van de Burgt Studio Corners 1
Susan's Garden Notes Hydrangea
Susan's Garden Notes Peony


Posted by Selma at 9:30 AM 4 comments
Labels: A Way With Words, Elizabeth Craft Designs, Garden Notes, Quietfire DT

Tuesday, September 20, 2016

Masculine Ice Skates Card


Creating masculine cards are sometimes difficult.  Today I used the Joset Designs Ice Skates and Winter Sweater dies to create a masculine card. The A Way With Words "Winter" die cut is from the 4-Seasons die set.

The skates were die cut using black card stock instead of white, which is more traditional for women.  Thin tan twine was used to lace the boots.  To lace, start at the top and skip every other hole then go back up and thread through the other holes.  Add the bow from the Ice Skates die set.

 The sweater was die cut using Clear Double Sided Adhesive on the front.  Using a craft knife, stripes were cut across the sleeves.  The covering was pulled off and Turquoise Silk Microfine Glitter sprinkled on.  The cuffs were die cut with the Adhesive and Turquoise Glitter added. The glitter was well polished with my fingers then the area cleaned up. Cool Diamond Microfine Glitter was added to the rest of the sweater.  To make the sweater masculine, I used the Anchor from the Joset Designs Lighthouse die set.  It was also glittered. 


Here is a picture of the same card without the Winter Sweater.  I'm not sure which one I like the best!

For the background, I used a piece of the Els van de Burgt Stone Through the Lens design paper.  The new Els van de Burgt Chevron Background die was used to frame the die cut Skates.  It was die cut using Clear Double Sided Adhesive on top of card stock, then sprinkled with Cool Diamond Silk Microsoft Glitter.  Two different pieces of card stock from my stash was used behind the die cut design. 

Assemble the card as shown leaving room for the A Way With Words Winter die cut at the top. Snowflake and Line Silver Peel Off Stickers were added to complete the card.

The following products can be purchased from Elizabeth Craft Designs:

Joset Design Ice Skates
Joset Design Winter Sweater
Joset Design Lighthouse
Els van de Burgt Chevron Background (under Comming Soon tab)
Els van de Burgt Through The Lens Stone Card Stock
A Way With Words 4-Seasons die set
Silk Microfine Glitter
Clear Double Sided Adhesive
Peel Off Stickers (Silver)


Posted by Selma at 10:26 AM 2 comments
Labels: A Way With Words, Christmas, Elizabeth Craft Designs, Els van de Burgt Studio, Joset Designs

Friday, September 16, 2016

Cute Hedgehog


Have you seen all the new dies just released from Elizabeth Craft Designs?  This card is designed using the Joset Designs Hedgehog, Mushroom die sets, and the Els van de Burgt Studio new Postage Stamp Rectangle and Entwined Circles, and Entwined Ovals die sets.

Postage Stamp Squares

This is a 6x6 inch card with a piece of plaid design paper in the background.  A large Stitched Square was die cut using Soft Sky Soft Finish Cardstock.  On top is layered one of the new Postage Stamp Rectangles.  A fine lined marker was used to draw a black line inside the Postage Stamp Rectangle.

Hedgehog

The Hedgehog was die cut using dark brown and tan card stock.  Brown ink was sponged on the face and feet.  

Mushrooms

The Mushrooms were die cut using tan shades of card stock and were glued together.  The grass die from this set was die cut 4 times to glue across the bottom of the card.


Entwined Circles

The smallest Entwined Circle was die cut to frame the sentiment.


Entwined Ovals

The flower dies from the Entwined Ovals die set were used to create the flower.  Susan's Garden Prills were added to the center of the flower.
Clear Stamps - General Sentiments - ElizabethCraftDesigns.com
The Joset Designs General Sentiment Clear Stamp Set was used for the sentiment.

These products can be purchased from Elizabeth Craft Designs:

Joset Designs Hedgehog
Joset Designs Mushrooms
Joset Designs General Sentiment Clear Stamp Set
Els van de Burgt Studio Entwined Circles
Els van de Burgt Studio Entwined Ovals
Els van de Burgt Studio Postage Stamp Rectangles
Els van de Burgt Studio Stitched Squares
Susan's Garden Prills
Soft Finish Cardstock


Posted by Selma at 7:00 AM 2 comments
Labels: Elizabeth Craft Designs, Els van de Burgt Studio, Joset Designs

Thursday, September 15, 2016

Baby It's Cold Out Here


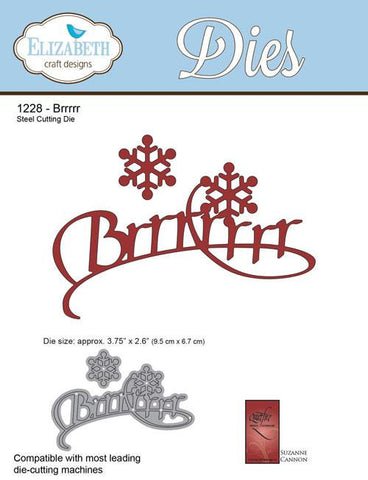
Aren't these little Birds cute!  They are a new die set by Joset Designs at Elizabeth Craft Designs.  They come with dies to dress them up for the cold winter season.  To express their thoughts, I have used the new Suzanne Cannon's A Way With Words - Brrrrrr die cut sentiment.


Birds


This is a 6x6 inch card.  The little birds were die cut using White Soft Finish Cardstock which has a nice texture to it.  Light blue ink was sponged on the bird's body and little wings.  The feet die cut was colored yellow and glued to the back of the body.
Prills - Flower Pot
 A black Prill was added to the eye of each bird.

Clear Double Sided Adhesive Tape - 101mm - ElizabethCraftDesigns.com

To achieve the sparkly hats and scarf, use a piece of card stock with Clear Double Sided Adhesive to die cut those pieces then sprinkle on Silk Microfine Glitter of your choice.  Glue the tassel and brims onto the hats.  Attach the hats and scarfs to the birds.

To ground the birds, use another piece of card stock with Adhesive on the front to die cut a snow bank for the bottom of the card. Sprinkle with Cool Diamond Silk Microfine Glitter.

5 Part Pine - ElizabethCraftDesigns.com

A Way With Words, Brrrrr


There is a lot of Glitter on this card!  Using more card stock with the Clear Double Sided Adhesive, die cut the Els van de Burgt 5-Part Pine and the A Way With Words Brrrrr Sentiment with an extra snowflake.  Add Go To Green Silk Microfine Glitter to the tree and attach to the card with dimensional glue dots.  Add Silver Silk Microfine Glitter to the Sentiment and Snowflakes and attach at the top of the card.  To finish the card, use Silver Line Peel Off Stickers to frame the scene.

The following products can be purchased from Elizabeth Craft Designs:

Joset Design Birds
A Way With Words Brrrr
Els van de Burgt Studio 5-Part Pine
Karen Burniston Outdoor Edges
Clear Double Sided Adhesive
White Soft Finish Cardstock
Silk Microfine Glitter 
Silver Line Peel Off Stickers
Susan's Garden Club Prills


Posted by Selma at 6:49 AM 4 comments
Labels: Christmas, Elizabeth Craft Designs, Els van de Burgt Studio, Joset Designs, Susan's Garden

Tuesday, September 13, 2016

The Woods Would be Very Silent


Good Morning.  Today I have a have a card designed using one of Suzanne Cannon's beautiful Quietfire Creations stamps.  I love the message on this stamp -  it tells us we all need to try, even if we are not the best!


The Woods Would be Very Silent - Set of 5 Stamps - Mounted


I used a piece of 6x6 inch design paper for the background. To frame the sentiment, I die cut two ovals using the new Els van de Burgt Studio Entwined Ovals from Elizabeth Craft Designs. The ovals were glued to the design paper. Using the Misti Precision Stamping Tool, the sentiment was stamped inside the oval using VersaFine Black Ink.

Using Susan's Garden Notes Chrysanthemum and Zinnia dies, flowers were die cut for the bottom of the card.  I wanted to add a bird similar to the one in the design paper, so I used Susan's Garden Birds 1 die set.  The flowers and bird were attached at the bottom of the Entwined Oval.

You can purchase the Quietfire Creations "The Woods Would Be Very Silent" stamp set at this LINK.


The Elizabeth Craft Designs dies include:

Els van de Burgt Studio Entwined Ovals
Susan's Garden Notes Chrysanthemum
Susan's Garden Notes Zinnia
Susan's Garden Notes Garden Birds 1 


Posted by Selma at 10:15 AM 3 comments
Labels: Elizabeth Craft Designs, Els van de Burgt Studio, Quietfire, Susan's Garden Notes

Monday, September 12, 2016

It's the Most Wonderful Time of the Year


Autumn is such a wonderful time of year with all the beautiful Fall colors!  It is that time of year we love to decorate our porches and yards with beautiful mums/chrysanthemums.

For my Susan's Garden Design Team Blog Post at Elizabeth Craft Designs today, I have designed a card using many of the colors we see this time of year.  The flowers were created with Susan’s Garden Notes Chrysanthemum dies.  Other dies used are the Susan’s Garden – Garden Patch Woodland Leaves, Leafy Branch, Berry Branch, and the new Els van de Burgt Studio Entwined Circles, Joset Designs Birds, and Winter Sentiments Clear Stamp Set.  

This is a 6×6 inch card.  The background is a slightly smaller piece of
Buttercream Colored Soft Finish Cardstock.

Die cut enough petals to create six Garden Patch Chrysanthemums. The flowers were die cut using Sunflower Soft Finish Cardstock and sponged with Really Rust Distress Ink.  They were shaped using Susan’s Flower Tool Kit.

Die cut a variety of the Woodland Leaves and sponge on different Autumn colors.  Spritz with water to blend.  Shape the leaves with the Flower shaping tools

Use the Leafy Branch die to die cut three branches out of Soft Finish Rust Cardstock.  Use the Leaf Tool to draw a line down the center of each leaf to shape.  You will be cutting the branches apart to fit behind the flowers.

Use the Berry Branch die to die cut three branches.  I used a dark burgundy card stock then added Love Letter irResistible Pico embellisher to each berry.  Set aside to dry.  These branches will also be cut apart to place behind flowers

Die cut the largest Entwined Circle using Rust Cardstock.  

Stamp the sentiment, using black ink, on to Rust Cardstock; cut around the sentiment using scissors.  This stamp is from a Winter Sentiments stamp set but it is versatile for any time of year!

Use the new Joset Designs Birds die set and die cut one bird – you need to die cut the body, the feet, and the little wing. Once assembled, I added a black Prill for the eye.  I used dimensional glue dots to attach the flowers and glue for the other die cut pieces.

Assemble the card as shown.

The following products can be purchased from Elizabeth Craft Designs:

Joset Design Birds
Garden Notes Chrysanthemums
Susan’s Garden Woodland Leaves
Flower Tool Kit
Entwined Circles (This die is in the new Els van de Burgt Studio release)
Berry Branch
Leafy Branch
Soft Finish Cardstock
Power Outage Prills (for Bird’s eye
Posted by Selma at 7:00 AM 3 comments
Labels: Elizabeth Craft Designs, Els van de Burgt Studio, Garden Notes, Joset Designs, Susan's Garden
Newer Posts Older Posts Home
Subscribe to: Posts (Atom)

LinkWithin

Related Posts with Thumbnails

Design Team Member 2020-2021

Design Team Member 2020-2021
Susan's Garden Club Spellbinders

I APPRECIATE YOUR VISIT

I APPRECIATE YOUR VISIT

Thank You

Thank You

Translate

Follow me on Bloglovin

Follow on Bloglovin
I am so happy you stopped by to visit my creative corner. I love to share my creations with you and hope they give you some inspiration. I would love for you to take a moment and leave a comment to let me know what you think. If you enjoy my work, I would also like for you to sign up as a Follower. It is fun to see who my followers are. I always look forward to reading your comments. Thanks for stopping by.

You can FOLLOW my BLOG UPDATES by signing up here.

Follow Me On SCS

Follow Me On SCS

THANK YOU FOR TAKING THE TIME TO COMMENT.

WOULD YOU LIKE TO SUBSCRIBE TO MY NEW BLOG UPDATES? SIGN UP HERE:

Enter your email address:

Delivered by FeedBurner

Legal Fine Print

Copyright

All content on this blog, including designs, text, tutorials, and photographs on this website are © 2012 Selma Stevenson unless otherwise noted. Content shared on this site is for your personal inspiration only and cannot be used for ANY other reason (including but not limited to publications and contest submissions) without my written permission. Please contact me for all authorization requests.

MY POST CATEGORIES INCLUDING TUTORIALS

  • 3-D Wheelbarrow (1)
  • A Way (1)
  • A Way With Stencils (2)
  • A Way With Words (88)
  • Acrylic Card (3)
  • Altenew (1)
  • Anna Griffin (1)
  • Art Impressions (3)
  • Baby's Breath Tutorial (2)
  • Bachelor Button Tutorial (1)
  • Bags (2)
  • Becky Seddon (9)
  • Bianca Petroschi (5)
  • Birdhouses (2)
  • Blog Hop (4)
  • Bookmarks (1)
  • Bougainvillea Tutorial (1)
  • Boxes (83)
  • Build A Flower (28)
  • Carnation Tutorial (2)
  • CHA (1)
  • Cheery Lynn (323)
  • Christmas (306)
  • CLASSroom Tutorial (1)
  • Clematis Tutorial (1)
  • Color Design Team (11)
  • Columbine Tutorial (1)
  • CountryScapes (74)
  • Craft Hoarders Anonymous (2)
  • Crafter's Companion (7)
  • Crafts-Too (3)
  • Crepe Paper Flower Tutorial (4)
  • Daffodil Tutorial (1)
  • Daisy Tutorial (1)
  • Dee's Distinctively (1)
  • Design Team Challenge (12)
  • Design Team Project (41)
  • Die Cut Design Team Challenge (4)
  • Die Storage (1)
  • Die-namics (5)
  • Die-Versions (2)
  • Double Embossing (1)
  • Easel Card (7)
  • Easter (3)
  • Easy Frames (4)
  • eBosser (22)
  • Elizabeth Craft Designs (9)
  • Elizabeth Craft Designs (574)
  • Els van de Burgt Studio (78)
  • Explosion Box (9)
  • Flower Soft (9)
  • Foamiran (7)
  • Frames (7)
  • Garden (1)
  • Garden Notes (351)
  • Garden Notes Pinecone Tutorial (2)
  • Garden Patch (13)
  • Gelatos (1)
  • Gift Cards (2)
  • Gift Certificate Folders (1)
  • GinaK (104)
  • GinaK Designs (3)
  • Graphic 45 (18)
  • Guest Designer (1)
  • Halloween (10)
  • Heartfelt Creations (346)
  • Hero Arts (1)
  • Home Decor (3)
  • Impression Obsession (34)
  • Inkadinkado (2)
  • Joan's Garden Challenges (127)
  • Joan's Gardens Tag Challenge (18)
  • Joan's Workshop (6)
  • Joset (1)
  • Joset Designs (78)
  • Journal (1)
  • Joy Crafts (23)
  • JUGS (6)
  • JustRite (318)
  • Kaiser Craft (4)
  • Karen Burniston (13)
  • Krista Schneider (7)
  • LaBlanche (22)
  • Leaf Tutorial (1)
  • Lily Tutorial (2)
  • Luminary (2)
  • Magnolia Tutorial (3)
  • Marianne Design (88)
  • Marianne Designs (189)
  • Masculine (19)
  • Melanie Muenchinger (72)
  • Memory Box (197)
  • MFT (9)
  • Mica Gloss (3)
  • Mixed Media (1)
  • ModaScrap (2)
  • Modeling Paste (3)
  • Mum tutorial (1)
  • My Favorite Things (34)
  • Nellie Snellen (13)
  • Notebooks (1)
  • Organization (3)
  • Organza Flower Tutorial (1)
  • Our Craft Lounge (7)
  • Our Daily Bread (8)
  • Paintbox Poppets (5)
  • Pan Pastels (1)
  • PanPastel Tutorial (1)
  • Pansy Tutorial (1)
  • Paper Smooches (1)
  • Papers and Pixels Magazine (2)
  • Penny Black (51)
  • Pine Cone Tutorial (2)
  • Pinecone Tutorial (1)
  • Poinsettia Tutorial (3)
  • Pop Up Cards (29)
  • Poppies (2)
  • Poppy Stamps (65)
  • Poppy Tutorial (4)
  • Post It Note Cover (2)
  • Pumpkin Tutorial (1)
  • Punch Bunch Storage (1)
  • Punched Flowers (153)
  • Quietfire (59)
  • Quietfire DT (35)
  • Rose Tutorial (8)
  • Rosebud Tutorial (2)
  • Rosettes (1)
  • Sarah Kay (6)
  • Savvy (4)
  • ScrapFusion (1)
  • Shadow Boxes (23)
  • Shaker (1)
  • shaped cards (9)
  • Shimmer Sheets (1)
  • Shoes (1)
  • Sidestep Card (2)
  • Sizzix (135)
  • Slider Card (1)
  • Spellbinders (95)
  • Spiral Rose Tutorial (2)
  • Stair Step Card (1)
  • Stampavie (16)
  • Stampendous (3)
  • Step Card (1)
  • Studio 490 Wendy Vecchi (7)
  • Susan's Garden (458)
  • Susan's Garden 3-D Book (1)
  • Susan's Garden Bearded Iris Tutorial (1)
  • Susan's Garden Branch Tutorial (1)
  • Susan's Garden Cattleya (1)
  • Susan's Garden Challenge (2)
  • Susan's Garden Cherry Blossom Tutorial (1)
  • Susan's Garden Clematis Tutorial (1)
  • Susan's Garden Club (38)
  • Susan's Garden Club Spellbinders (5)
  • Susan's Garden Club/ Spellbinders (12)
  • Susan's Garden Club/Spellbinders (194)
  • Susan's Garden Dies (133)
  • Susan's Garden Fairy (1)
  • Susan's Garden Flower Quince Tutorial (1)
  • Susan's Garden Forsythia tutorial (1)
  • Susan's Garden Hibiscus Tutorial Tutorials (1)
  • Susan's Garden Ladybug Tutorial (2)
  • Susan's Garden Lilac Tutorial (2)
  • Susan's Garden Lily Tutorial (2)
  • Susan's Garden Magnolia (1)
  • Susan's Garden Magnolia Stamen Tutorial (1)
  • Susan's Garden Mum Tutorial (1)
  • Susan's Garden Notes (7)
  • Susan's Garden Peony Tutorial (1)
  • Susan's Garden Pinecone Tutorial (1)
  • Susan's Garden Rose Bud Tutorial (1)
  • Susan's Garden Rose Tutorial (1)
  • Susan's Garden Violet Tutorial (1)
  • Susan's Rose Bud Tutorial (1)
  • Sweet Poppy Stencils (1)
  • Tablet (2)
  • Tags (39)
  • Technique Friday with Els (1)
  • Theresa Momber (26)
  • Thomas Kinkade (2)
  • Tim Holtz (12)
  • TMITA (32)
  • Tombow (1)
  • Tombow Sticky U (1)
  • Tonic Studios (45)
  • Tri Shutter Cards (2)
  • Tri-fold cards (1)
  • Tulip Tutorial (2)
  • Tulips (1)
  • Tutorials (171)
  • Valentines (15)
  • Vellum Flower Tutorial (1)
  • Vellum Flowers (29)
  • Velvet Adhesive Sheets (1)
  • Violet Tutorial (3)
  • Votive (1)
  • We R Memory Keepers (5)
  • Webster's Pages (14)
  • Window Card (1)
  • Wrinkled Petal Tutorial (2)

Search This Blog

Blog Archive

  • ►  2024 (15)
    • ►  November (1)
    • ►  October (6)
    • ►  September (5)
    • ►  July (1)
    • ►  June (1)
    • ►  April (1)
  • ►  2023 (56)
    • ►  December (1)
    • ►  November (3)
    • ►  October (12)
    • ►  September (2)
    • ►  August (9)
    • ►  June (1)
    • ►  May (3)
    • ►  April (3)
    • ►  March (9)
    • ►  February (5)
    • ►  January (8)
  • ►  2022 (78)
    • ►  December (5)
    • ►  November (5)
    • ►  October (6)
    • ►  September (5)
    • ►  August (6)
    • ►  July (13)
    • ►  June (2)
    • ►  May (3)
    • ►  April (8)
    • ►  March (10)
    • ►  February (13)
    • ►  January (2)
  • ►  2021 (53)
    • ►  November (2)
    • ►  October (7)
    • ►  September (5)
    • ►  August (7)
    • ►  July (10)
    • ►  April (3)
    • ►  March (12)
    • ►  February (6)
    • ►  January (1)
  • ►  2020 (92)
    • ►  December (1)
    • ►  November (3)
    • ►  October (8)
    • ►  September (21)
    • ►  August (1)
    • ►  July (5)
    • ►  June (3)
    • ►  May (12)
    • ►  April (13)
    • ►  March (5)
    • ►  February (10)
    • ►  January (10)
  • ►  2019 (86)
    • ►  November (18)
    • ►  October (11)
    • ►  September (14)
    • ►  August (14)
    • ►  July (5)
    • ►  June (3)
    • ►  April (2)
    • ►  March (19)
  • ►  2018 (171)
    • ►  December (2)
    • ►  November (11)
    • ►  October (27)
    • ►  September (17)
    • ►  August (23)
    • ►  July (7)
    • ►  June (9)
    • ►  May (15)
    • ►  April (9)
    • ►  March (14)
    • ►  February (13)
    • ►  January (24)
  • ►  2017 (130)
    • ►  December (5)
    • ►  November (13)
    • ►  October (11)
    • ►  September (6)
    • ►  August (5)
    • ►  July (7)
    • ►  June (13)
    • ►  May (13)
    • ►  April (12)
    • ►  March (13)
    • ►  February (17)
    • ►  January (15)
  • ▼  2016 (146)
    • ►  December (5)
    • ►  November (14)
    • ►  October (15)
    • ▼  September (19)
      • Noel
      • Gift Card Sleigh Pop Up
      • Witches Brew
      • Peace
      • Warm & Cozy
      • Cherish
      • Masculine Ice Skates Card
      • Cute Hedgehog
      • Baby It's Cold Out Here
      • The Woods Would be Very Silent
      • It's the Most Wonderful Time of the Year
      • Merry Christmas Sweater Card
      • Christmas Pudding
      • Noel
      • Winter Sweater
      • Let It Snow
      • Merry Christmas
      • Merry Christmas Gingerbread Man
      • Christmas Tree
    • ►  August (13)
    • ►  July (11)
    • ►  June (14)
    • ►  May (12)
    • ►  April (6)
    • ►  March (12)
    • ►  February (12)
    • ►  January (13)
  • ►  2015 (123)
    • ►  December (11)
    • ►  November (20)
    • ►  October (9)
    • ►  September (13)
    • ►  August (15)
    • ►  July (7)
    • ►  June (6)
    • ►  May (7)
    • ►  April (11)
    • ►  March (9)
    • ►  February (9)
    • ►  January (6)
  • ►  2014 (102)
    • ►  December (2)
    • ►  November (4)
    • ►  October (7)
    • ►  September (11)
    • ►  August (17)
    • ►  July (7)
    • ►  June (8)
    • ►  May (10)
    • ►  April (5)
    • ►  March (10)
    • ►  February (8)
    • ►  January (13)
  • ►  2013 (207)
    • ►  December (7)
    • ►  November (15)
    • ►  October (15)
    • ►  September (16)
    • ►  August (21)
    • ►  July (20)
    • ►  June (16)
    • ►  May (24)
    • ►  April (19)
    • ►  March (23)
    • ►  February (18)
    • ►  January (13)
  • ►  2012 (239)
    • ►  December (12)
    • ►  November (22)
    • ►  October (18)
    • ►  September (21)
    • ►  August (15)
    • ►  July (14)
    • ►  June (22)
    • ►  May (21)
    • ►  April (24)
    • ►  March (20)
    • ►  February (24)
    • ►  January (26)
  • ►  2011 (307)
    • ►  December (17)
    • ►  November (32)
    • ►  October (26)
    • ►  September (21)
    • ►  August (23)
    • ►  July (23)
    • ►  June (29)
    • ►  May (24)
    • ►  April (27)
    • ►  March (29)
    • ►  February (27)
    • ►  January (29)
  • ►  2010 (292)
    • ►  December (27)
    • ►  November (33)
    • ►  October (33)
    • ►  September (26)
    • ►  August (23)
    • ►  July (28)
    • ►  June (26)
    • ►  May (14)
    • ►  April (16)
    • ►  March (25)
    • ►  February (19)
    • ►  January (22)
  • ►  2009 (251)
    • ►  December (19)
    • ►  November (25)
    • ►  October (36)
    • ►  September (24)
    • ►  August (32)
    • ►  July (25)
    • ►  June (28)
    • ►  May (36)
    • ►  April (26)

Tonic Studios Susan's Garden Club

Tonic Studios Susan's Garden Club
Design Team Member 2019 - 2020

Susan's Garden Design Team 2015-2018

Susan's Garden Design Team 2015-2018
Elizabeth Craft Designs

Design Team Member 2015-2018

Design Team Member 2015-2018

Design Team Member 2016-2017

Design Team Member 2016-2017

Designer for Joan's Gardens 2010-13

Designer for Joan's Gardens 2010-13

Heartfelt Creations Alumni Design Team

Heartfelt Creations Alumni Design Team
October 2010-March 2011

Guest Designer

Guest Designer

Guest Designed for JustRite Stamps


Heartfelt Creations Frame a Winner!

Heartfelt Creations Frame a Winner!
Click my photo to see my email.

I HAVE BEEN PUBLISHED IN PAPERS AND PIXELS

I HAVE BEEN PUBLISHED IN PAPERS AND PIXELS
Click this icon to go to magazine

Past Design Team Member

Past Design Team Member

GUEST DESIGNER FOR

GUEST DESIGNER FOR

GUEST DESIGNER FOR LA BLANCHE STAMPS

GUEST DESIGNER FOR LA BLANCHE STAMPS

Guest Designer for Theresa Momber

Guest Designer for Theresa Momber

Guest Designer for Melanie Muenchinger

Guest Designer for Melanie Muenchinger

HONORED TO BE CHOSEN CHIC OF THE WEEK

HONORED TO BE CHOSEN CHIC OF THE WEEK

SERVED ON THE FIRST

SERVED ON THE FIRST

Have served as

Have served as


My Blog was created April 12, 2009

MY GOLD STAR AWARD

MY GOLD STAR AWARD

My Gallery on Splitcoaststampers

http://www.splitcoaststampers.com/gallery/showgallery.php?cat=500&ppuser=9

Pages

  • Home

Feedjit

Where My Readers Are From

Locations of visitors to this page
Simple theme. Theme images by merrymoonmary. Powered by Blogger.