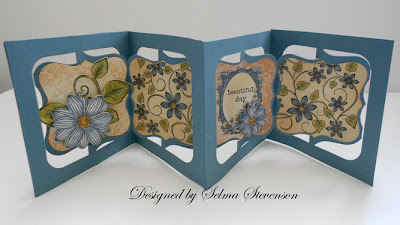
It is time for a new challenge at Joan's Gardens. This week we want you to create a card
- Use a leafy design for the background (die cut, stamped or embossed)
- Add purple flowers
- Use green, purple and white for colors
- Use a sentiment
For my card I use the Spellbinders "5x7 Matting Basics A" dies to create my card. If you are not familiar with these dies, you get 7 dies in this set, plus 7 dies in the Matting Basics B" set to help you create perfectly cut cards or perfect matting pieces for your cards. I used the third largest die from the Matting Basics A set for this card.
To cut a perfect card, fold your card stock in half and place the folded edge just inside the cutting line of the die. Tape it down so it doesn't slip when going through the machine. When cutting your card with these dies, you get a pretty embossed line around the edge, which makes your card look very professional.
Here you can see the card once it is die cut.
For the delicate "cover" over my card, I used the Heartfelt Creations "Vintage Floret Frame PreCut Set" to stamp the design on a piece of green card stock. I die cut it with the matching "Decorative Leafy Frame Die". In order to get the stamped design folded just perfect to place in the die so I could have the lacy design on the front and back of the card, I used a ruler and the ScorPal to make a score line down the side. With the ruler lined up on the ScorPal I could wiggle the card just right so my score line would go right next to the stamped edge.
In case you are not familiar with how to use this Heartfelt Creations stamp and die, here is a picture of how you do it. First you tape the die to a piece of card stock and cut out the design. With this one you end up with a frame to place over the stamped frame; it also cuts out around the leafy design. With the die still attached, you place that frame over the stamped image, lining up the stamped edge with the die cut frame. I have a piece of wax paper in my die that stayed there from the last die cut. If you use wax paper between the die and card stock, it comes right out. Tape the die cut frame down with removable tape so it doesn't move.
Place the die down over the stamped image. You can feel it when you have it down in the die cut; tape so it doesn't move.
Here are the two pieces I created for my card - the lacy frame (cover) to go over the Spellbinders cut card. I placed a 1/8" strip of ScorTape down the fold of the green frame and attached the white card inside.
The sentiment from the Heartfelt Creations "Classic Message PreCut Set" stamp set was stamped in the center of the circle. The leafy frame has three die cut flowers so I used the Heartfelt Creations "Open Vintage Floret" and "Mini Vintage Floret" stamp sets to stamp the three sizes of flowers, then colored them with markers. There are three layers to each flower. They were shaped with the Sizzix Flower Tool Kit. In the center of each flower I added some Viva Black Paper Pen.
Spellbinders "5x7 Matting Basics A (S6-001)
Heartfelt Creations "Vintage Floret Frame PreCut Set" (HCPC 3522)
Heartfelt Creations "Decorative Leafy Frame Die" (HCD 731)
Heartfelt Creations "Open Vintage Floret PreCut Set" (HCPC 3500)
Heartfelt Creations "Mini Vintage Floret PreCut Set" (HCPC 3502)
Heartfelt Creations "Vintage Floret Die" (HCD 727)
Heartfelt Creations "Classic Message PreCut Set" (HCPC 3354)
Sizzix "Flower Tool Kit" (658437)
Versafine "Onyx Black" Archival Instant Dry Pigment Ink pad
Ranger "Super Fine Detail Clear" embossing powder
ScorPal


