Showing posts with label Valentines. Show all posts

Monday, February 12, 2018

Happy Valentine's Day


Today I have another quick and easy Valentine Card.  The background is a piece of the ModaScrap Baby Love design card stock.

Use the Entwined Hearts die set and die cut the heart, using white card stock.  Attach to the front of the card.

Use the A Way With Words Baby Love die set and die cut the love with adhesive on the front of the cardstock.  Add Silver Soft MicroSoft Glitter to the sentiment and polish with your fingers.

Use the Garden Notes Jasmine die set and create 6 Jasmine flowers.  Use Susan's Flower Tool Kit to shape the flowers.  Attach to the left side of the heart.  

Use the Love Sentiments stamp set for the sentiment.  Stamp with VersaMark Ink and Gold Emboss.

Use the Valentines Edges die set and die cut the white border for the bottom of the card.

Product links are shown below.


Thanks for stopping by today.


Sunday, February 11, 2018

You Are My Missing Piece


Valentine's Day is just a few days away.  Today I created a card using the Puzzle Heart die set from Elizabeth Craft Designs.

Start with a 6-inch square card.

Cut a 5 3/4 inch piece of white card stock; this piece will be attached to the front of the card.    Use a ScoreBoard and score seven lines down one side.  

Use the Bricks die set and a piece of white card stock that has adhesive on the back, to die cut the bricks.  Attach this die cut to the right side of the 5 3/4 inch card stock.  Attach this piece to the front of the card.

Use the Puzzle Heart die set for the large glittered heart.  Use a piece of white card stock that has Clear Double Sided Adhesive on the front and die cut the puzzle heart.  Peel off the adhesive and pour on red Silk Microfine Glitter; polish with your fingers.  Die cut the solid heart with Clear Double Sided Adhesive on the front.  Sprinkle on Silver Silk Microfine Glitter and polish.  Attach the puzzle pieces over the silver heart, leaving one piece out.  Attach this heart to the front of the card as shown.

Use the Entwined Heart die set and die cut the small red hearts and the two outline hearts.  Use white card stock that has clear double sided adhesive on the front and sprinkle on red glitter.  Attach these hearts as shown.

Use the Love Sentiments stamp set and stamp the sentiment using black ink.  Fussy cut around the sentiment and attach to the lower right corner.  

You can purchase the products used by clicking on the links below.


Monday, February 5, 2018

Be My Valentine


Today I have a valentine designed using red, white and kraft colors.

Start with a 6 inch square card and cover the front with a piece of the design paper from the ModaScrap Simply Love paper pack.  

Use the Dotted Scallop Squares and die cut a red square.  Use a piece of corrugated  board and cut a small square to fit inside the red square.  You can use Deckle scissors for an uneven edge.  Attach the squares at an angle as shown.

Use the Love Sentiments die set and die cut 'Be My Valentine' using both red and white card stock.  Attach the Red sentiment on top of the white sentiment, for dimension.

Use the A Way With Words Calligraphic Elements 3 die set and die cut the heart on  a string.  

Die cut three white flowers using the Bunch of Flowers 3 die set.

Use the Heart Cutouts die set and die cut red hearts.

Attach the sentiment, flowers, and heart on top of the corrugated square, as shown.  Glue one of the small die cut hearts in the center of each flower and around on the design paper.

Use the A Way With Words Love Joy & Piece Christmas Ornament and die cut the 'love' sentiment, using red card stock.  Die cut it again using white card stock.  Attach the red sentiment over the white.  Attach the love sentiment in the lower right corner. 

Links are provided below for the products used.


Friday, February 2, 2018

Love Birds


This card could be used for a Valentine or for almost any occasion.  It was created using the Flowers Lace Frame, Lovebirds, and Garden Notes Dahlia 2 die sets.

Start with a 6-inch card.  Cut a piece of Lavender Soft Finish Cardstock to cover the front of the card.

Use the Flowers Lace Frame die set and die cut one white frame.  Trim to fit inside the lavender card stock.

Use Susan's Garden Notes Dahlia 2 die set and create one flower.  This flower was die cut using 85 lb white cardstock and a purple marker used to color around the edges of all the petals.  Shape the petals and leaves using Susan's Flower Tool Kit.  Attach the flower to the lower left corner of the frame.

You can purchase the products used by clicking on the links below.


Thursday, February 1, 2018

Cherish Valentine with Violets


Valentine's Day is just two weeks away.  Today I designed a card using the new Love Struck die set, Susan's Garden Notes Pansy and Leafy Berry Branch, and the beautiful A Way With Words Wishing You A and the Cherish die sets.

This is a 6-inch card.


Use a piece of White Soft Finish card stock cut 6 inches square.  Lay the back of the Love Struck die on the card stock with the back facing the card stock. Use the embossing plates and embossing pad and run through your die cutting machine.  This will 'deboss' the heart into the card stock.  Use a Scoreboard and score around the edges of this piece.

Use the Garden Notes Leafy Berry Branch die set to die cut one branch.  For the berries, use Nuvo drops.  Let the berries dry while working on the rest of the card.

Die cut the Love Struck heart using the pink section of the ModaScrap Fly & Scrap design paper.  Attach the pink heart down in the debossed heart.

Use the Garden Notes Pansy die set and create 10 lavender pansies (violets).  Use 85 lb Soft Finish Cardstock to die cut.  Color the flower petals, shape with the Flower Tool Kit, and assemble. Add Prills to the center of each flower.  

Use the A Way With Words Cherish die set and die cut four Cherish die cuts.  Glue the sentiments together for dimension.  Attach to the Love Struck heart as shown.

Use the A Way With Words Wishing You A  die set and die cut the 'you' sentiment.  Attach the ModaScrap Fly & Scrap card stock, that has clear double sided Adhesive on the back to white card stock before die cutting.  This will give it some dimension.  Attach the sentiment on the lower right corner of the heart.

Attach the Leafy Berry Branch to the left side and bottom of the heart, as shown.  Attach the pansies and pansy leaves.

Have you started your Valentine cards yet?  Valentines are always beautiful when completed with any of Susan's beautiful flowers.

You can shop for the products used by clicking on the links below.


Wednesday, January 31, 2018

Valentine Card

Yesterday the design team had a challenge to create a Valentine card.  I created two cards and saved this one for today.  Valentine cards are so fun to design.  Here is how I created this card.


This is a 6 inch square card.

1.  Cut a piece of the ModaScrap Sweet Vintage Rose paper.

2.  Use the Lace Pocket die set and die cut one pink pocket.  Attach the pocket tabs around the Sweet Vintage Rose card stock.  Attach the pocket to the front of the card.

3.  Use the Dotted Scallop die set to die cut three hearts.  

4.  Use the Lace Heart Die set and die cut one white heart.  Sponge lightly with light pink ink.  Attach to the larger Dotted Scallop Heart.

5.  Use the A Way With Words Calligraphic Elements 3 die set and die cut the little heart with the bow string.  Sponge on light pink ink.  Glue the heart from the Calligraphic Elements 3 die set to the center of the smallest die cut heart.  Attach the hearts to the side of the Lace Heart die cut has shown in the picture.  Attach these hearts inside the upper left side of the Lace Pocket, as shown.

6.  Use the Entwined Heart die set and die cut the smaller heart. Sponge the heart with light pink ink.    Attach it to the middle size die cut heart. 

7.  Use the love from the Love Sentiments die set and die cut two sentiments.  Glue the two sentiments together.  Sponge with light pink ink.  Attach the sentiment inside the Entwined Heart.  Glue these hearts over the front of the Lace Pocket as shown.

8.  Uses Susan's Garden Rose 1 die set and create a pink and white rose.  Use Pink PanPastels to color the base of the petals.  Shape the petals with the flower tool kit and assemble the the flower.  Shape the leaves and color with light green PanPastels.  

9.  Use the Garden Notes Maidenhair Fern die set and die cut two ferns.  

10.  Attach the ferns and rose to the lower left corner of the Lace Pocket.

11.  For mailing, use a 6 3/8 x 6 5/16  clear plastic box.
You can shop for the products used by clinking on the links below.


Tuesday, January 30, 2018

Valentine - Design Team Challenge


Valentine's Day is just a couple of weeks away.  Have you created your Valentine's yet?  To help give you inspiration, the Elizabeth Craft Design Team was challenged to create a card that would be suitable for Valentine's Day.  You can view all the beautiful Valentines created by the design team by going to this LINK.

As with all challenges, Elizabeth Craft Designs is giving you a chance to win a great prize.


****************

For today's challenge Elizabeth Craft Designs is giving away a $20 Gift Card, to use on their  website, to 3 winners


To enter simply leave a comment on the Elizabeth Craft Designs Challenge posand tell us "What Elizabeth Craft Designs dies or stamp sets would you use to create a Valentine’s Card??”

Elizabeth Craft Designs will select 3 lucky winners in a random drawing 

The winners will be announced on Friday, February 1st on the Elizabeth Craft Designs blog.

****************


Here is how I created my Valentine.

1.  Start with a 6 - inch square card.  Cut a piece of pink card stock 6 inches square and attach to the front.  

2.  Use the Flowers Lace Frame die and die cut one white frame, using white Soft Finish Cardstock.  Attach to the center of the front of the card.  


3.  Use the Love Struck die set and die cut the large heart and the smaller insert heart, using Soft Finish White Cardstock.   Use Clear Double Sided Adhesive on the back of only the large heart.  


4.  To create a colored background to the Love Struck Heart,  use the large Love Struck die and place it on pink card stock.  Use a pencil to trace around the outside edge of the die.  Use scissors to cut out this heart.  By tracing around the outside of the die, it will give you a small border around the white die cut heart.

 5.  Remove the covering off the adhesive and center the white die cut heart over the pink heart you cut out, leaving an even border around the edges of the white heart.  Attach the heart in the center of the Flower Lace Frame, using dimensional tape.

6.  Use the Love & Hearts Collection stamp set and stamp the sentiment in the center of the smaller heart you die cut using the Love Struck die set.  Use black VersaFine ink and clear emboss the sentiment.  Lightly sponge light pink ink around the edges of this heart.

7.  Attach the heart with dimensional tape on the large heart. 

8.  Use the Hearts Cutouts die set and die cut it using pink card stock.  Glue some of the small hearts around the sentiment.

9.  Use the Garden Notes All In A Mist die set and create three lavender flowers.  Use Susan's Flower Tool Kit to shape the flowers.  Assemble and attach the flowers to the lower left corner of the card.

I hope you like my Valentine.  Be sure to go over the the Elizabeth Craft Designs blog to see all the other Valentines created by the design team.  Be sure to leave your comment to be eligible for the drawing for a $20 gift card.

You can shop for the products I used by clicking on the product links below.

Thanks for stopping by.


Friday, January 19, 2018

Gold & White Valentine


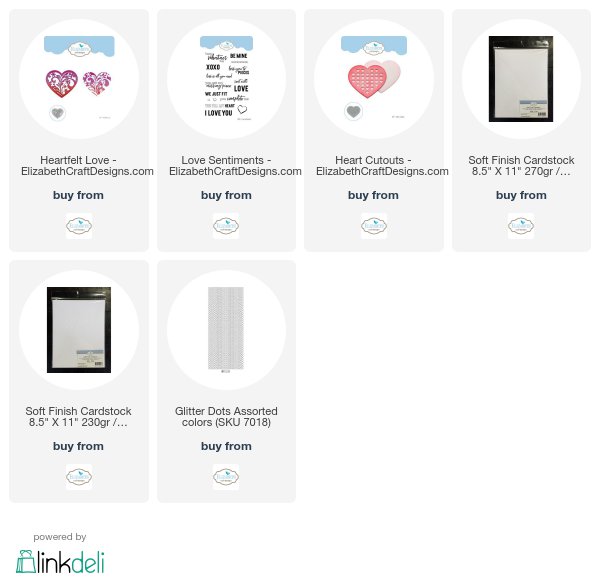
Today I have an elegant Valentine card created with the new Becky Seddon Heartfelt Love die set.  Isn't that a beautiful heart!

This is a 6 inch card.

Use a piece of white card stock 6 inches square and tape down the Heartfelt Love die without the outer heart die.  Run through your die cut machine.  This will die cut the intricate design into the card stock.

Use the Heartfelt Love die set and die cut the intricate heart with the larger heart die on the outside to cut out the heart.  Glue the die cut heart over the design die cut into the 6 inch square.  Line it up so all of the design matches.  

Use the Heartfelt Love die set and use only the outline die to die cut one gold heart.  Attach the gold heart to the back of the intricate heart .  

Attach the heart panel to the front of the card using double sided dimensional tape.

Use the Love Sentiments stamp set and gold emboss the sentiment on the lower right corner of the card.

Use the Hearts Cutouts die set and die cut gold hearts.  Add the small hearts on the lower portion of the card, as shown.

Add Gold Corner Peel Off Stickers to the upper corners.

Add glitter Dots to the center of the die cut flowers in the design.

You can shop for the products used from Elizabeth Craft Designs by clicking on the products shown below.


Friday, January 12, 2018

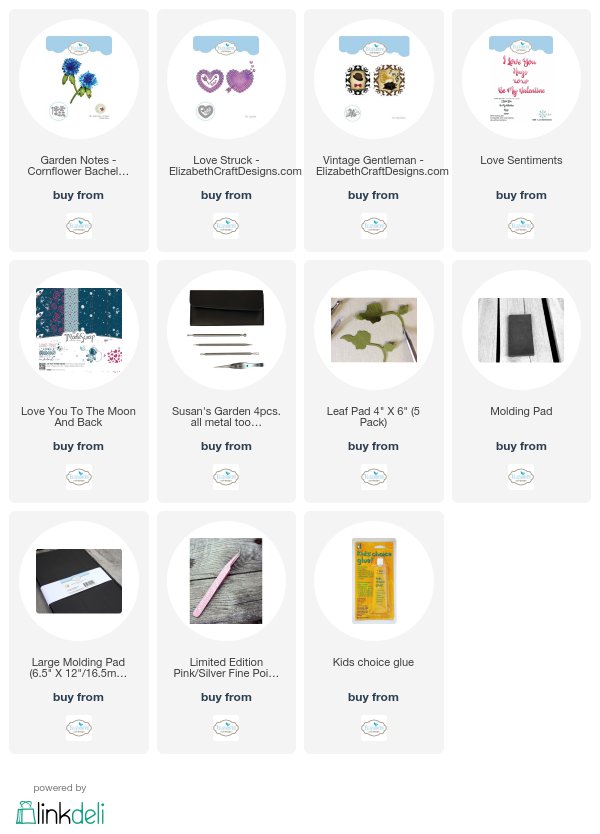
Bachelor Button Masculine Valentine


Today I wanted to create a masculine Valentine card.  Elizabeth Craft Designs has a new release with dies that are perfect to create such a card.  

This is a 6-inch square card.  A piece of the ModaScrap Love You To The Moon paper pack was cut to fit the front of the card.

Use the Love Struck Heart die set and die cut the large heart twice - once in a tan card stock and once using white card stock.  Attach the two hearts together to make it stronger.  Attach the heart in the center of the card, using dimensional tape.

Use the Love Struck Heart die set and die cut the Arrow once using gray card stock and once using white card stock.  Attach the two pieces together to create a strong die cut.  Die cut the small heart using a bright pink card stock to match the hearts in the design paper.  Use the three heart die to die cut the small heart and attach it to the back of the gray heart at the end of the arrow.  Glue the bright pink inside the center opening of the gray heart.

Use the new Garden Notes Cornflower Bachelor Button die set and die cut enough pieces to create three Bachelor Buttons, using a bright blue card stock.  Shape the flowers using Susan's Flower Tool Kit.  Attach to the lower right bottom of the die cut heart.

Use the Vintage Gentlemen die set and die cut the brown derby using brown card stock for the top and black cardstock for the solid derby.  Glue the brown die cut over the black die cut.  Attach the derby with dimensional tape to the upper left side of the die cut heart.

Use the Vintage Gentlemen die set and die cut the two pieces of the Bow, using bright blue card stock.  Attach the die cut bow over the stems of the Bachelor Buttons.

Use the Love Sentiments die set and die cut the LOVE twice - once using the bright blue card stock and once using white card stock.  Attach the two pieces together.  Glue to the heart below the derby.  

Be sure to go check out all the fun new die sets from Elizabeth Craft Designs, that have just been released.  


Tuesday, January 9, 2018

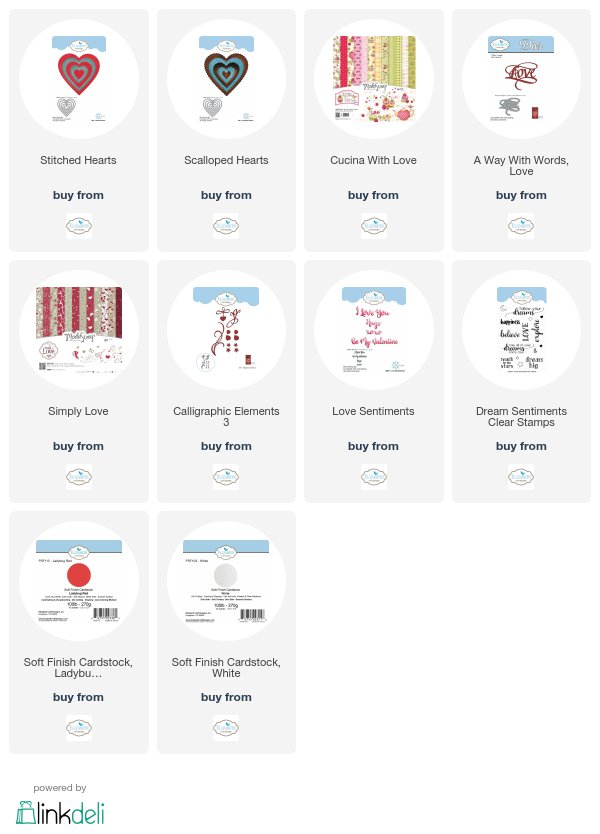
You Fill My Heart


Valentine's Day is not far away so I have been working on some Valentines using products from Elizabeth Craft Designs.

This is a 6-inch card.  Cut a 5 3/4  inch piece of design paper from the Simply Love paper pack.  Score around the edges on a Score Board for a finished look, then attach to the front of the card.

Die cut the large red and small red hearts using the Stitched Hearts die set.  

Die cut the white Scalloped Heart and attach over the large red heart, using dimensional tape.  Attach to the front of the card. 

Die cut the 'you' from the Love  Sentiments die set, using red card stock.  

Use the Love Sentiments stamp set and stamp the sentiment that reads "You Fill My Heart", using black ink onto white card stock.  Cut out the 'Fill My' from the stamped sentiment.  Color in the words with a red marker.  Attach to a small piece of red card stock and cut a small border around the sentiment.

Use the A Way With Words Calligraphic Elements 3 die set and die cut the heart with the ribbon attached.  

Use the Hearts Cutouts die set and die cut using red card stock.  Use one of the small hearts and glue to the middle of the white heart with the ribbon.

Use the A Way With Words Love die set and die cut the sentiment using red card stock.

Glue the sentiments and hearts to the front of the card, as shown.

For some added "glam" add a few red rhinestones.

All the products from Elizabeth Craft Designs are linked below.

Thank you for stopping by today.


Wednesday, January 3, 2018

Love


It is time to wish you a Happy New Year!  Our next holiday will be Valentine's Day.  Nothing represents this special day better than roses and hearts (or is it Chocolate for some of you!).  Today I have designed a card using Susan's Garden Rose 1 die set and the Elizabeth Craft Designs Scalloped Hearts die sets. The beautiful sentiment is one of the A Way With Words die cuts.

This is a 6 inch square card.

1.  Emboss a piece of white cardstock using the  Hearts & Strings Embossing Folder.  You will have to place the white card stock inside the embossing folder twice in order to emboss the entire piece.

2.  Use the Scallop Heart die set and die cut all the hearts in the set except the largest heart.  Attach the hearts together using dimensional tape.

3.  Use the Susan's Garden  Rose 1 die set to create one rose.  Die cut the petals using white card stock.  Use the bright pink PanPastel to shade the lower portion of each petals.  Shape the petals using Susan's Flower Tool Kit and assemble the rose.

4.  Use the Susan's Garden Rose 1 die set and die cut 7 rose leaves.  Use Susan's Leaf Tool to draw veins on the leaves.  Color the leaves using light green PanPastel.  Shape the leaves using the Flower Tool Kit.


5.  Use the Garden Notes Queen Anne's Lace die set to create Baby's Breath.

6.  Use the small petal die plate and die cut eight times, using white card stock.  Remove the card stock from the die cutting machine and leave the die attach.  Place the card stock onto the black molding pad and punch down through the holes in the die with a small stylus.  This will push the small flower out and shape it at the same time.  

7.  Die cut the stems using the Queen Anne's Lace die set.  I have shown three stems here, but only needed two for the one rose.


8.  Use Kids Choice Glue to spread glue down one long stem.  Add a small dot of glue to work sheet or paper plate.  Use the Elizabeth Craft Designs Tweezers to pick up one small flower, dip bottom in glue and attach to the stem you have added the glue.  Add small flowers down the entire stem.  You don't have to be precise about adding the flowers at this point.  You are starting the base to add additional flowers to create a fuller stem of baby's breath.  Glue small flowers to each stem.  Allow to dry.  Complete this process on one more die cut branch.   


9.  Once the glue has dried on the first step of adding the small flowers, start adding additional flowers to create a cluster of flowers on each stem.  This time pick up small flower with the tweezers and dip back in glue and lay on top of first layer.  You can add flowers to create a wider stem as shown above.  Allow the glue to dry completely before continuing with these die cut pieces.

10.  Once the baby's breath pieces are dry, cut each piece in half.  You will have four clusters that can will be added under the rose.

11.  Use the A Way With Words Baby Love die set and die cut two 'love'.  Glue the two die cuts together.  Glue the sentiment to a piece of white card stock.  Use scissors and cut around the sentiment, leaving a small border.  Attach the sentiment to the lower right corner of the card front, using dimensional tape.

12.  Attach the pink hearts to the upper right side of the card front, as shown.  Use dimensional tape under the largest heart.

13.  Attach the Rose on the lower left side, using a dimensional glue dot.  Glue the rose leaves and the baby's breath under the rose

14.  Add a string of pearls across the bottom edge of the card.  Add small pearls in a heart shape in the center of the smallest pink heart.  Add Clear Glitter Dots on the largest and second largest pink heart, as shown.  Add one larger pearl in each upper corner of card.

You can shop for products used from Elizabeth Craft Designs by clinking on the links below.


Sunday, February 3, 2013

Cupid


 I love the Savvy Dies "Cupid" and the Memory Box "Precious Hearts" dies to create a very romantic type card.   I started by embossing the background with the eBosser "Delicate Dots" embossing folder.  I used two frames behind the little "Precious Hearts"; the one in the back is the Memory Box "Twirling Vine" and layered on top is one of the dies from the Marianne Design (LR0235) doily set.  I used Claudine Hellmuth's Studio Multi-medium Matte adhesive to glue these pieces down.  This is a wide mouth jar and you can either dip portions of the die cut into the adhesive or use a brush to pick up glue and spread on your die cut.  

The roses were created using the Spellbinders "Spiral Blossom Four" and the MFT "Royal Rolled Rose" dies.  They were die cut using white card stock and sponged with Spun Sugar Distress Ink before rolling them.  I used a variety of leaves to tuck around the flowers:  Marianne Design (LR0117), Marianne Design (LR0226) and Memory Box "Tender Leaves" (98313) to give the background fullness.   I had a pretty fluffy white feather in my stash and tucked that down in between the flowers. The "Cupid" was attached using a dimensional glue dot.  To add a little more "elegance" to this card, I added a lot of Kaiser Craft "Blush" pearls. A bow was made with the "Bow Easy" and placed down in the corner.  For the sentiment,  I used a very small stamp, from my stash, that says "Hugs" on the largest of the "Precious Hearts".  


Savvy Dies "Cupid" #10075
Memory Box "Precious Hearts" (98474)
Memory Box "Twirling Vine" (98299)
eBosser "Delicate Dots" embossing Folder
Marianne Design "Doily Set" (LR0235)
Spellbinder "Spiral Blossom Four" S4-364
MFT Die-Namics "Royal Rolled Rose"
Marianne Design "Leaves" (LR0117) (This set also has a doily)
Marianne Design "Leaves" (LR0226)
Memory Box "Tender Leaves" (98313)
Dimensional Glue Dots
Kaiser Craft "Blush" Pearls

861107

Thursday, January 31, 2013

Joan's Gardens Weekly Challenge


Boy, this week has gone by fast.  It is time for a new challenge at Joan's Garden.   The challenge this week is very easy - the only requirement is to create a "Vintage Valentine"
One of the new Memory Box dies  is this cute "Box Heart Pocket".  It is one piece and clips together with that little heart in the front.  It is the easiest little box I have ever made.  On the inside of it I added another new Memory Box Die "Loom Circle".  I used it as a "filler" behind a piece of chocolate.  

Something I have been wanting to do is create flowers with design paper.  I had some old paper that had large flowers on it that would be hard to use on a small card, and it was double sided, so I used the Spellbinders Blossom I and MFT "Royal Rolled Rose" dies to create these flowers.  Before I rolled them, I sponged on Distress "Fired Brick and Aged Mahogany" Inks then lightly spritzed with water to blend the colors.    I used Rangers "White" Distress White Acrylic Paint Dauber" to add some white to a few of the petals.  Once the flowers were assembled, I used the Ranger Gold Acrylic Paint Dabber to add gold to the tips of the petals.  I love the look this gave the flowers.  I added the Heartfelt Creations Bella Rose die cut flourish behind the flowers.  

For the background I used a piece of vanilla card stock and embossed it using the Sizzix "Heart and Ornate Frame" embossing folder.  Tea Dye Distress Ink was sponged over the embossed part using the Ranger Blending Tool.  This helped give me the "Vintage" look.  There is a heart in the center of this embossed background and I attached the Memory Box "Box Heart Pocket" over it.   On the bottom of the card I added a piece of design paper from the Prima "Reflections Collection" paper pad and added a Cheery Lynn Border at the top of it.  To complete the "Vintage" look, I added a piece of seam binding that was stained with the Ranger Fired Brick and Aged Mahogany" inks and a couple of Kaiser Craft pearls.

Joan completed a valentine for this week's challenge you will want to see.  She used some of the new Die-Versions dies.  Please go over to her blog to see her beautiful card and to get all the information about this week's challenge.  We hope you will joining us this week.


Memory Box "Box Heart Pocket" die 98509
Memory Box "Loom Circle" 98520
Spellbinders Blossom I die
MFT Royal Rolled Rose die
Heartfelt Creations "Bella Rose" flourish die
Sizzix "Heart and Ornate Frame" embossing folders 657339
Cheery Lynn "Lace Light Deco Border" B133
Distress Inks
Ranger Paint Daubers
Seam Binding
Prima "Reflections Collection" design paper pad
Kaiser Craft black pearls

858744

Sunday, January 27, 2013

Red and White Valentine


Have you created all your Valentine Cards?   Memory Box has this beautiful heart die I had fun working with today.  This is the Memory Box "Heart Ensemble" die.  I die cut it layering a piece of red card stock and a piece of design paper so I only had to die cut it once.  I pulled the pieces apart and used the red outline then pieced in the plaid pieces.  I attached this to a piece of card stock that was embossed with the eBosser "Delicate Dots" embossing folder.  The sentiment is die cut using the Cheery Lynn "Love" die.   

Roses always look great on a Valentine card so today I created one large rose and three rose buds, using the new Cheery Lynn Build A Flower #3 dies.  The large rose was created using the largest "pear" shaped petals and the buds were created using the smaller "pear" petals. When you are creating flowers with the Build A Flower dies, you can follow the tutorials I have listed in my side bar for creating roses.  I build up many layers using a "flower base" then adding a "petal" to each point on the base.  I always use the flower tool kit and embossing pad to shape each petal.  To create the buds, I add glue to the front side of four or five small petals, then wind them around the self closing tweezers that are in the Flower Tool Kit.  The green on the outside of the buds is from the Build A Flower #2 embellishment dies.  

There are three different types of greenery (leaves) behind the roses.  I used the Marianne Design (LR0245) die, and the Cheery Lynn Rose Leaf Strip, and the Cheery Lynn Flourish Leaf Strip.  You can die cut your leaves using green card stock, but I really like to die cut them using white card stock then use Peeled Paint Distress Ink and the blending tool to add color.   When I sponge the color on the die cuts, it makes the embossed areas (details) in the leaves really show up.   I only used Peeled Paint on these leaves, but you could add more contrast by using several shades of green Distress Inks.  

There are some small flowers in the Build A Flower #3 dies/Embellishements that I added around this arrangement.  A few Cheery Lynn "Wreath Strips" branches were tucked in around the flowers and yellow Stickles added to the center of the white flowers.  


The inside of the card was completed by adding the Memory Box "Twirled Heart Border" down the right side and the sentiment pieces from Cherry Lynn. I die cut the border using both red card stock and the plaid design paper.   One of the little hearts from the "plaid" border was added down in the corner to help tie it in with the front design. 

I have received a lot of emails asking about how I'm feeling.  I am still having lots of migraine headaches and lots of neck and back problems from our car accident out on the highway.  They told me I have a cracked rib, but the way it hurts, I feel like it is broken!  My daughter's card was totaled so we are in the process of helping her find a new car.  I know I have been a little show in posting, but I love to work on cards when I feel well enough to do it.  I just completed a project I am excited to show you next Tuesday when we will be doing the Heartfelt Creations Alumni  Design Team Blog Hop.  Be sure to check back then. 

Memory Box "Heart Ensemble" 98479
Memory Box "Twirled Heart Border" (on inside) 98279
eBosser "Delicate Dots" embossing folder
Marianne Design "leaves" (LR0245)
Cheery Lynn Build A Flower #3 and Embellishments #3
Cheery Lynn Build A Flower #2 Embellishments
Cheery Lynn "Rose Leaf Strip" B241
Cheery Lynn "Flourish Leaf Strip" B178
Cheery Lynn "Wreath Strip" B216
Cheery Lynn "Love" B227
Cheery Lynn "Happy" B226
Cheery Lynn "Valentine's"  B229
Cheery Lynn "Day" B236
Yellow Stickles
Peeled Paint Distress Ink Pad
Blending Tool

855848

Thursday, January 24, 2013

Joan's Gardens Weekly Challenge


Valentine's Day is fast approaching so this week at Joan's Gardens, our challenge is to create a Valentine for someone special. 

Here are the requirements for this challenge:

  • Use pink and white 
  • Use at least one heart
  • Use a pretty border

For my Valentine, I chose to use the new Memory Box "Bingham Heart".  I love the dainty details in this heart.  It was die cut using green card stock then again using pink.  All the little pink flowers were sniped off and glued onto the green heart.  I die cut a solid heart using the MFT "Layered Heart" die and glued the Bingham Heart along the edges.  The reason I die cut the solid heart is because the background piece was embossed with the eBosser "Gracious Argyle" embossing folder and it would have been hard to stamp the pretty sentiment from the Our Daily Bread "Sentiments Collection" on the embossing.  On the Left side of the card I added the Memory Box "Contempo Circle Border".  In the right side corners, I added a Cheery Lynn die cut corner.  When I stamped the sentiment, the little hearts were outlined in black, so I used the Martha Stewart "Loops Heart" corner punch to get the little pink hearts to glue in the center of the three hearts stamped in the sentiment.  The three little hearts from that punch fit perfectly.  To complete the card, I added Kaiser Craft pink rhinestones along the left side and in the center of the flowers.  

I hope you will join us in our challenge this week.  I am sure there is someone special you who would love to receive a Valentine from you.  


Memory Box Bingham Heart (98499)
Memory Box Contempo Circle Border (98451)
MFT Die-namics Layered Heart
eBosser "Gracious Argyle" embossing folder
Cheery Lynn Corner (B164)
Our Daily Bread "Sentiments Collection" (E334)
Martha Stewart "Loops Heart" corner punch for small hearts on sentiment.
Kaiser Craft Rhinestones 

853116

LinkWithin

Related Posts with Thumbnails