Showing posts with label Shadow Boxes. Show all posts

Wednesday, October 3, 2018

Christmas Shadow Box Tutorial

Inside of Shadow Box Card


Close-up of shadow box


Side view of shadow box

Front of Shadow Box Card


This is a 6-in square card when closed, with a dimensional shadow box inside.  The instructions for the cover for this shadow box was posted yesterday.  Here is the LINK.

To create the shadow box, begin with a piece of white card stock 6 x 12 inches.
Score at 6 and 6 1/2 inches.  Crease score lines with a bone folder.  This piece becomes the outside cover of the card.  For the sentiment on the  inside left side cover, use the A Way With Words-Merry Christmas die set and die cut one gold metallic sentiment.

Cut a piece of white card stock 6 x 6 1/2 inches.  Score at 1/2 inch, 5 1/2 inches, and 6 inches.  Crease with a bone folder for a crisp fold line.


Use the Garden Notes Frame It/Stitched Square die set to die cut an opening.  Use the 2nd largest die and center and tape in the middle of the 5x6 inch section of the piece previously scored.  


Cut a piece of white card stock 5 x 6 inches.  This piece will become the background in the shadow box.  Use Susan's Snowstorm and Mounds Stencil to sponge on snow mounds in the middle of this piece.  Use light gray or light blue ink.  Sponge light blue ink above the snow mounds - this will be the sky.  Use the same stencil to sponge VersaMark Ink over the falling snow portion of the stencil - above the snow mounds.  White emboss the  falling snow.


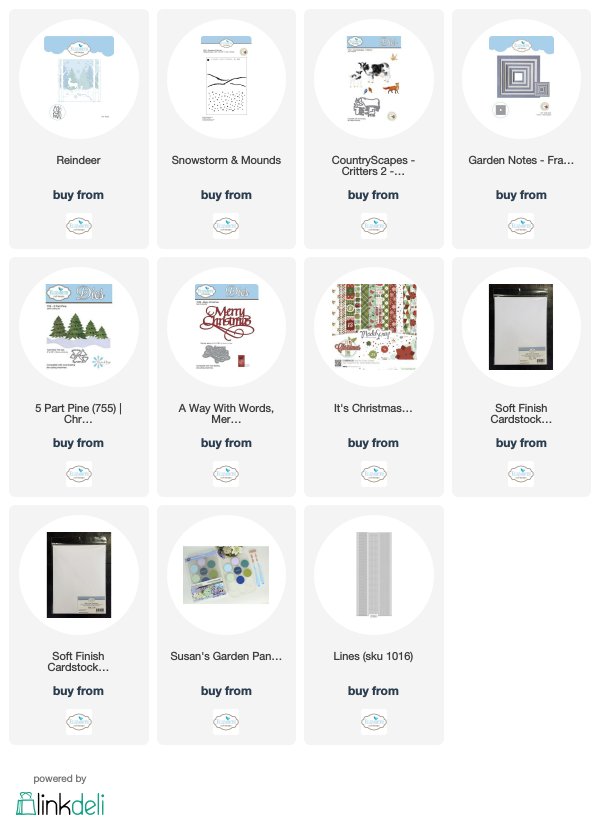
Use the Reindeer die set and die cut two snow mound pieces.  Attach these pieces together to create two levels of snow mounds.  They will be uneven on the ends, but you can trim them straight.   


Attach the snow mounds to the backside of the open frame, using 3mm Clear Double Sided Adhesive, only along the sides and bottom.  You will be adding die cuts between the snow levels.


Add a strip of 6mm Clear Double Sided Adhesive to each end of this shadow box.  

Use the Reindeer die set and die cut three large birch trees and one small tree.  To add dimension to the shadow box, the trees are attached at different levels.   Glue two large trees into snow - one on the left behind the lower snowbank and one behind the edge of the frame on the right. Ends of the branches can be pulled over the edge of the frame.  Add a second large tree next to the tree on the left but behind the higher snow bank.  This will give it dimension.  The small birch tree is attached to the background piece so it shows to the right of the two trees on the left.

Use the Five Part Pine die set and create the green pine tree.  Cut a narrow long strip of card stock to attach to the back of the tree to make it sturdy.  Attach at the bottom of the frame, as shown.  

Use the Reindeer die set and die cut two reindeer.  Glue the two pieces together.  Sponge on color and attach as shown.  Only the legs are attached at the bottom of the shadow box.  

Use the CountryScapes Critters die set and die cut the small birds.  Color them red and attach as shown on the branches and the flying bird to the background, which gives dimension when the card is opened.  

 Use the ModaScrap Christmas Time Card stock to cut two narrow strips of stripped paper to go along the top and bottom of the shadow box window.

Attach the shadow box to the inside of the card.  Remove the covering on the Clear  Double Sided Adhesive on the left side and attach to the cover which was created at the beginning of this tutorial.  To attach the right side, you might want to make a light pencil mark 3/4 inches from the right side of the card back for placement of the right side of the shadow box.  The shadow box should fit perfectly square when the front cover of the card is pulled back so the front is level.  

Glue the back of the inside panel (the one with the snow, one tree and flying bird) behind the shadow box frame.  Slide down inside the shadow box frame.  It is easier to use glue to attach this so you can slide it around to fit perfectly behind the frame.  To make sure it is pressed down, use a ruler to press it down.


The depth of the shadow box is 1/2 inch.  Because it is attached 3/4 inch from the right side of the cover, it will fold down flat for mailing.

To decorate the edges of the stripped pieces at the top and along the right side of the shadow box, add Gold Peel Off Line Stickers.

The front of this card is dimensional.  It will fit nicely in one of the clear acrylic boxes which is linked below.


Saturday, June 27, 2015

Lilacs in Shadow Box


Today I have created a shadow box out of a piece of 12 x 12 card stock and filled it with pretty lilacs created with Susan's Garden Notes Lilacs.

I want to give credit to Amanda (The Craft Spa Blog), where I saw this type of shadow box.  Here is the link .  In the bottom of the box I glued in a piece of white card stock that was embossed with the Damask Embossing Folder.  It was glued down before gluing down the sides of the shadow box.  I created two light purple and two dark purple lilac stems and arranged them in the box.  Behind the lilacs I added 8 branches from the Flourishes & Branches die set.  On the top I added purple design paper.  Along the bottom, is a banner label from the Lorna Label PopUp die set. Stickers were used for the sentiment and two purple brads added at each end.  The white flourishes are from the Flourishes & Branches die set. To complete this shadow box, I added two ECD Small Butterfly die cuts.

I have had emails asking about my foot.  It is really slow going.  I am able to put partial weight on my foot and can not do much walking yet.  I will start physical therapy next week.  I am not able to sit with my foot down very long or it gets very swollen and painful.  I am working on my cards in spurts!  I am so happy to be creative again.

Links to products from Elizabeth Craft Designs:


Monday, April 20, 2015

Dogwood Shadow Box


Today is my turn to design a project for Susan's Design Team on the Elizabeth Craft Designs Blog.  I created a dogwood flower shadow box with Susan's Garden - Dogwood dies. Dogwood flowers are either white or pink. I love the delicate pink flowers so that is what I have created for this shadow box.

ECD-STCDT-April2015-B
 The finished shadow box is 6"x 6". With the pretty lacy top, the height is 7-1/2". On the side, I created an accordion fold so it will push down flat. The instructions are below.

ECD-SGDT-April-2013-tut1
1. Creating the flowers: Die cut all the petals using white cardstock. Use the Leaf Tool from Susan's Garden All Metal Flower Tool Set to draw vertical lines on each petal, as shown in the picture below. Then use the medium-sized ball stylus to shape each petal on the backside.

dogwood-picture
2.  To create the color of my flowers, I used the picture above to try and duplicate the delicate pink on the petals.

ECD-SGDT-April-2013-dogwood
3.  Above is a picture of the dogwoods I created.

ECD-SGDT-April-2013-Tut2
4. To achieve this coloring, use Rouge Pan Pastel (light pink) across most of the petal leaving the top and base of the petal white. Next, rub in Magenta Pan Pastel in the center, blending it well over the light pink Pan Pastel.  As a rule, I generally color my petals before shaping, but for this flower, I found it was easier to get the color in the middle by bending the shaped petal over my finger and applied the Pan Pastel with Fantastix Coloring Tool Brush Point.

ECD-SGDT-April-2013-Tut3
5. Next the four shaped petals were glued to the calyx (base) die cut piece. Once the petals have dried on the calyx, you can use the tweezers to add additional shaping.

ECD-SGDT-April-2013-Tut8
6. To create the stamen, use the Fine Pointed Scissors to cut between each stamen projection to make them thin.  The stamen was then rolled and glued closed and placed in the center of the flower using the self-closing tweezers in Susan's Tool Set. Once the stamen was firmly attached in the center of the flower, add Viva Light Moss Green Paper Pen to the tips of each stamen. Put a very tiny dot on both the front and back of each projection.

ECD-STCDT-April2015-Tut-1
7. I wanted to create a shadow box that would fold down flat. Start with a piece of 18" x 12" cardstock and cut it down to 18" x 6".  To create accordion sides, score it at 4-1/2",  5",  5-1/2", 11-1/2", 12" and 12-1/2".

ECD-STCDT-April2015-Tut-2
8. The picture above shows how the accordion sides are folded. To create the accordion folds, with top side up, create a valley fold on the center score line and a mountain fold on the two outside lines. Do the same thing on the other score lines. Crease the folds well with a brayer or Bone Folder tool.

ECD-SGDT-April-2013-Tut4
9.  Use Susan's Garden Patch - 1 1/2-inch grid die for the window.

ECD-SGDT-April-2013-Tut5 
 10. The die was taped to the front of the card in between the score lines and die cut. This will fit because the card is 6" tall.
 
ECD-SGDT-April-2013-Tut6
11. The grid die cut a perfect opening for the Shadow Box. I did not use the little squares, but did use the die cut frame for the inside of the box.

ECD-STCDT-April2015-Tut-3
12.  Before attaching the Shimmer Sheet to the inside of the card, the panels on the back of the shadow box were taped down with transparent Double Sided Tape, to create the box.  To get the back panel folded exactly right, a piece of 6x6 inch card stock was placed in the back scored lines then the back panels were taped down.  When you place the colored 6"x6" card stock in the back, you will get a perfectly square box.


ECD-STCDT-April2015-Tut4
13.  This photo shows how the back pieces overlap.  A 6x6 inch piece of card stock is glued to the back of the card to finish the backside.

ECD-SGDT-April-2013-Tut7
14.  For a pretty background for the dogwoods, I used a piece of the ECD Pink Iridescent Shimmer Sheet and embossed it using the ECD Heart Strings Embossing Folder.  The white die cut Grid was glued over the Shimmer Sheet (it is not glued together in this picture).    Next, the shadow box was pressed down in a flat position, and the grid was glued in so it perfectly fit inside the die cut opening.

 ECD-STCDT-April2015

15.  To complete the shadow box, I used Purple/Silver Glitter border stickers on each side of the opening then attached additional dogwoods.  Across the top of the box I added two Paris Edges die cuts.  One was glued to the inside of the front and the other cut shorter and glued to the top side of the frame.  A piece of glitter paper from the edge of the glitter border was used at the top of the opening and along the bottom, I used some of the "scraps" from both the Paris Edge die cut and the from the border sticker sheet.

Shadow Box Cards are very easy to create.  I hope you enjoyed this project.

Products from Elizabeth Craft Designs:
1009 - Susan's Garden Dogwood
808 - Susan's Garden Tool Set
809 - Susan's Mini Molding Pad
802 -Fine point scissors
Susan's Garden Patch - 1 1/2-inch grid & Mini Petals die

E112 -Heart Strings Embossing Folder
SS0104 -Pink Iridescent Shimmer Sheet
506 -Transparent Double Sided Tape
7045 - Purple/Silver Glitter Ribbon Branches border stickers
979 - Paris Edges

Other Products used:
17"x 6" card stock for Shadow Box
Score Board
White Card Stock
340.88 Rouge, Pan Pastel (light pink)
430.5 Magenta Pan Pastel
"Fantastic" Coloring Tool Brush Point
Viva, Light Moss Green, Paper Pen
Glue
Bone Folder Tool


Tuesday, November 26, 2013

Heartfelt Creations Alumni Design Team Blog Hop

 Heartfelt Creations Shadow Box

The Heartfelt Creations Alumni Design Team has a great Blog Hop for you this month.  There are 16 designers participating, which will give you a lot of inspiration using your Heartfelt Creations stamps, dies and design papers.  Would you like to have a chance to win a $25 Gift Certificate to Heartfelt Creations?  All you have to do is visit each designers Blog Hop post and leave a comment.  You have until Friday, November 29th at midnight to leave your comments, then a random drawing will be held from one of the 16 blogs.  The winner will be announced at noon, Saturday, November 30th. 

Here are the 16 designers participating in this blog hop:

Caroline Duncan
Amarilys Doria 
Deneen Treble 
Vicki Dutcher 
Cibele Glazer 
Emilia van den Heuvel 
Giovana Smith 
Selma Stevenson  (you are here)
Alissa Wells
Linda M. Loew 
Lee Ann Barrett
Mary Faus 
Candy Slabaugh 
Glenda Brooks 
Linda Payne 
Lisa Allen 

I love working with the Heartfelt Creations design paper collections to create beautiful cards.  This month I decided to create a Christmas Shadow Box.  I used one of the beautiful pages from the "Frosty Blanket Collection" to create this box.  The  Heartfelt Creations design paper collections always come with 2 sheets, each of 24-double sided, 12x12 papers.  For this box I needed two identical sheets of design paper,.

 My finished shadow box is 6" square.  For the box, cut two pieces of white card stock 6 1/2" x 6".  Score down the 6 1/2" side, 1/4" from each end. Next, cut the design paper creating a 6x6" panel -- cut two identical pieces.  One will be used inside the box and the other on the top.     Next cut 1/4" strips for the sides of the Shadow Box.  Adhere the design paper to the "top of the box. 

 For the inside of the box, attach the other piece of design in the center.

 Next you need to cut an opening on the top piece, for a window into the shadow box.  I used my paper cutter to cut a 1/2" border along the top and bottom, and a 1" border along the sides. 

 This is what the top will look like when you cut out the center of the design.  Save that piece cut from the center - we'll use it later.

This picture shows the top of the box with the side panels glued on.

 Before I attached the two pieces together to create a shadow box, I used the piece of design paper that was cut out from the top to create dimensional elements.  I cut out the snow above the door, the wreath, the door knob, sled and the bunny and holly.  They were attached over the design inside the box with dimensional tape.  In the bottom of the box I attached the sled and bunny with dimensional tape on the top portion of the cut out and added glue at the bottom (so the bottom would blend in with the scene.  Glitter was applied to all the snow areas.

I used a piece of clear card stock over the "window".  It was attached inside the card with Scor-tape. 


Scor-Tape was added down the side panels and the box assembled.  On top I added  a poinsettia created with the Heartfelt Creations Petite Poinsettia PreCut Set and cut out with the Layered Poinsettia Die.  The sentiment is from the Heartfelt Creations "Christmas Sentiment Circles PreCut Set".   

It was really hard to get a good picture of this card because of the glare the clear card stock created.  I love how this card turned out.  

Your next stop on this blog hop is to Alissa Wells

Be sure to leave your comment below for a chance to win the $25 Gift Certificate from Heartfelt Creations.

Here are the links at Heartfelt Creations for the products used:


Sunday, January 20, 2013

Shadow Box


Yesterday I received a bunch of new Memory Box and Poppy Stamp dies from Joan's Gardens.  Wow!  They are all so beautiful I hardly knew where to start. .  Making choices will be hard!  I love working with dies because it is such an easy way to create a quick card.  

I have not created a Shadow Box card for a long time, so decided the Memory Box "Honey Blossom Frame" would look great inside one.  I started with two pieces of card stock cut 7" x 6".  I scored down both sides of all four pieces at 7/8" so with the folds, the width of the front of this card is 5 1/2" x 6".  I used design paper from the Best Creation "A Walk in the Garden" 6x6" paper pad for everything on this card.  I love the little outdoor scene and thought it would create a beautiful background for the "Honey Blossom Frame".  I used the Memory Box "Debutante Frame", which is a solid backing frame, to go behind the die cut "Honey Blossom Frame".  This frame also works with many of the other Memory Box die cut frames.  A piece of 5 1/2" x 6"   design paper was attached to the inside of the shadow box.  Don't attach the die cut frame yet.

To create the front of the shadow box, I first cut a piece of the design paper and glued it to the center portion of the front of the box, like I did for the inside.  The Memory Box "Debutante Frame" die was centered  over that design paper and die cut. Be sure to tape it down so it doesn't move.   Now I have the opening that matches the "Honey Blossom Frame" that will be inside the shadow box.  The front and back pieces were laid flat on top of each other, then the "Honey Blossom Frame" (with pop dots on the back) was placed in the opening and pressed down onto the inside of (the bottom of) the box.  

To complete the decoration on the front (top) of the shadow box, I used a stripped piece of design paper, from the same paper pad, for the sides.  On the front I die the Memory Box "Butterfly Vine Border" twice - once in green and once in purple.  The top portion of the green border was placed on the right side of the frame and the left over part (bottom portion) was attached to the left side.  This beautiful border is 9.6" long and is very easy to divide if you want smaller portions.  The little butterflies were cut off the purple border and glued over the butterflies on the green border.  


You can see in this picture how the "Honey Blossom Frame" is down inside the shadow box.  To add a little more dimension, I die cut one of the new Poppy Stamps cats - this one is the "Large Curious Cat". Poppy Stamps has a lot of new cat and dog dies cuts.   It was attached along the bottom of the frame with a piece of ScorTape.   The trim I used along both sides of the box was die cut using the MFT "Little Open Scallop Strip.  This border is 6" long and fits perfectly down the sides to complete this card.

Best Creation "A Walk in the Garden" Design Paper Pad
Memory Box "Honey Blossom Time Frame" (98455)
Memory Box "Debutante Frame" (98297)
Memory Box "Butterfly Vine Border" (98458)
Poppy Stamps "Large Curious Cat" (874)
MFT "Little Open Scallop Strip" for the border on sides
Pop Dots

850209  

Thursday, May 24, 2012

Joan's Gardens Weekly Challenge and a Winner


First I want to CONGRATULATE the winner of the $100 Cheery Lynn Prize package -- Donna P.  Her name was chosen from  Joan Morrison's blog.  Thanks to all of you who left comments during our Blog Hop.  CONGRATULATIONS DONNA. You can read her comment over at Joan's Gardens.  Joan and I also want to thank all our Guest Designers for helping out with our Blog Hop and Cheery Lynn for donating the fabulous prize package.

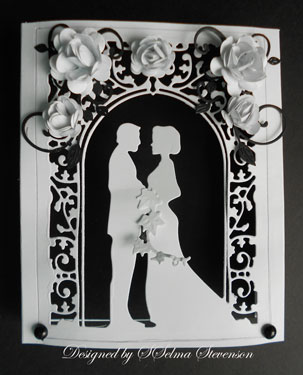
It's time for another challenge at Joan's Gardens..  This week we want you to create a Wedding Card.   I created my card using the new Cheery Lynn "Wedding Vows" die.  Isn't it beautiful.  It actually cuts out a Frame but I used this frame to create the front of the Shadow Box.

In this picture you can actually tell it is a Shadow Box.  Shadow Boxes are very easy to create.  The size of this shadow box is 5" x 6" when open and will measure 6" x 6" when you press it down along the side score lines.  Start with 2 pieces of card stock each 6" x 7". Score at 1" down the  7"  edge on both ends.  For a smaller shadow box, you can also use two 6"x6" pieces of card stock and score down 1/2" from the side edge, if you want a narrower depth from front to back.  


To cut the frame, I centered the frame, on the front, between the score lines, taped it down to hold it in place, and ran it through the die cutting machine.  

The frame will actually cut out all the way.  Since I want the frame attached to the front of my shadow box, I cut some narrow strips that will go along the cut edge.  You need to place the front of the shadow box down on your work area and fit the frame back in the opening.  Attach the narrow strips all the way around the cut seam of the frame to hold it in.  Since this is on the inside, it doesn't show.  A piece of black card stock was attached to the middle section, between the score lines, on the inside of the back piece.  

The top of the frame was embellished with roses, created with the Cheery Lynn  Medium and Large Rose dies.  I created two large roses and three medium roses.  Behind the roses is the Cheery Lynn "Mini Fanciful Flourish".  Between the Bride and Groom, I used a piece of "Ivy" from Marianne Designs.  On each side of the shadow box I add the pretty Cheery Lynn "Mini Flourish Band".

Products used:
Cheery Lynn "Wedding Vows" (FRM 138)
Cheery Lynn "Medium Rose" (B154)
Cheery Lynn "Large Rose" (B155)
Cheery Lynn "Mini Fanciful Flourish" (B117S)
Cheery Lynn "Mini Flourish Band" (B176)
Marianne Design "Ivy" (LR0206)

LinkWithin

Related Posts with Thumbnails