Showing posts with label Becky Seddon. Show all posts

Thursday, November 1, 2018

Baby It's Cold Outside


I really love this moose.  He was created with the Joset Designs Moose die set.  Suzanne Cannon's stamp was used for the perfect sentiment for this card.

This is a 6-inch card.  A piece of white card stock was cut 6-inches square and scored around the edges, which is used for the front of the card.  

Use Susan's Earth & Sky Stencil and the light blue PanPastel to create a cloudy sky, approximately half way down, on the 6-inch square piece of cardstock.

Use the Reindeer die set to create the pine trees.  Use a scrap piece of card stock and die the tree in the center of it to make a stencil.  Use a sponge and green ink to sponge inside the tree stencil.  Stencil the tree on the left; move the stencil over and sponge on a second tree, making it slightly darker green.  Move the stencil between the two trees and lightly sponge on green ink.  If the trees are colored different shades of green, it gives them dimension when sponged on the card.

Use a white opaque pen and create snowflakes in the sky and on the trees.

Use the Christmas Collection stamp set and stamp the sentiment, using VersaFine Black Ink, in the lower left corner.

Use the Moose die set and create one Moose.  I die cut the pieces using white Soft Finish Cardstock and sponged on tan and brown inks.  He was assembled using Kids Choice Glue.  Attach the moose using dimensional tape in the lower right corner.

For extra dimension and sparkle, use Nuvo Glitter Crystal Drops and draw in snow lines below the trees and under the hooves of the moose.

This card is flat enough to be mailed in a regular 6-inch square envelope.


Monday, September 24, 2018

Let It Snow


I did something a little different today.  I created a Christmas card using a heart die cut background.

Heartfelt Love

For the heart, I used the Heartfelt Love die set.  This heart has die cut swirls and flowers in it.  To use it for a winter scene, it was die cut using glitter card stock.  A piece of Soft Sky Soft Finish Cardstock was used to die cut the backing.

There are different size flowers in the heart die cut.  Snowflakes from five different die sets were used to cover the flowers.  A large snowflake was added in the center.   The die sets used for snowflakes include:  Snowflakes, Ornate Snowflakes, Penguin, Reindeer, and Hot Chocolate die sets.  The larger snowflakes include two different size die cuts for dimension.  In the center of the snowflakes, a light blue rhinestone was added.  The heart was attached to the front of the card.

The Moose die set was used to die cut the cute moose.  It was attached with dimensional tape.

The Santa's Sleigh die set was used for the gift.  The package and bow were die cut using white card stock with Clear Double Sided Adhesive on top.  Lavender Ice Silk Microfine Glitter was added to the package and Cool Diamond glitter added to the bow.

The Winter Sentiments stamp set was used for the sentiment.  It was stamped using VersaMark Ink and Silver embossed.

Three small snowflakes were added above the sentiment.

Product links are provided below.


Monday, April 2, 2018

You Can Never Have Enough of Nature


Becky Seddon's Garden Scene die set from Elizabeth Craft Designs is beautiful.  You can use this die set to create a beautiful quick and easy card or add embellishments.  


Here is a picture of another  card I made using the Garden Scene die set.  The Garden Scene was die cut and glued to a light blue backing.

Today I wanted to see if I could create a card with a laser cut effect on the front of the card, that would have open space to the inside.  I was able to create that look.

This is a 6-inch square card.

Use the Garden Scene die set and die cut the garden scene, centered on the front panel of the card.  

To make the die cut scene sturdy, use 100 lb Soft Finish card stock and die cut the Garden Scene, with the scallop frame around it, two times.  Glue these die cut scenes over the die cut on the front of the card, aliening  all the elements.  It is best to use glue, rather an clear double sided adhesive, because the glue will slide around making it easy to match up each element.

Use only the scallop frame from the Garden Scene die set plus the largest die in the Fitted Square die set and cut a narrow frame to go around the die cut scene.  This will give the piece a more completed appearance.  You can attach this frame with 3mm Clear Double Sided Adhesive.

Use Krista's Summer Sentiments clear stamp set for the sentiment.  Stamp using black VersaFine ink and clear emboss.  Die cut using the Stitched Fishtail Banner die set to cut out the sentiment.  Cut the left side of the banner so it will fit at an angle.  Attach to the upper left corner.

Use the CountryScapes Mini Botanicals Hollyhock die set and create one hollyhock stem.  Use the Flower Tool Kit to shape the flowers and leaves.  Add a couple of yellow Prills to the center of each hollyhock.  Attach to the lower left corner, beside the picket fence.

Use the Garden Notes Dogwood die set and create one flower.  Shape with the Flower Tool Kit.  Add pollen to the end of the stamens.  Attach to the upper left corner over the sentiment.

Use the cardstock in the ModaScrap Butterfly Dreams pack for the butterflies.  Cut five small butterflies out, using scissors, and attach to the front of the card as shown.


This picture shows the card open with the inside laying down.  To make the back panel stronger,  a 5 3/4 inch piece of white card was attached.  This will help the card stand up.


This is a picture showing the inside of the card.  There is nothing behind the die cut front.  A piece of Teal Soft Finish Cardstock was attached on the inside back panel.  Using a darker color card stock helps show off the die cut front when it is closed.  


This card is very pretty when standing open.  

Since the front of the card is open, the message will need to be written on the very back of the card.  

This card has only a little dimension and will probably fit in a regular envelope, or you can send it in one of the acrylic boxes.

You can shop for the products used by clicking on the products shown below.

Thank you for visiting today.  


Wednesday, February 7, 2018

Spring Fever


I love to create different scenes combining different die sets.  Today I used Joset's new Spring Basket and Bunny die sets to create a scene.  To add  additional fun Spring items to this scene, I used Becky Sneddon's Garden Scene die set.

This is a 6 inch square card.   

A piece of white 5 3/4 inch square card stock was scored around the edges.  

One of the Dashing Rectangle dies was used to die cut an opening at the top of the 5 3/4 inch square.   

Die cut a frame to go over the Dashing Rectangle opening.  The same Dashing Rectangle and one size larger Dashing Rectangle was used to die cut the frame. 

A piece of Soft Sky Soft Finish Cardstock was cut to fit behind the die cut opening.  

Use Joset's new Spring Sentiments stamp set for the sentiment.   It was stamped using VersaFine black ink and clear embossed.  

Attach the Soft Sky card stock behind the opening.  Attach the die cut frame over the opening, using 3mm Clear Double Sided Adhesive.  

Use the Bunny die set and create the back side bunny.  Attach the feet using a small piece of dimensional tape.  Use the same die set and die cut 9 carrots.  Color and attach the top to each carrot.  

Use the Spring Basket die set an die cut the Basket, grass and small flowers.  Attach a few of the die cut grass pieces just inside the front edge of the basket.  Attach 8 carrots inside the basket.  Attach the bunny to the right side of the basket, as shown.

Use the Leafy Branch Die and die cut one branch.  Cut the branch apart.  Attach some of the branches on the lower left side of the basket and a few on the right side.  Attach two of the die cut grass pieces to the left side of the basket.  Attach the remaining carrot down in the grass.  

Shape two of the flowers die cut from the Spring Basket die set and attach to the lower right side of the basket.  Prills were added to the center of all the flowers.

Use the Garden Scene die cut and cut it apart to add the extra Spring items to the card.  The pieces used include a piece of the tree, birdhouse, bird, fence and two pots of flowers.

I hope you enjoyed my card today.  

You can purchase the products used by clicking on the product links below.

Thanks for visiting my blog today.


Sunday, February 4, 2018

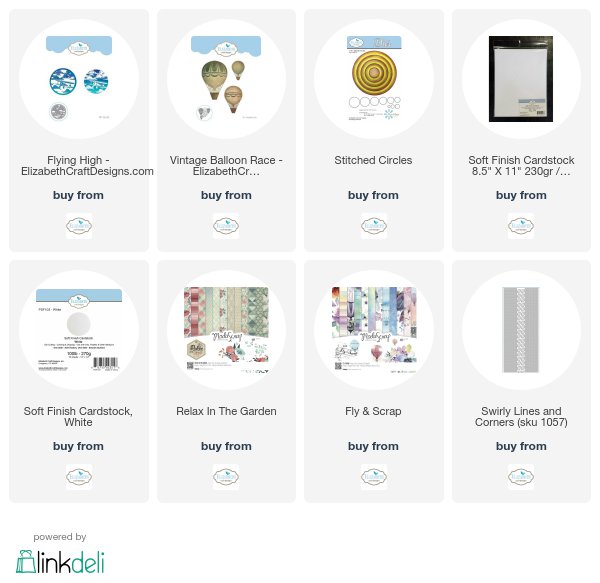
Balloon Race


I had so much fun creating this card. 

This is a 6-inch square card.  Use the piece of ModaScrap Relax In The Garden card stock, as shown, for the front of the card.

Use the striped piece of ModaScrap Relax In The Garden card stock  and the Becky Sneddon Vintage Balloon Race die set to die cut the Hot Air Balloon.  Use the same die and die cut it using a tan card stock.  Use tan card stock  and the solid balloon, to die cut the backing for the balloon.  Glue the solid balloon to the back of the detailed balloon.  Cut the strings/basket off the tan card stock and glue over the  front of the balloon.  Sponge brown ink on the basket for shading.

Use Gold Line stickers to decorate the top edge of the basket and use the small diamond stickers up on the top of the balloon and base of the balloon as shown.

Use the Flying High die set and die cut one white piece.  Use the same circle die and the next to the largest Stitched Circle die to create a round frame for the front of the Flying High die cut.  Remove the airplane from this die cut, using scissors.

Use the circle die from the Flying High die set and die cut one blue circle from a piece of the card stock from the ModaScrape Fly & Scrap card stock.  Glue this blue card stock to the back of the Flying High die cut.  Glue the circle frame to the front of this die cut piece.  Sponge light tan ink around edges of the white frame and very lightly over the edges of some of the clouds.

Attach the framed clouds to the front of the card.  Attach the Hot Air Balloon over the area where you cut out the airplane, using dimensional tape.

Use the gold line peel off stickers to frame the edge for the background card stock.

You can shop for the products used by clicking on the links below.


Monday, January 15, 2018

Becky Seddon Garden Scene

Today the Elizabeth Craft Design Team has create a variety of projects/cards using the new Becky Seddon products.  You can see all the projects created on the Elizabeth Craft Designs Blog at this LINK.

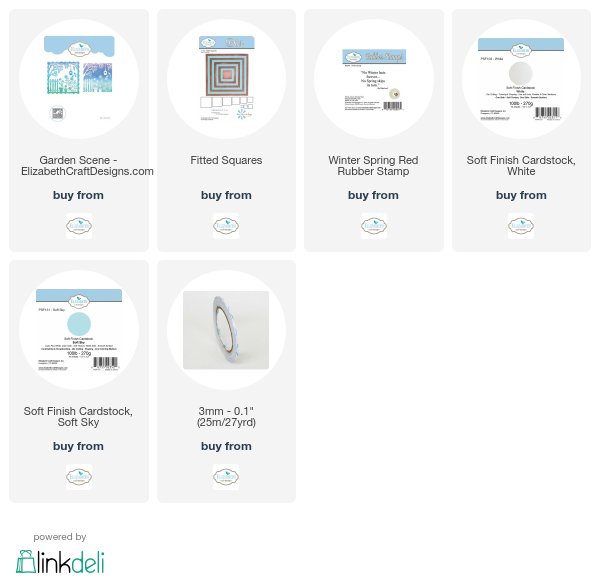
For my project, I used the beautiful new die called Garden Scene.  There are two dies in this set -- the beautiful die cut Garden Scene and the die for for Scalloped Frame.

Here is how I created my card:

This is a 6 inch square card.

1.  Use 100 lb White Soft Finish Card stock and die cut the Garden Scene.

2.  Use 100 lb White Soft Finish Card Stock to die cut the Frame.  Place the Scallop frame from the Garden Scene Die Set on the card stock then place the Fitted Square Die on the inside.  Tape the two dies together to die cut an open frame to fit over the Garden Scene.

3.  Use the scallop frame from the Garden Scene die set and die cut one using Soft Sky Soft Finish Cardstock to fit behind the die cut scene.  

4.  Attach the die cut Garden Scene over the Sky Blue Frame.

5.  Attach the open White scallop frame over the top of the die cut scene.  

6.  Attach the completed die cut scene to the front of a white card front, using dimensional tape.

7.  Use Susan's Seeds of Thought,  Winter Spring, stamp set to stamp the sentiment on white card stock.  Use scissors to cut just a small border around it.  Glue the sentiment to a piece of Sky Blue Cardstock and cut a small border around the stamped sentiment.  Attach to the front of the card as shown.

Becky's Garden Scene die set is perfect for a beautiful, quick and easy card that could be used for just about any occasion.

Be sure to go over to the Elizabeth Craft Designs Blog to view all the cards/projects prepared by the design team for this new Becky Seddon release.

You can shop for the products used by clicking on the links below.


Becky Seddon Lake Scene


This card was created with a new Becky Seddon die set from Elizabeth Craft Designs.  We usually have trouble creating masculine cards, but with this die set you can quickly create a beautiful card.

1.  This is a 6-inch square card.  

2.  Using the Lake Scene die and die cut the scene using White Soft Finish Cardstock.

3.  Use the Frame die from the Lake Scene die set plus one of the Fitted Square dies to create the frame to be attached over the die cut scene.

4.  Create a background for the scene.  Use a piece of white card stock and sponge on shades of blue and lavender inks, as shown.

5.  Attach the colored background to the back of the die cut scene.  Attach the die cut frame over the top of the die cut scene.

6.  Attach the framed scene to a piece of light blue card stock.

7.  Attach the frame to the front of the card.

8.  Stamp and die cut the sentiment using the Sentiments 1 die set and matching dies.

You can shop for the products used by clinking on the product below.


Becky Seddon Flying High


This card was designed using the new Becky Seddon Flying High die set from Elizabeth Craft Designs.  The design team has been busy creating cards with all the new producrts from this release.

Here is the LINK to the Elizabeth Craft Designs Blog so you can see all the cards created with the new Becky Seddon release.

Here is how my card was created.

1.  This is a 6-inch square card.  

2.  Cut a 6 inch square piece of white card stock for the front of the card.  Center the Flying High Die in the center of this square and die cut.  Color the plane with markers

3.  Die cut a second scene for  and cut out the airplane for a second plane.  Color the plane with markers.

4.  Use a piece of white card stock and shade with blue inks to represent the sky behind the die cut scene.  Attach behind the die cut.

5.  Use the circle die that is in the Flying High die set plus a die from the Fitted Circles die set to cut a narrow black frame.  

6.  Attach the die cut Flying High scene over the blue background.  Attach to the front of the card.  Glue the black circle frame around the opening of the die cut scene.

7.  Attach the second plane as shown, using dimensional tape.

8.  Use the stamp from the Plant, Grow & Bloom Stamp set and stamp it using black ink on white card stock.  Cut around the sentiment using scissors.  Sponge blue ink around the edges and attach to the card front using dimensional foam tape.

9.  Use Black Line Peel Off Stickers to go around the outside edges of the card front, as shown.  

We usually have a hard time designing masculine cards, and this die set is perfect for this.

Be sure to go over to the Elizabeth Craft Designs Blog to view all the other great new dies in the Becky Seddon Release.


Becky Seddon Vintage Gentleman


Today I have a card designed using one of the new Elizabeth Craft Designs Becky Seddon die sets.  I have only used a few dies from this set. 

1.  This is a 6 inch card.  Cover the front of the card with a piece of card stock from the ModaScrap Sweet Vintage Rose design paper pack.   Use Black Peel Off Corner Stickers to decorate each corner.

2.  Use the dies in the Vintage Gentlemen needed to complete the Victrola.  Color the pieces in the colors you wish and assemble.

3.  Die cut the music using black card stock.

4.  Glue the Victrola and music to the front of the card as shown.

5.  Use the Banner Sentiment Stamp Set to stamp the sentiment, as shown, using black ink.


LinkWithin

Related Posts with Thumbnails