Showing posts with label Susan's Garden Club/ Spellbinders. Show all posts

Friday, October 13, 2023

Tutorial for coloring Maple Leaves using ink pads and blending brushes


Hello Paper Crafters,

This is the third tutorial for coloring leaves in Susan's new Autumn Foliage die set.  This tutorial shows how I color Maple Leaves.  My favorite way to color leaves is to using Blending Brushes and dye ink pads to blend a different colors on each leaf.  


Die cut the leaves using watercolor paper.  Use the Leaf Tool that is in Susan's Flower Tool Kit and trace over all the score lines in the dye cut leaf.  For Maple Leaves, I like to start off by coloring the whole leaf using bright yellow ink on the front and back.


Use an orange ink to brush around the edges of the leaves.


Here I brushed on a  Crimson Red to blend over some of the orange ink.


To make the edges of the leaves darker, a brown ink was brushed around the edges. and lightly over the whole leaf.

- - - - - - - - - - - - 

Here is how I colored the second set of leaves I had die cut.


 I used bright yellow ink to just color small portions of each leaf.


Next I brushed on green ink leaving a small portion of the leaf uncolored.


To fill in the rest of the leaf, bright red ink was brushed on.   (Half the leaves here have red ink brushed on.)


I forgot to take a picture here, but I brushed mahogany ink over edges of leaves.  


After the leaves were colored, I used a mechanical pencil and lightly drew over the scored lines.


As with the other leaves, some dark spots were stamp on some of the leaves with  brown ink.


The leaves were lightly misted, on the back, with water and shaped using the tweezers from Susan's Flower Tool Kit.  Each point on these leaves were shaped.  It's a little extra work to shape the leaves, but it really makes them look very realistic. To finish the leaves, Clear Crystal Glaze was brushed over the top of each leaf.

I hope these tutorials give you inspiration for coloring autumn leaves.  You don't need to use the exact color ink pads I used or even use as many colors, but I'm sure you will have fun once you start creating your autumn leaves.  

I have Susan's new release linked below.  If you haven't ordered your dies yet, I would appreciate your support by clicking on the links below.  Thank you.

SELMA

Monday, August 21, 2023

Snow Garden Winter Bough Glimmer Plate and Chickadee


Good Morning,

Things have been scary for us with all the fires currently burning around Spokane.  One of the three big fires is very close to us.  It is devastating to see all the homes that have been burned to the ground.  We are expecting a little rain today, so hope it helps put the fires out and clears the hazardous pollution.  

Today I have another card I designed using products in Susan's Snow Garden Release.

This is a 6x6 inch card.  I used a piece of embossed cardstock from my stash for the background. 
 
Using Susan's Winter Bough Hot Foil Plate from the Snow Garden Release was used for the gold foiled design on the green metallic card stock.  It was die cut using Spellbinders Essential Arches Etched Die set.  

The little Chickadee is one of the dies in the Hemlock, Cones & Chickadee die set.  It was colored and attached with dimensional tape.

The Snow Garden Sentiments Hot Foil Plate set was used for the sentiment.  It was foiled using red foil and die cut using the matching die.

To complete the card, Spellbinders Gold Embellishments were added around the arch. 


Saturday, August 5, 2023

Decorative Kale, Hemlock, Holly and Chickadee


It is time for a new release from Susan's Garden.  This release is called 'Snow Garden'.  

For my first card, I have used the Decorative Kale die set for the main attraction in this bouquet.  

For the background, I used  Susan's 3-D Bamboo Trellis embossing folder.  It was embossed on glossy black card stock then gold metallic rub was used over the embossed design.

Susan has posted videos on YouTube on how to create all the flowers in her new release.  You can also watch her weekly videos on Susan's  Garden Club Budding Paper Garden FaceBook page.  

If you Google Decorative Kale, you will find a great variety of colors of kale.  Following Susan's instructions, I have completed a green/pink variety.  Susan has included a stamp set to go with the Kale dies so we can get that raised design that all kale has on the leaves.  The leaves were die cut using Susan's Specialty Cardstock.  I found that you can use either white or clear embossing powder - the white does show up a little more.  The leaves were shaped using Susan's Flower Tool Kit and assembled using Beacon Kids Choice Glue.  

Susan's Pansy die set was used to create the two pansies.  I chose a variety that coordinates with the kale.  

Susan's Chrysanthemum die set was used to create three purple flowers.  

Susan's new Hemlock die was used to fill in around the arrangement.  It is important to snip each of the needles on the branch to help make it fuller looking.  I didn't add the little pine cones that come with the Hemlock die set.  

Susan's new Holly die set was used to create the Holly.  They were colored using OLO markers then a clear glaze added to give them the shine that the holly leaves have.  

At my request, Susan added a little Chickadee bird to the collection.  It is in the Hemlock and Pine cone die set.   I added one to the top of this arrangement.

To make the arrangement a little more festive, I added purple berry clusters.

Susan has added a sentiment glimmer set to this release.  I gold foiled one of the sentiments on black card stock and added it with dimensional tape to the top of the card.

This arrangement was added to Susan's Berry Basket that is from an earlier release  It was die cut using white card stock and the edges sponged with grey ink. 
 

Wednesday, June 7, 2023

Concertina Pop Out Card


Hello Paper Crafters,

This morning on Susan's Garden Club Facebook video, she gave instructions on how to create a concertina pop out card.  I loved the card she created and decided to create this style card.  You can get her instructions here.   Lhttps://www.facebook.com/SusansGardenClub/videos/1939242373126662INK.  

To decorate my card, I used the Spellbinders Four Petal Floral 3-D embossing folder for the background on the front of the card.  This is a gorgeous embossing folder.

To try and duplicate the flower in the embossing, I used Susan's Camellia die set.  It was die cut using Susan's Specialty Card stock.  Susan's tool kit was used to shape the flower.  This die set did not come with a stamen so I used one from  her Celmatis die setYellow Pollen was added to the tips of the stamen.  I found a picture on the Internet of a pink camellia that I duplicated.  

Susan's Bee Blossom die set was used to create four stems of flowers.  Behind the Bee Blossom I used Susan's Lemon Verbena die (Victorian Garden Foliage)  to die cut 5 branches.  OLO markers were used to color them.


On the inside, I used a piece of design paper I found in my stash.  The pieces were cut as per Susan's instruction and glued onto the card.  A Spellbinders sentiment was used.  It was die cut using gold metallic card stock and backed with black cardstock.


Friday, March 17, 2023

Masculine Floral Card


Good Morning.  I was asked to create a Masculine floral card.  I used Susan's new Southern Magnolia, Spirea, and Oriental Lily die sets.

For a masculine card I used a dark background.  This is a 6x6 inch card.   I used an older Becca Feeken die set and cut it apart to create corners under the circles.  A large solid circle was die cut then a piece of design paper, from my stash, was die cut and glued over the larger circle.

Susan's Woodland Wreath die set was used to die cut two brown wreaths.  

Using Susan's new Southern Magnolia die set, one magnolia was created.  It was die cut using Susan's  Specialty Cardstock.  For instructions on how to create this flower, you can watch Susan's instructions on YouTube.

Susan's Oriental Lily die set was used to create two yellow lilies.  They were die cut using Susan's Specialty Cardstock, colored with OLO markers, and pollen added to the tips of the stamens.

The Spirea die set was used to create one branch of spirea.  

Using the Lemon Verbina die from Susan's Victorian Garden Foliage die set, three branches were die cut, colored with OLO markers, and shaped using Susan's Flower Tool Kit.

Susan's new Victorian Garden release is now available from Spellbinders and are linked below. 


Wednesday, March 15, 2023

Spider Mum and Peach Blossoms


Good Morning Paper Gardeners.    Today I designed a slimline card using Susan's new Spider Mum from her Victorian Garden Release.

For the background, I used the Spellbinders Flowering Slimline die set.  The sentiment is from Susan's Garden Favorite stamp set.  It was stamped using VersaFine black ink, die cut and attached with dimensional tape.

The Spider Mum die set was used to die cut the mum.  It was die cut using Susan's Specialty Cardstock.  The petals were colored using R.1 OLO markerSusan's Flower Tool Kit was used to shape the flowers and leaves.  Kids Choice glue was used to assemble the flowers.

Susan's Peach Blossom die set was used to create pear blossoms.  Peach blossoms are pink and pear blossoms are white.  

Behind the arrangement, I used Susan's new Lemon Verbena die from the Victorian Garden Foliage die set.  

Right now, Susan's Victorian Garden release is available from Spellbinders.  I have these dies linked below.


Saturday, March 11, 2023

Camellia with Lavender


This morning I created this card and love it so much I can't wait to post it even though I have already posted today.  I had a lot of fun creating this Mini Double Tower Fold Card.  For the instructions for this card I watched Sam Calcott's YouTube Video here Lhttps://www.youtube.com/watch?v=Jj51-RNaCaIINK.

Sam always has such easy instructions for creating unique cards.  This one folds up to fit into a 6-inch square.  Because it is so dimensional, I will mail it in an acrylic box.  The card base was created using Spellbinders Portobello Cardstock. This is a nice heavy cardstock which holds up well for this card design.   I found a piece of design paper in my stash that I really like and designed the card around that paper.  It has a mix of gray, tan and peach in the woodgrain design.  

I used Susan's new Camellia die set to create a peach colored flower.  It was die cut using Susan's Specialty cardstock   and colored with OLO markers.  The camillia looks similar to a rose but the shaping is different.  Susan will have YouTube instructions up soon for her new Victorian Garden die sets.  

The Mason Jar and Lavender die set was used to create the Lavender.  

The Victorian Garden Foliage die set was used to die cut the Ginkgo leaves.  

Susan's Berry Branch was die cut and small styrofoam balls, that have been colored with acholol ink, were glued on the branch.  

I found a piece of design paper in my stash that I really like and designed the card around that paper.  It has a mix of gray, tan and peach in the woodgrain design.  

For enbellishments, I used Spellbinders Silver Embellishments.  


Closeup of the beautiful Camillia.


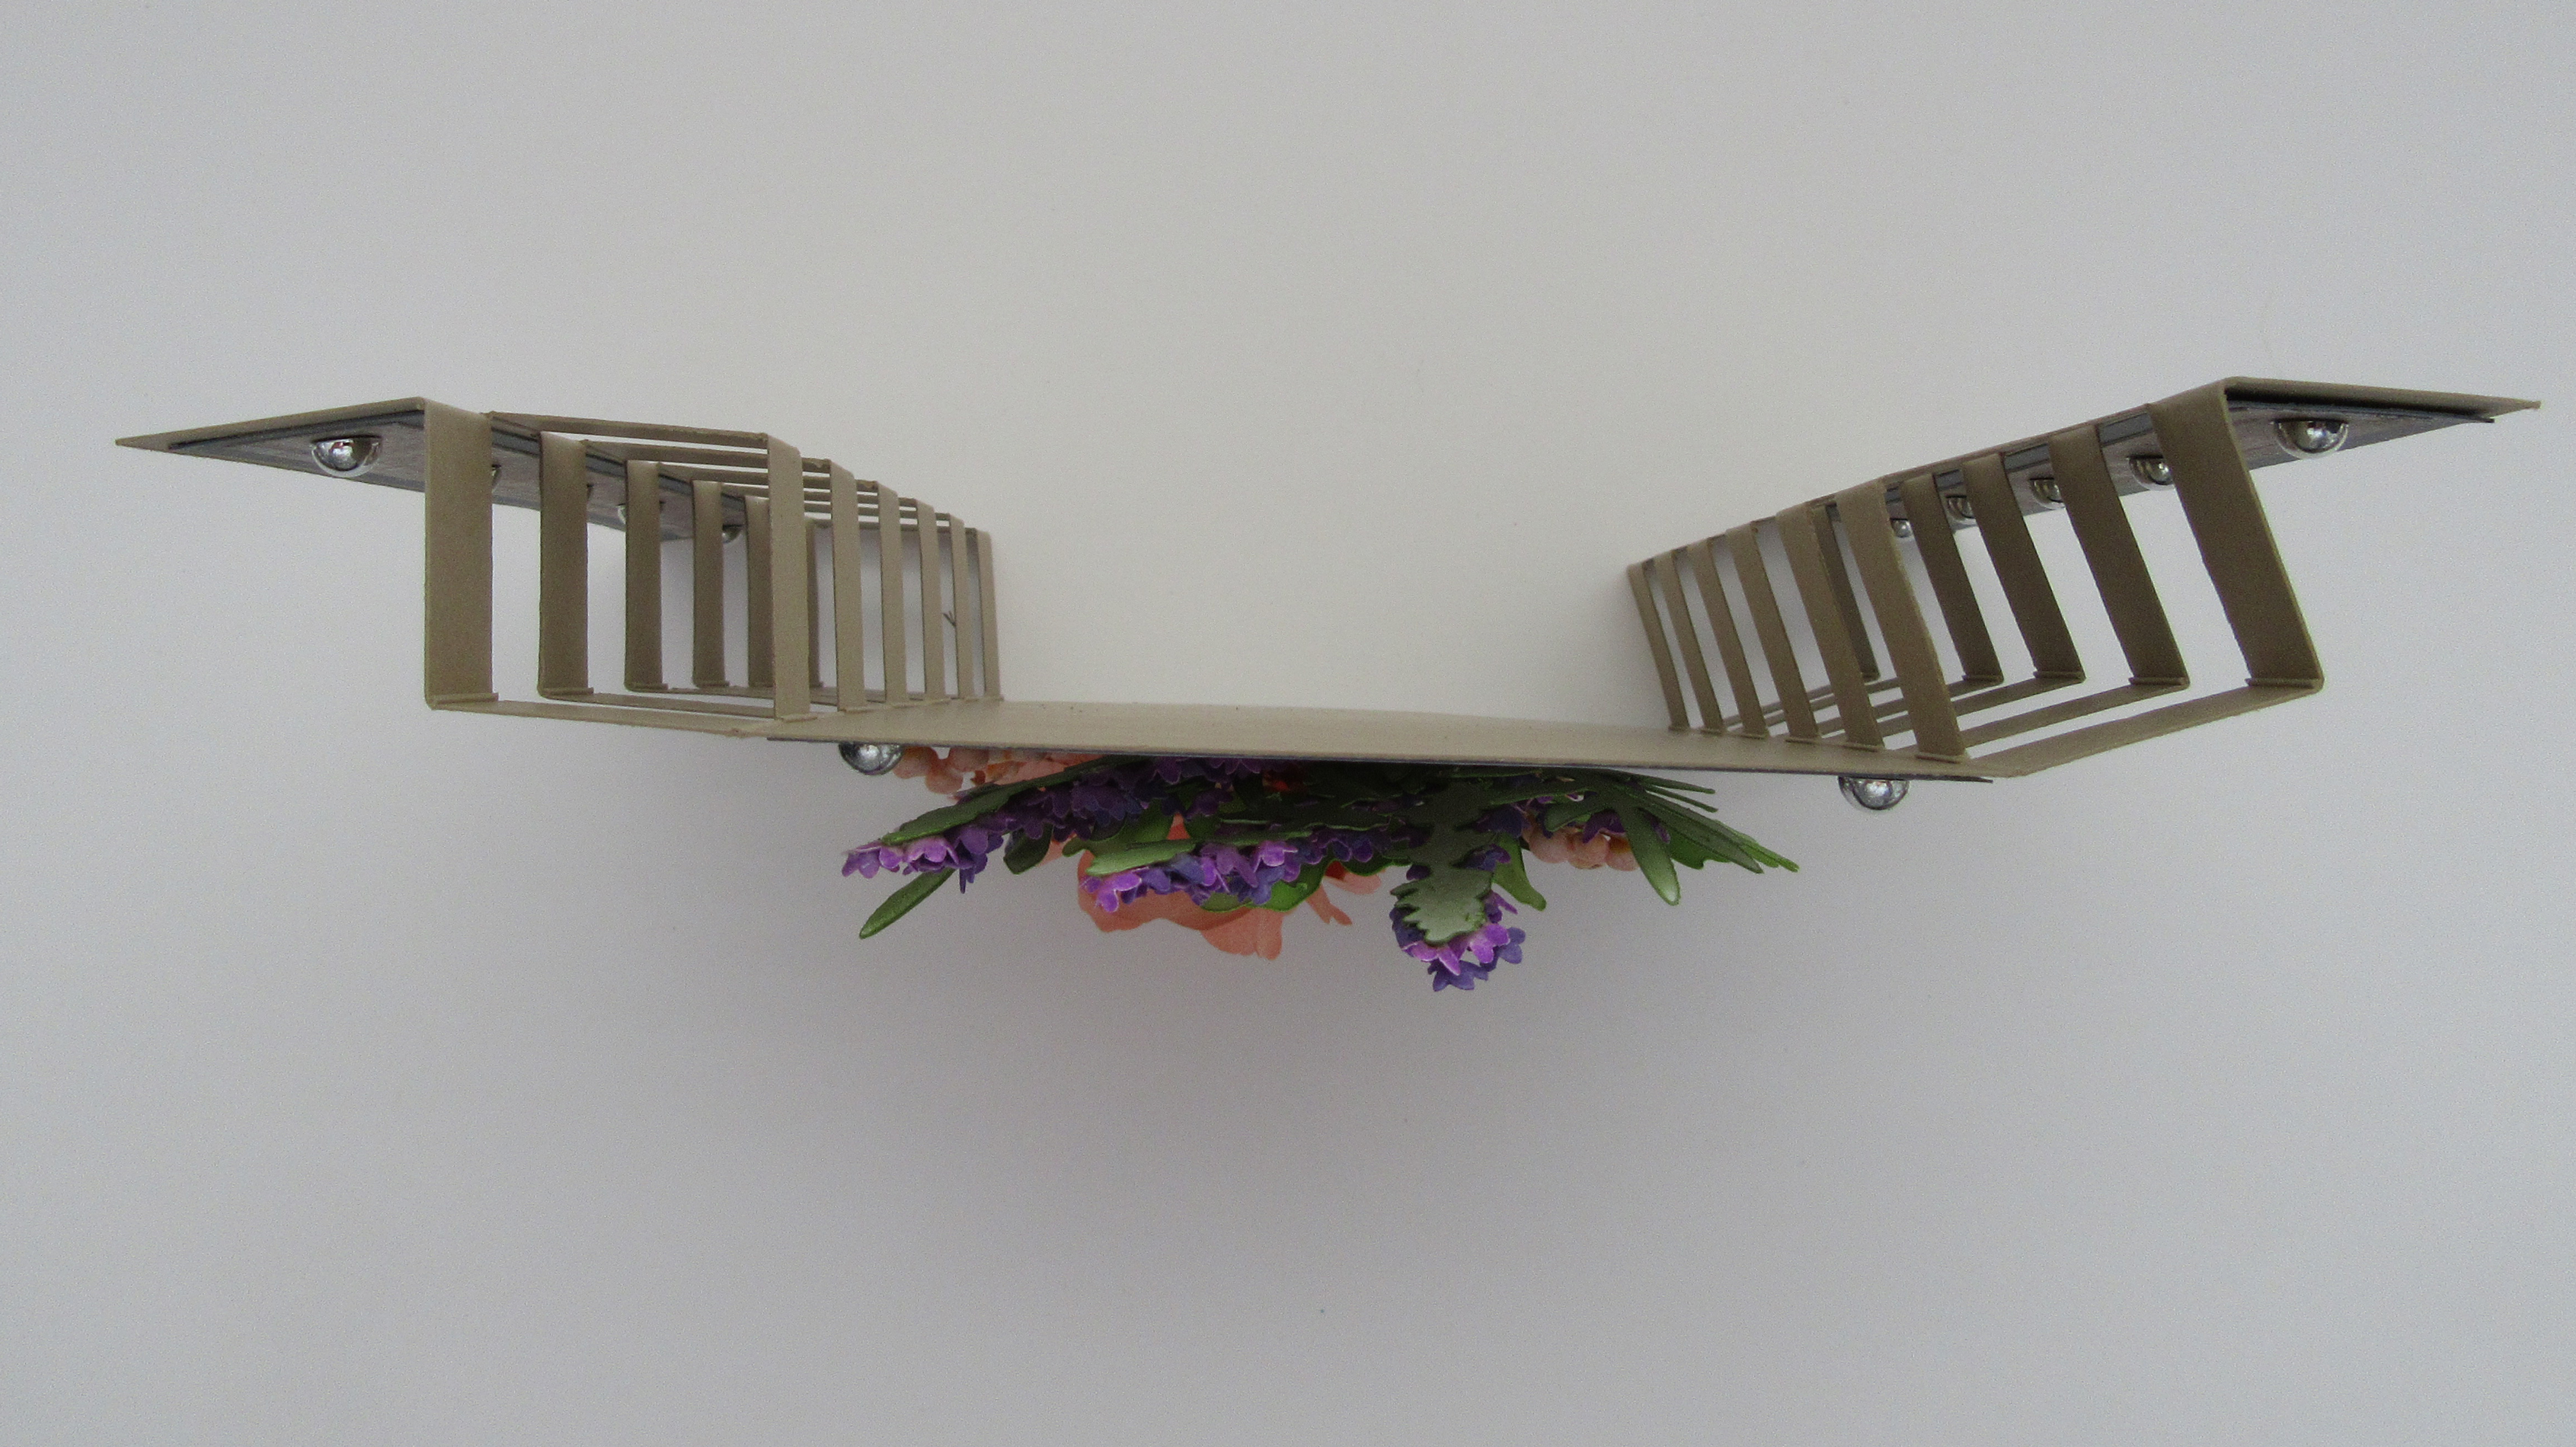
Picture of card looking down from the top.

This card really was very easy to create.  I think you will enjoy making it.


Monday, January 30, 2023

Quad Easel Card


Good Morning.  Today I created a Quad Easel Card.  I watched a video by Sam Calcott on YouTube.  Here is the LINK for instructions.  It's a fun card to create as each panel is an easel, so the card is very dimensional.  

I have used a variety of flowers I previously created and have not used.  The flowers on the panels are Bee Blossom, Chrysanthemum, Coreopsis, Carolina Allspice and Pansy.  All the flowers were created using Susan's Garden die sets.  

Saturday, January 21, 2023

Bird of Paradise, Pulmeria, Kerria Japonica, and Gerber


Good Morning.  Today I have a colorful card.  The Susan's Garden Bird of Paradise, and  Gerber, from the Painters Garden release, plus Kerria Japonica and Pulmeria die sets were used.

This is a 6x6 inch card.  The background was embossed and attached to a piece of green cardstock.  

First I created the beautiful Bird of Paradise.  This looks like it might be a complicated flower to create but Susan has designed the dies so it is very easy.  You will find her tutorial on YouTube for easy instructions.  The pieces were die cut using Susan's Specialty Cardstock.  OLO markers along with a little ink sponging were used to color the pieces.  There are two Bird of Paradise flowers in this arrangement.

From Susan's Tropical Release, the Pulmeria were die cut.  They were die cut using Susan's Speciality Cardstock, colored, and shaped using her Flower Tool Kit.  Kids Choice Glue was used to assemble all these flowers.

The Gerber die set from the new Painter's Garden was used to create one red flower.  This is a very easy flower to create.  The number of pieces to die cut is always shown on each die to make it easy to know how many pieces you need to assemble the flowers.  In the center a few Prills were added.

The Kerria Japonica, from Susan's Spring Flora release, were die cut.  This arrangement has seven little yellow flowers attached to the branches and divided around the arrangement.

In each of Susan's releases, she always includes a little ladybug. She has been die cut, colored and added with a dab of clear crystal glaze on her back.  

To help make this arrangment a little more tropical, I cut green cardstock in very narrow strips, curled the strips around the end of a large brush and tucked them in around the arrangment.


I hope I have given you inspiration to create a pretty arrangement.  With all the bad weather, it is nice to escape to the paper garden.


Sunday, January 8, 2023

Pansies


Hello my friends.  Today I have a card designed using Susan's new Pansy die set.  This is in her new Spellbinders Painters Garden Release.

This is a 6x6 inch card.  I die cut a rectangle on the right side of a 6 inch square card stock, then using the same size and one size larger die, cut a frame to go around the opening to give it a finished look.  A 1/8 inch score line was drawn around the edge of this piece.    Under the opening a piece of yellow design paper was glue on.  This was glued to the card front.

Using the Pansy die set, two differernt colors of panies were created.  They were die cut from Susan's Specialty Cardstock, colored with OLO markers and shaped with tools from  Susan's Tool Kit.  They were assembled using Kids Choice Glue.

Using the Foliage & Ladybug die set, three Eucalyptus branches were die cut, colored and shaped.  They are placed behind the arrangement.

Susan's Berry Branch was die cut and purple berries added.  I used small styrofoam balls that were colored for the berries.  

One of the stamps from Susan's Garden Favorites Stamp Set was used for the sentiment.  It was stamped using Black VersaFine Ink, clear embossed, and cut out the the rectangle die.  It was attached with dimensional tape.

For final embellishment, I added tiny dark purple rhinestones around the left side of the arrangement.

Friday, November 18, 2022

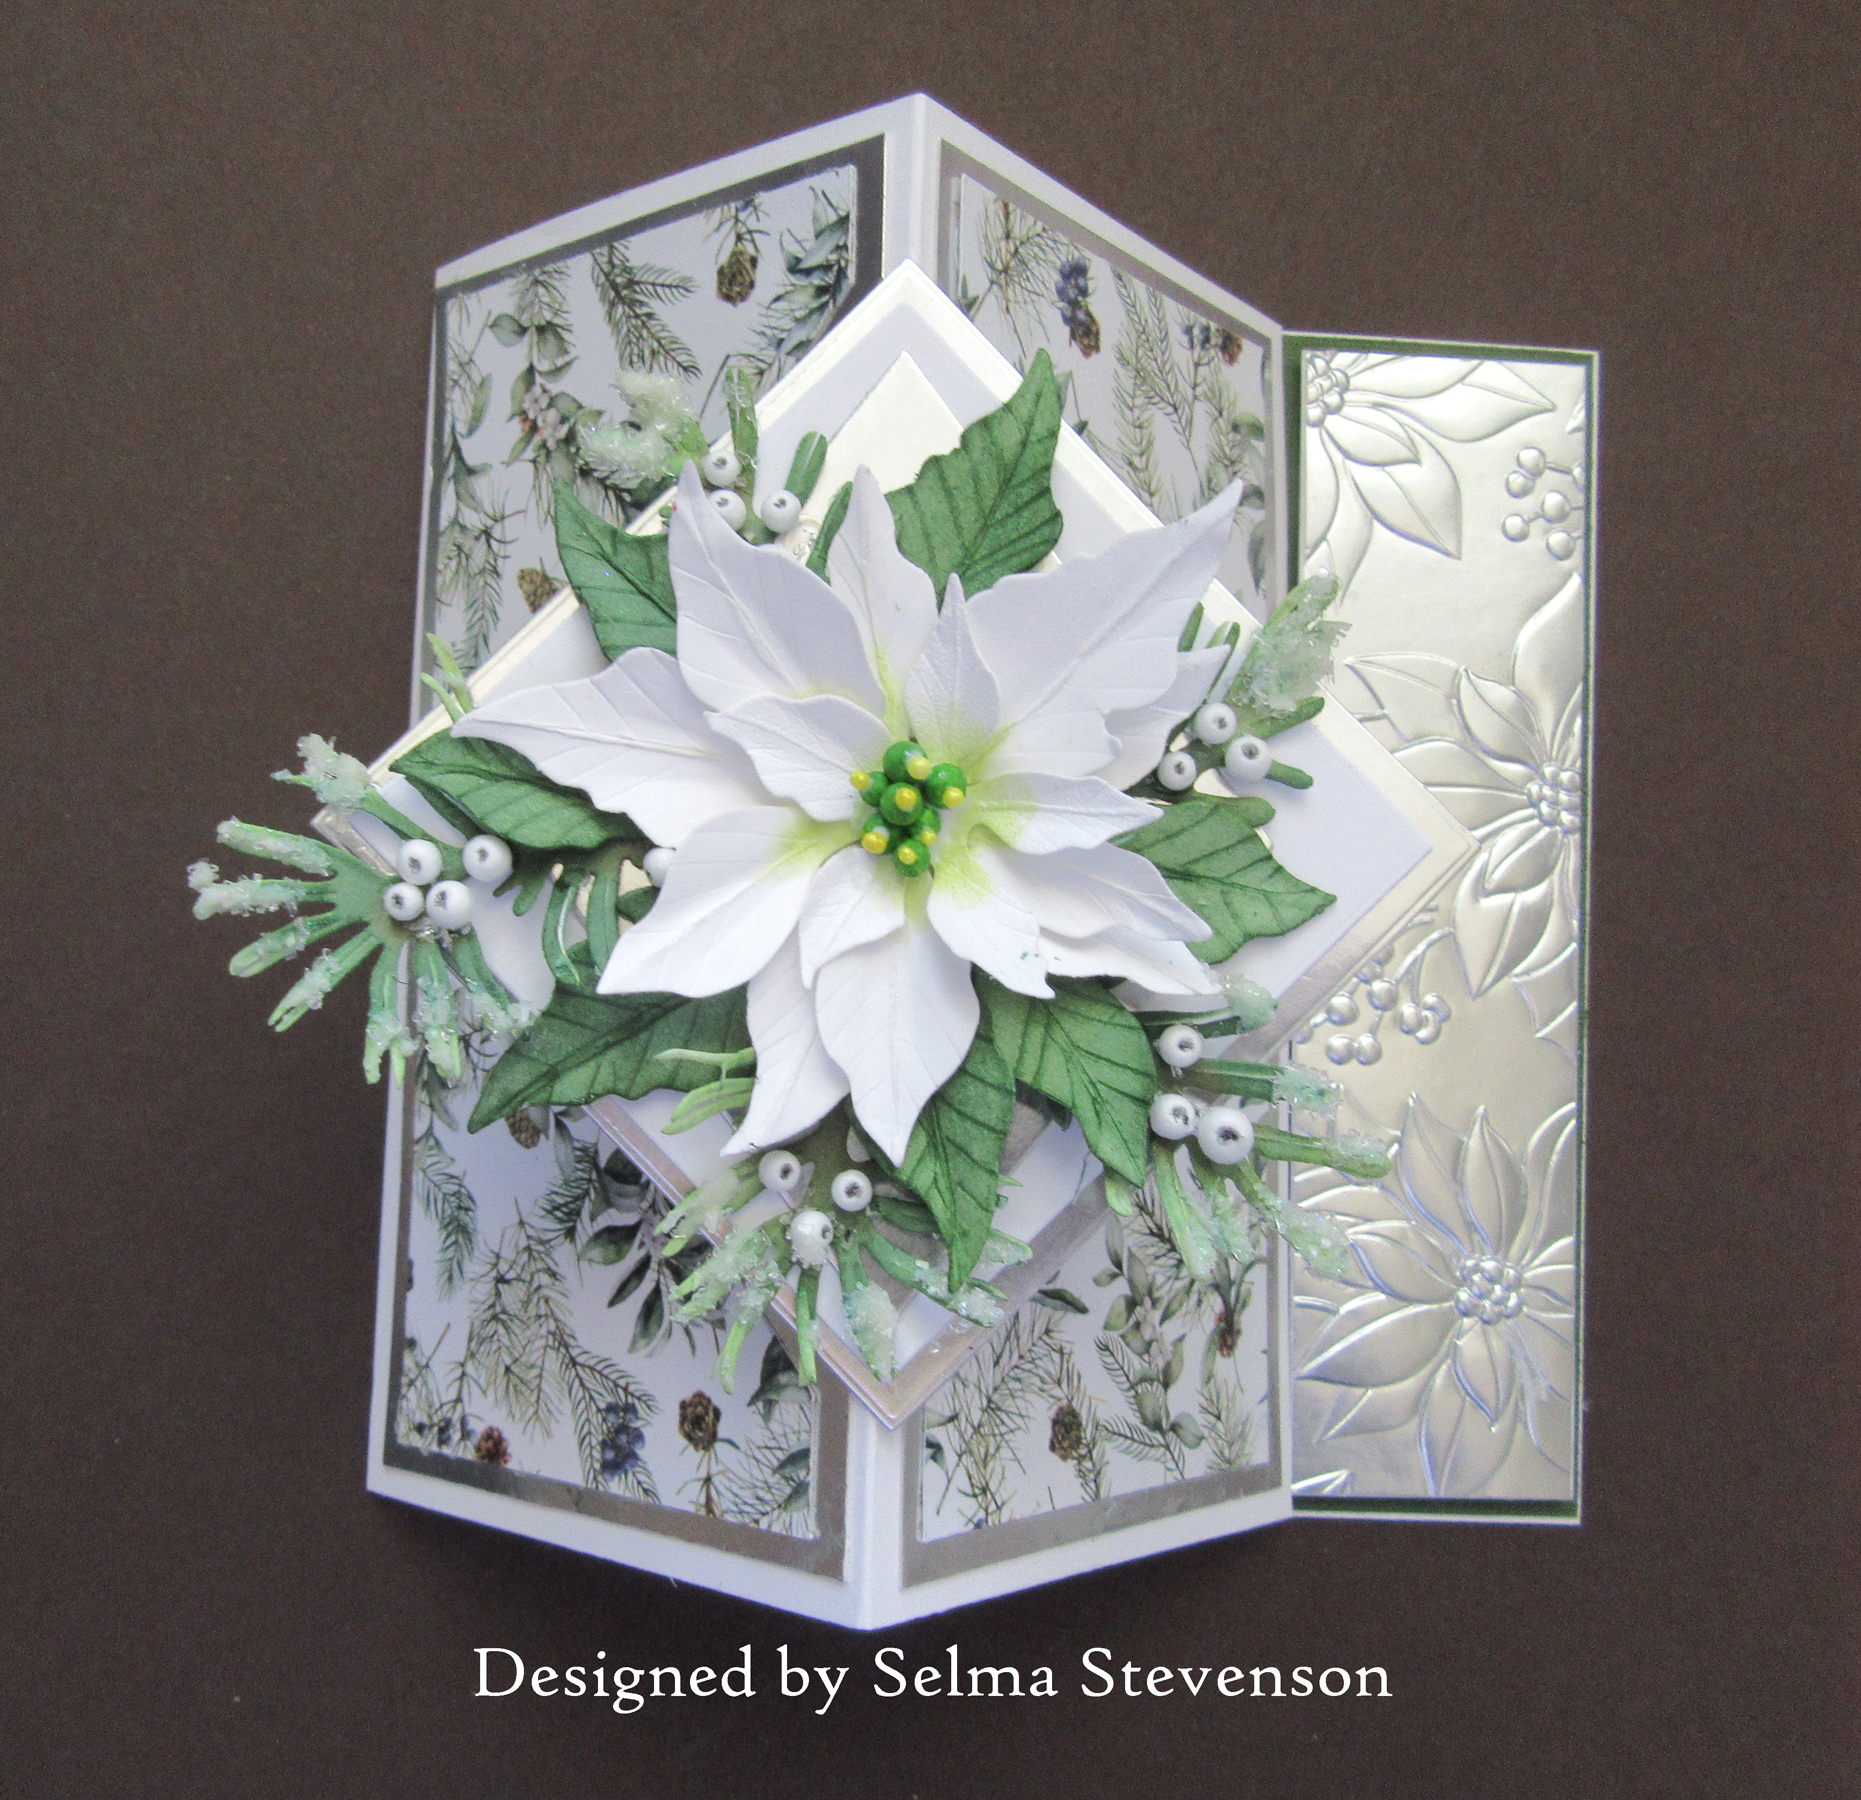
Faceted Diamond Easel Card


I am happy you came to visit my blog today.  It is a very, very cold day here today so I decided to create another Christmas card.  In Susan's Garden Club Facebook Live Video, she showed how to create a faceted diamond easel card.  Using her directions, I created one of these cards.  


Silver metallic card stock triangles were added to the diamond cut outs in that fold in on the center of the card.  

Before adding the front panels to the card, a strip of acetate was added across the center of the card.  This is what the square that holds the poinsettia is attached to.

The design paper I used is from the Paper Heaven-White As Snow 6x6 inch pad.  For the mats I used Silver Metallic Card Stock. 

For the side panel on the inside of the card, I used a piece of dark green cardstock for the mat and then used the Spellbinders Scenic Poinsettia 3-D embossing folder to embossed a piece of silver metallic card stock.  I added a piece of heavy weight white cardstock under the embossed piece.  This piece was attached using dimensional tape.


 I die cut a 3" white square, a 3 1/4" silver square and glued them together.  In the middle of this square, I used the Spellbinders Essential Diamond  Etched die set to die cut a silver diamond.  It was attached in the middle of the squares.  This square was attached to the piece of acetate that goes across the center of the card.  

Susan's Poinsettia die set was used to create a white poinsettia.  It was die cut using Susan's Specialty Card Stock.  For the bracts,  added light green styrofoam balls then glued a small yellow Prill to the top of each ball.  To shape the poinsettia, I used Susan's Flower Tool Kit then assembled using Kids Glue.

Susan's Winter Evergreen Foiliage die set was used to die cut the Whitepine branches.  I used white styrofoam balls for the berries, then used a fine tip pen to press down on the end of each berry.

As a final touch, I added snow paste to the white pine branches then sprinkled on Twinkletts glitter.

Tuesday, September 6, 2022

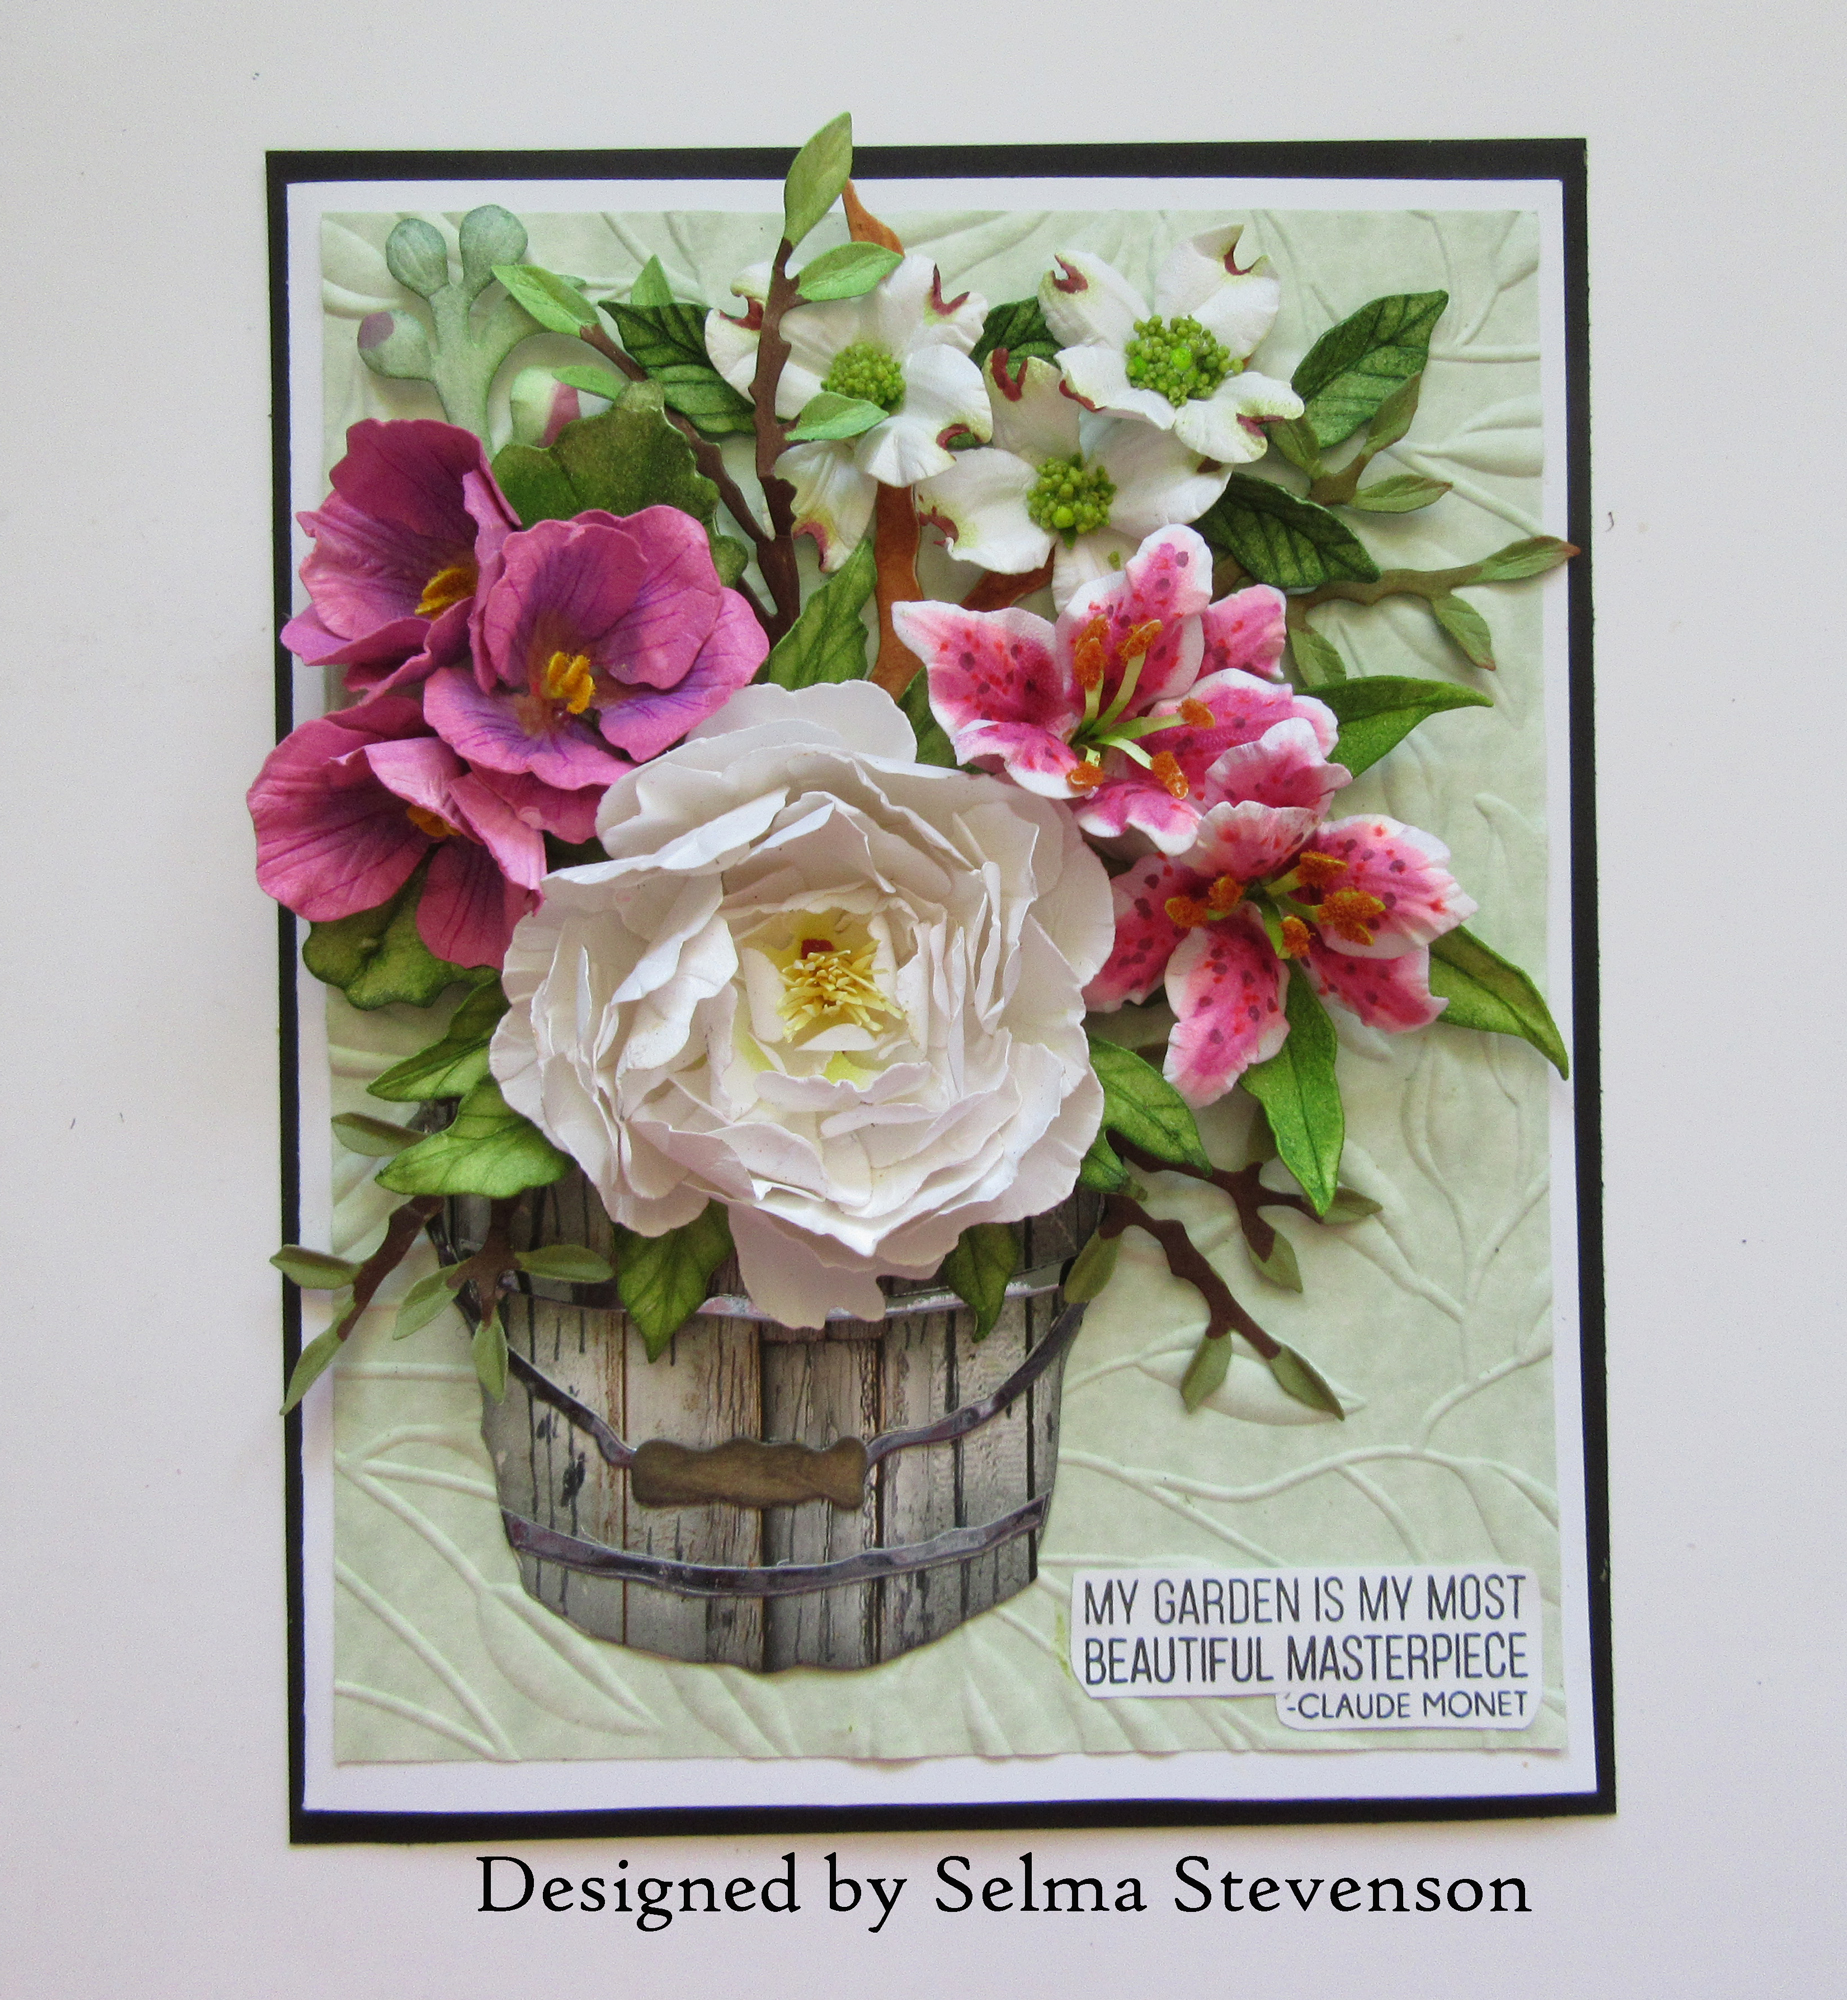
Bouquet in Wooden Bucket


Hello Paper Gardeners.  Today I have a card designed using Susan's Wooden Bucket and a variety of pretty flowers using her flower die sets.  

This is a 5x7 inch card.  For the background I used the Spellbinders Leafy 3-D embossing folder.   I lightly misted a piece of green card stock with water before adding the card stock to the embossing folder.  It was cut down to fit the front of the card.

The Wooden Bucket die set was used to die cut two buckets.  The buckets were glued together.  The bucket was colored and a dark silver mirror card stock used for the bucket bands and handle.  It was attached using dimensional tape in the center of the bucket and glue around the edges.  This gives the bucket a rounded appearance.

Susan's Peony die set was used to create one white peony.  It was die cut using Susan's Specialty Cardstock and shaped using her Flower Tool Kit.

The Hollyhock die set was used to die ut the bright pink hollyhocks.

The Oriental Lily die set was used to create two flowers.  Instructions for creating all of Susan's flowers can be found on YouTube under Spellbinders Susan's Garden.

The Dogwood die set was used to create the three white dogwoods.  Prills was used in the center of the flowers.

The Foliage die set was used to die cut the leafy branches.  They were attached under the bouquet.

Susan's Spring Quotes Stamp Set was used for the quote.


LinkWithin

Related Posts with Thumbnails