Showing posts with label Christmas. Show all posts

Sunday, November 24, 2019

Winter Wishes


I want to remind you that today is the last day for the Tonic Studio Weekend Special for the Susan's Garden Club Bundles.  You can purchase all of Susan's dies and other products at a great savings.  

Today I created another Christmas card using Susan's Helleborus, Pom Pom Dahlia and Holly & Berries die sets.  For the sentiment a used a Tonic Studio die set.

For the background I used a piece of blue card stock from the Tonic Studios December Skies 6x6 card pack.  

For the sentiment, use the Tonic Studios Mythical Glade Layering Die Set and die cut the sentiment die inside the smallest tag frame die using white card stock.  I attached a piece of holigraphic glitter paper, from my stash, behind the die cut and attached it to the right side of the card front.  This die set includes 9 dies, inctluding a beautiful Christmas sentiment and multiple layering dies.   

Use the Garden Club Hellebrouse die set and create two white flowers.  Add Susan's yellow pollen to the stamens.  

Use the Garden Club Pom Pom Dahlia die set and create one dark red flower.  

Use the Garden Club Holly & Berries die set and die cut six holly branches and extra leaves, using Tonic Champagne card stock.  Use a dark green marker to color the leaves, leaving the edges uncolored.  Use the Nuvo Crystal Glaze and a small brush to add glaze to the top of all the leaves.  

Die cut two or three Garden Club Berry Branches and use Nuvo Autumn Red Crystal Drops for the berries.  Once dry, cut the branches in smaller pieces.

Arrange the holly on the left side of the card and add the two Helleborus, the red Pom Pom Dahlia then glue the berries branches around on the holly.

Below, I have added links to Tonic Studio's products I use.  If you use these links to purchase products, I will receive a small commission which helps me purchase supplies at no additional cost to you.  I appreciate you visiting my blog and appreciate your support.


Friday, November 22, 2019

Susan's Garden Club Die Sets Available in the USA


EXCITING NEWS!  Susan's Garden Club die sets and other Garden Club products  from  Tonic Studios are now available in the USA.   You can purchase her products individually or take advantage of Susan's Garden Club discounted product bundles in the Tonic Studios Weekend Specials.  I have added links  below.  

 For the Christmas card above, I used Susan's Gathering Basket & Galvanized Bucket, Holly & Berries, Ladybug& Stems, and Spider Mum die sets.  The sentiment is a die cut using a die from Suzanne Cannon's A Way With Words die set.

Using the Gathering Basket die, one basket was die cut using 100# card stock.  The heavier card stock will help to hold the shape of the basket and also gives a better impression of the woven score lines in the die cut. I like to use white card stock and sponge on color.  Several shades of brown inks were sponged on then using a fine tip ball stylus and the Nuvo Toasted Almond Embellishment Mousse, thin lines wer drawn in to bring out the weave in the design.  A Craft Perfect Dimensional Pad was added on the back of the basket, right in the center to create dimensional, and the Nuvo Deluxe Adhesive was used around the sides and bottom to attach to the card.

Using Tonic's Candy Red Card Stock, the petals of the Spider Mum were die cut.  For the petals in the center of the flower, yellow card stock were used.  For the long center piece that is to be rolled, use a very light green  marker to color over the yellow card stock.   The flower was assembled using Nuvo Deluxe Adhesive. 

Use the Holly and Berries die set and die cut five or six holly branches and some extra holly leaves.  Color the leaves with two shades of green ink, with the lighter ink on the tips.  Color the stems with a mixture of green and brown inks.  Shape the leaves and paint the leaves using a small paint brush and Nuvo Crystal Glaze. This will give the holly leaves the glossy appearance of real holly.

 Using the berry branch die, die cut two or three branches.  Color the branches to match the stems on the holly.  I like to color the berries on the die cut with a red maker before adding the dimensional red berries.  Use the Nuvo Autumn Red Crystal Drops to create the berries on the branches.  Once dry, cut the branches into smaller pieces to place on the stems of the the holly.

Use the Ladybug and Stems die and die cut the ladybugs.  I die cut a lot of the ladybugs, using white card stock and store in a small container.  Color the ladybug red using a marker, then add the black dots and line down the center of the back.  You can add Nuvo Crystal Glaze to the ladybugs while they are on a non-stick mat or wait and add the glaze once you attach it to your piece.  

Arrange the holly/berries, and spider mum in the gathering basket.

For the sentiment on this card, the A Way With Words Merry Christmas was die cut using glitter card stock.  I used the Nuvo Smooth Precision Glue Pen to add adhesive to the back of the sentiment, but you can also use the Nuvo Medium Flat Tip Glue Pen.  

I have added links to Tonic Studio's products below.  If you use these links to purchase products, I will receive a small commission which helps me purchase supplies -- no additional cost to you.  I appreciate you visiting my blog and appreciate your support.
Happy Crafting!


Monday, October 14, 2019

White Poinsettia Christmas Card plus new Tonic Glass Mat


Have you started working on your Christmas cards yet?  Today I have a gold and white card designed using Susan's Garden Notes Poinsettia die set.

I am excited to announce another new product from Tonic Studios.  I have loved working on my large Tim Holtz Glass Media Mat but today, there is a smaller version of this glass media mat that will be perfect for travel or for a friend to use when they come to craft with you.


 This is the large Tonic Studios Glass Mat with the card created today.  I LOVE working on this great Glass Mat on my desk but now there is a new smaller glass mat that we can travel with.


This is the brand new smaller, Tonic Studios Travel Glass Mat.  Watch the Tim Holtz demostration for this new mat on FaceBook Live at this LINK.  


Turn your cards into a gift.  I wanted to show you how you can design a card and easily turn it into a framed gift that will be treasured year after year.  You can usually find beautiful frames on sale at the craft store to fit any size card you wish to create.  This is a great idea for those people hard to buy for, or for people who treasure your cards!

How to Create this card:   This is a 6-inch card.  The backing is a piece of Tonic Mirror Gold Card Stock. The edges of this piece were scored on the Tonic Studio Super Trimmer that includes both a cutting and scoring blade.  On top is a smaller piece of white card stock.  To decorate the corners, use the Tonic Studio's Snowflake Flurry Stencil. Add Nuvo Moonstone Glimmer Paste, with the Tonic Spatulas, to two different snowflakes, onto the top corners.  Allow to dry while working on the rest of the card.  Once dry, add to the Gold Card using the Tonic Adhesive Tape Runner.

Use the Tonic Studios Mirror gold Card Stock to create a smaller square gold frame to fit down in the lower right corner.  

Use the Budding Vine - Floral Blossom die set for the design behind the gold frame.  Use both pieces of this set to die cut.  Trim this die cut down to fit behind the Gold Mirror Card Stock Frame.  You can use the narrow Nuvo Tape Runner to attach the die cut background. 

Use Suzanne Cannon's A Way With Words - Merry Christmas die set for the sentiment.  Die cut it using the Mirror Gold Card Stock.  Use the Nuvo Precision Glue Pen to add glue to the back and attach inside the gold frame, as shown.

Use Susan's Garden Notes Poinsettia die set to die cut the poinsettia.  Use Nuvo Bottle Green Crystal Drops in the center of the Poinsettia for the bracts. Add yellow Pollen to each drop.  Color the Poinsettia leaves with Green and a touch of red Embellishment Mousse.  Shape and attach under the white poinsettia.

Use the Garden Notes Whitepine Bough & Pinecone die set for the pine boughs.  Two different shades of green card stock.  Attach the pine boughs under the poinsettia.  Use the Garden Notes Berry Spray and die cut two sprays out of Tonic Kraft Brown Card stock.  Use Nuvo Chalk White Stone Drops to create the berries.  Use the Nuvo Deluxe Adhesive to glue the pine boughs and berry branches under the Poinsettia.  

I have added product links below.  If you use these links to purchase products, I will receive a small commission which helps me purchase supplies -- no additional cost to you.  I appreciate you visiting my blog and appreciate your support.


Sunday, October 6, 2019

Pink Poinsettias


Today I designed a card using white Foamiran and Susan's Garden Notes Poinsettia die set.  

This is a 6-inch card.  A piece of Tonic Chrome Silver Mirror Card stock was used, layered with a slightly smaller Tonic Craft Perfect Ultra Smooth White card stock, and on top a piece of Tonic Pearlescent Princess Pink card stock that was scored around the edges using the Tonic Studio Trimmer.  On the left side of the pink card stock, Susan's Snowstorm and Mounds Stencil was used to create the white snow.  The stencil was taped down and Nuvo Moonstone Glitter Paste was applied using one of the Tonic media spatulas.  

The Garden Notes  Poinsettia die set was used to die cut the flowers.   Two of the large petals and one of the small petal die cuts were used for each flower.  The veins in the petals and leaves were scored using the Leaf Tool from Susan's Flower Tool Kit.  The petals were colored using two shades of pink ink.  The ends of the petals were left white.  The color was sponged on, using a small sponge.  The petals were put together, using a hot glue gun.  For the center of the poinsettia, small dots of Nuvo Bottle Green Crystal Drops were made on the Easy Clean Mat and allowed to dry.  Once dry, a small dot of the Nuvo Deluxe Adhesive was placed in the center and a small amount of Yellow Pollen was added.  These dots were then added to the center of the each poinsettia. 

The Garden Notes Whitepine Boughs and Pinecone die set was used to die cut the boughs and the pinecones.  For my pine cones, I shaped them by pressing down on each brown petal, with the small stylus in the Flower tool Kit, to 'cup' them.  They were glued on the pinecone base with the cupped side facing up.  If you want a closed pinecone, you would glue them with the cupped side facing down.  Once the base was covered with petals, let dry then go back and glue in more petals to make it appear full.  The petals were die cut using brown card stock and glued together using Nuvo Deluxe Adhesive. 

Glue the Poinsettias, Pine Boughs and Pine Cones to the left side of the card as shown.  

For the sentiment, I used GinaK's Joyful Holiday Foil Mates.  It was foiled using silver foil, then die cut using GinaK's Double Stitched Small Rectangle die set.  The ECD Dotted Scalloped Rectangle die set was used for the die cut under the sentiment.  Tonic Dimensional Foam Pads was used under both the foiled sentiment and under the scalloped rectangle. 

This card can be mailed out in one of the clear acrylic boxes linked below.

I have added product links below.  If you use these links to purchase products, I will receive a small commission which helps me purchase supplies -- no additional cost to you.  I appreciate you visiting my blog and appreciate your support.


Thursday, August 22, 2019

Foamiran Poinsettia


I have some red Foamiran that a dear friend in the Netherlands sent me and I decided to create a poinsettia with it using Susan Tierney-Cockburn's dies.  

This is a 6-inch card.  

A piece of white cardstock, slightly smaller than the front of the card was die cut using Susan's Frame It-Stitched Oval die set.  The oval was die cut toward the top.  A piece of white card stock was embossed with a dots embossing folder and attached to the back of the die cut oval.  

Suzanne Cannon's A Way With Words Merry Christmas die set was used for the sentiment.  It was die cut using red card stock and attached on the lower right side.

Susan's Poinsettia die set was used to create the poinsettia.  The red leaves were detailed using the leaf tool from her Flower Tool Kit.  The poinsettia was assembled using a hot glue gun.  

To create the bracts for the poinsettia, Nuvo Bottle Green Crystal Drops were created on a craft mat.  While the drops were still wet, a very small amount of yellow pollen was pushed into the top of the green drop.  Once dry, the bracts were glued into the center of the poinsettia using tacky glue.

The Garden Notes Whitepine Bough die set was used to die cut a lot of pine branches.  I used the Tim Holtz scissors to cut some of the pine needles in half.  This makes the pine branch appear fuller.  For snow on the branches, Nuvo  Gloss Simply White Crystal Drops was spread across some of the pine needles then Nuvo Ice White Pure Sheen Glitter sprinkled on, for a snowy effect.

The Garden Notes Berry Spray was used to die cut 2 sprays.  The stems were colored brown and Nuvo Gloss Simply White Crystal Drops was used to create the berries.  

The Poinsettia was attached to the left side of the die cut oval then the pine boughs and berry spray was attached under it.  

This card can be mailed out in one of the clear acrylic boxes linked below.


Tuesday, December 18, 2018

December Challenge


It is time for the December Design Team Challenge.  The name of our challenge is:  Garden Notes - Frame It/Stitched Inspiration.  

 For our challenge this month, we are to use any of the Garden Notes - Frame It/Stitched nested dies to create a card or project. There are four different die sets in this collection … squares; rectangles; ovals and circles.  You can view all the cards/projects created by the design team at this LINK on the Elizabeth Craft Designs Blog.

As in the past, you will be eligible to win a prize by commenting on the Elizabeth Craft Designs challenge post.

* * * * * * * * * * * * * * * *

For today's challenge, Elizabeth Craft Designs is giving away a $20 Gift Card to use on their website to 3 winners. 


To enter simply leave a comment on the Elizabeth Craft Designs Challenge post and tell us  Which of the Garden Notes - Frame It/Stitched die sets would you use on a project and how would you use it    

Three lucky winners  will be selected in a random drawing and will be announced on Friday, December 21st on the Elizabeth Craft Designs blog.

Good Luck in the drawing.

* * * * * * * * * * * * * * * * * *

To create my card, begin with a 7 x 5 1/2 inch card base.

1.  Cut two pieces of white card stock 7 x 5 1/2 inches.

2.  Cut two pieces of ivory card stock 7 x 5 1/2 inches.

3.  Use the Garden Notes Frame It/Stitched Oval die set and use the next to the largest die to die cut an oval in the center of one of the white pieces of card stock.

4. For the second layer, use the same die set and the next smallest die.  Die cut an opening in one of the ivory card stock pieces.  To get the oval centered perfectly in the center of the white die cut, place the white oval piece over the ivory card stock, center the smaller die, leaving an even border all around.  Tape to the ivory card stock.  Remove the white die cut piece and die cut the oval in the ivory card stock.

5.  For the third layer, use the same die set and the next smallest die.  Using the instructions in step 4, die cut an oval in the last white piece of card stock.

6.  For the fourth layer, use the same die set and the next smallest die.  Use the same instructions and die cut an oval in the last piece of ivory card stock.

7.  Use dimensional double sided tape to attach all the ovals together.  Attach to the base card.

8.  Use the A Way With Words Rejoice die set and die cut the sentiment using Gold Mirror Card Stock.  Attach down in the center of the die cut ovals

9.  Use the Poinsettia stamp set and stamp the berry branch and pine boughs, using black ink.  Color with markers.  Use the matching die set to die cut the pieces. Arrange around the lower edge of the oval, as shown.

10.  Use the Garden Notes Poinsettia die set and create one flower. Shape using the Flower Tool Kit and glue together using Kids Choice Glue.  Use yellow pollen and green Prills for the center of the poinsettia.  Attach in the corner, over the berry branches and pine boughs.

11.  For a little sparkle, add some glue to the berry branches and pine boughs, and sprinkle on Cool Diamond Micro Fine Glitter.

12.  Use gold Corner Peel Off Stickers on all four corners of the card, for a nice finishing touch.


Monday, December 3, 2018

Christmas Explosion Box


Several people have asked me to create a Christmas Explosion Box. These boxes are easy to create and always fun for the recipient to open. Below is a tutorial on how to create this project.

Tuesday, November 20, 2018

Design Team Challenge - Floral Card


It is time for the November Design Team Challenge at Elizabeth Craft Designs.  This month we are to create a card or project that features either flowers, foliage, etc to create something Christmas related.  I chose to create a Christmas card.  You can be inspired by all the projects created by the design team at this LINK.

As in the past, you will be eligible to win a prize by commenting on the Elizabeth Craft Designs challenge post.

* * * * * * * * * * * * * * * *

For today's challenge, Elizabeth Craft Designs is giving away a $20 Gift Card to use on their website to 3 winners. 


To enter simply leave a comment on the Elizabeth Craft Designs Challenge post and tell us Which Elizabeth Craft Designs flower or foliage die or stamp set would you chose to create a Christmas card or decoration.  

Three lucky winners  will be selected in a random drawing and will be announced on Friday, November 23rd on the Elizabeth Craft Designs blog.

Good Luck in the drawing.

* * * * * * * * * * * * * * * * * * * *

A small square frame was die cut using the Fitted Frames 2 die set.  Behind it is a piece of watercolor paper that was dipped in Brusho powders that was sprayed with water.  

Use the Classic Christmas stamp set and stamp the sentiment in the lower right corner, using black ink.

Use the Garden Notes Trevi Urn die set to die cut the urn.  Use Cafe au Lait Soft Finish Cardstock to die cut the urn and use a darker brown ink and sponge lightly over it to bring out the embossed areas.  Attach to the bottom of the card.

Use the Leafy Berry Branch die set and die cut three branches.  Add berries with Autumn Red Nuvo Crystal Drops.  

Use the Garden Notes  Whitepine Bough die set and die cut 6 pine branches, using green card stock.

Use the Garden Notes Whitepine Bough die set and create two pine cones.

Use the Garden Notes Poinsettia die set and create three poinsettias.  Shape with the Flower Tool Kit and assemble with the Kids Choice Glue.  Add green and yellow prills to the center of each poinsettia.

Assemble the Leafy Berry Branch, Whitepine Boughs and Poinsettias inside the Urn.  Add the pine cones.

Use the Garden Notes Hydrangea die set and die cut 16 small white flowers.  Glue them around the edges of the arrangement.  Add yellow Nuvo Crystal drops in the center of each white flower.


Thursday, November 8, 2018

Winter Blessings

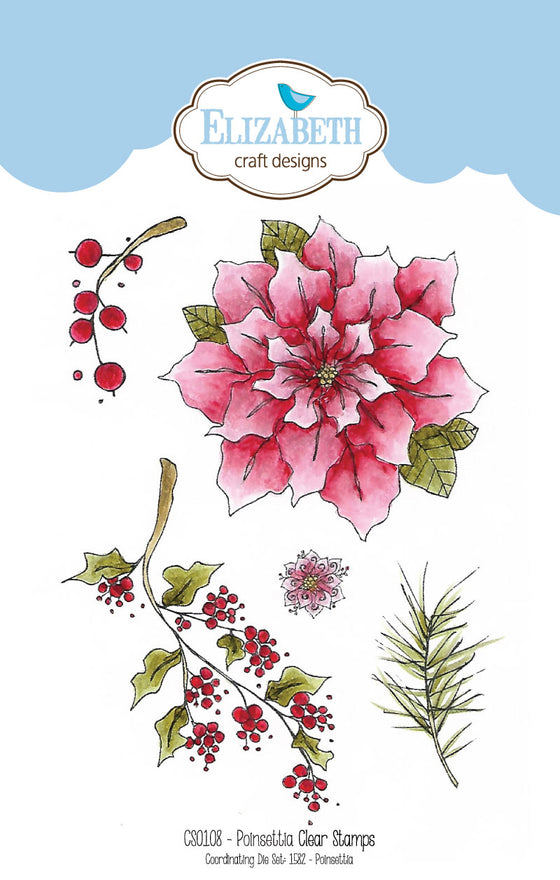
This new poinsettia stamp set by Krista Schneider is so beautiful.  

This is a 6-inch card.  Cut a piece of white card stock 6 inches square, score around the edges and attach to the front of the card.

Use the Fitted Square die set and die cut the a solid piece of card stock, using the largest die.  In the center of this square, use the Garden Notes Frame It/Stitched Square die set and die cut an opening.  This piece should be attached to the front of the card using dimensional tape.

Use the Fitted Squares and  the same Garden Notes Frame It/ Stitched Square die used above, to die cut the narrow frame for the front of the card.  Glue the narrow frame over the opening in the piece created with the die cut opening in the center.

Use the Classic Xmas Sentiments stamp set and stamp the sentiment in the upper left Corner, using black ink.
Poinsettia stamp set

Use the Poinsettia Stamp Set and stamp one poinsettia, three berry branches, and four pine branches.  Color with markers and die cut using the matching dies to cut the pieces out.  Before adding the arrangement, use a sponge and light sponge pale yellow PanPastel inside the square frame to give a little highlight behind the flower.  Arrange the die cut pieces inside the frame.  Add yellow and green Prills to the center of the Poinsettia.

This card is flat enough to be mailed in a regular 6 inch square envelope.  


Sunday, November 4, 2018

Joy


I have a friend who loves vintage type cards.  With the help of the ModaScrap  Xmas Vintage Collection design paper I created this card.  The design paper has a collection of vintage Christmas ornaments and goes perfect with this beautiful A Way With Words Christmas ornament.

This is a 6-inch square card.  The front is covered with the ModaScrap Xmas Vintage Collection Design paper.  

Use the Dotted Scallop die set to die cut two different size squares using True Green and Silver Gray Soft Finish Cardstock.  Attach the squares to the front of the card.

Use the A Way With Words Love, Joy, Peace Christmas Ornament,  die set for the ornament.  Use a piece of white Soft Finish Cardstock covered with a piece of Clear  Double Sided Adhesive to die cut the ornament.  Peel off the adhesive covering and sprinkle Light Gold Silk Microfine Glitter on both the die cut circle and the flourish.  Polish well with your fingers to bring out the sparkle.  Attach the ornament in the center of the green die cut square.

Use the same die set and die cut the 'Joy' using a piece of white card stock that has Clear Double Sided Adhesive on the top.  Sprinkle on Cool Diamond Silk Microfine Glitter.  Use a piece of Fun Foam and die cut the sentiment again - this will give the sentiment dimension.  Glue the glittered sentiment to the top of the Fun Foam then attach to the center of the ornament.

Use the Garden Notes Poinsettia die set and create a red poinsettia. For this flower, I combined the petals of the large Poinsettia with the petals from the small Poinsettia.  Shape the poinsettia using the Flower Tool Kit and assemble using Kids Choice Glue.  Add Yellow and Green Prills to the center.

Use the Beautiful Baubles die set and die cut two pine branches.  Use the fine pointed scissors to cut some of the pine needles in half; this will give them some fullness.  Sponge a little white pigment ink on the branches and use a brown maker to color the center (branch) of the pine bough.   Attach the boughs to the upper left corner, then attach the poinsettia on the corner.  

For a final touch, use the Gold Corners, Peel Off Stickers, on the other three corners.

This card can be mailed in one of the clear acrylic boxes which is linked below.


Saturday, November 3, 2018

Let It Snow Slider


This is a 6-inch square slider card.  There are many videos on YouTube on how to create a slider card.  I watched Jennifer McGuires video at this link to figure out how to create this slider card.

For the front of the card I used a piece of the ModaScrap Relax in the Garden design paper.  The edges were covered with black Line Peel Off Stickers.

Use the Snowflake die set and die cut the largest snowflake.  For the backing (solid) snowflake, use a piece of the Clear Double Sided Adhesive on the front so you can add glitter.  Add silver Silk Microfine Glitter to the adhesive, then attach the top die cut on top.  If you die cut this snowflake with the clear double sided adhesive on the back, it is easy to attach, or you can use glue on the back of the snowflake. Press the snowflake firmly down so it sticks to the glittered background.   Attach this snowflake to the front of the slider piece - which is explained in the video.  


The Garden Notes Poinsettia die set was used to create the poinsettia.  The petals were colored using a bright pink marker.  The poinsettia was shaped using the Flower Tool Kit and assembled using Kids Choice Glue.  It was attached in the center of the snowflake.

The Garden Notes Holly die set was used to create the Holly under the poinsettia.  The leaves were die cut using white card stock and colored by sponging on green ink.  The leaves were shaped with the Flower Tool Kit.  Nuvo Crystal Glaze was brushed over the leaves for the shiny finish.  Attach the Holly leaves under the Poinsettia.

Use the Winter Sentiments stamp set for the sentiment.  With the Pull Tab pushed down in place, stamp 'let it snow' in the upper left corner.  With the Pull Tab pulled up, stamp 'Stay Warm' at the bottom of the snowflake.  The sentiment needs to be underneath the snowflake when the pull tab is down in place.  

Write or stamp 'Pull' on the top of the slider tab.

Use the Reindeer die set and die cut a bunch of small snowflakes.  Attach around the sides of the card, as shown.

You can add a stamped sentiment and your personal message on the inside of the card.

This card can be mailed in one of the clear acrylic boxes linked below.


Thursday, November 1, 2018

Baby It's Cold Outside


I really love this moose.  He was created with the Joset Designs Moose die set.  Suzanne Cannon's stamp was used for the perfect sentiment for this card.

This is a 6-inch card.  A piece of white card stock was cut 6-inches square and scored around the edges, which is used for the front of the card.  

Use Susan's Earth & Sky Stencil and the light blue PanPastel to create a cloudy sky, approximately half way down, on the 6-inch square piece of cardstock.

Use the Reindeer die set to create the pine trees.  Use a scrap piece of card stock and die the tree in the center of it to make a stencil.  Use a sponge and green ink to sponge inside the tree stencil.  Stencil the tree on the left; move the stencil over and sponge on a second tree, making it slightly darker green.  Move the stencil between the two trees and lightly sponge on green ink.  If the trees are colored different shades of green, it gives them dimension when sponged on the card.

Use a white opaque pen and create snowflakes in the sky and on the trees.

Use the Christmas Collection stamp set and stamp the sentiment, using VersaFine Black Ink, in the lower left corner.

Use the Moose die set and create one Moose.  I die cut the pieces using white Soft Finish Cardstock and sponged on tan and brown inks.  He was assembled using Kids Choice Glue.  Attach the moose using dimensional tape in the lower right corner.

For extra dimension and sparkle, use Nuvo Glitter Crystal Drops and draw in snow lines below the trees and under the hooves of the moose.

This card is flat enough to be mailed in a regular 6-inch square envelope.


Warm Thoughts Card and Pine Cone Tutorial


A Way With Words, Flourished Candle


The A Way With Words die sets are perfect for creating an elegant Holiday card.  This is Selma Stevenson today and I designed a card using Suzanne Cannon's Warm Thoughts and Flourish Candle die sets.  For additional embellishment, Garden Notes die sets were used.


Begin with a 6-inch square card  Cover the front with gold metallic card stock.  Add a piece of white card stock cut 5 3/4 inches square.  Layer a piece of the ModaScrap Wood Effects design paper on top for the rustic background.

Use the A Way With Words Warm Thoughts die set and die cut the sentiment using gold metallic card stock.  Attach to the top of the card, as shown.

A Way With Words, Flourished Candle

Use the A Way With Words Flourish Candle die set and die cut the candle once using gold metallic card stock.  Use the same die and die cut the candle, and extra flame and melting wax, using ivory card stock.  Color the flame using yellow and orange markers.  Add a small amount of Kids Choice glue to the flame with your finger, then sprinkle on Warm Diamond Silk Microfine Glitter.  Attach the ivory candle and flame on top of the gold metallic candle.  Use a clear glaze and spread over the candle to give it a waxy appearance.

Use the Garden Notes Whitepine Bough & Pine Cone die set to die cut 8 green pine branches.


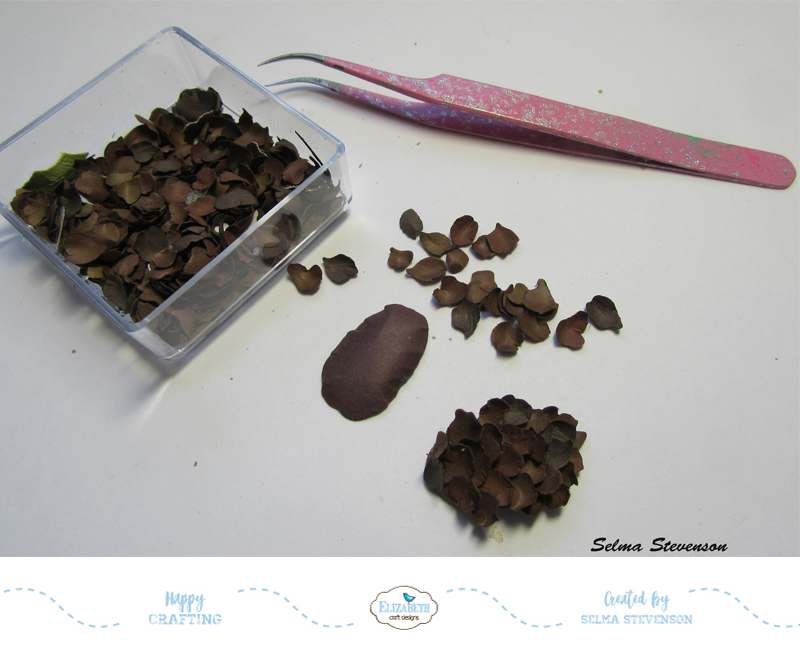
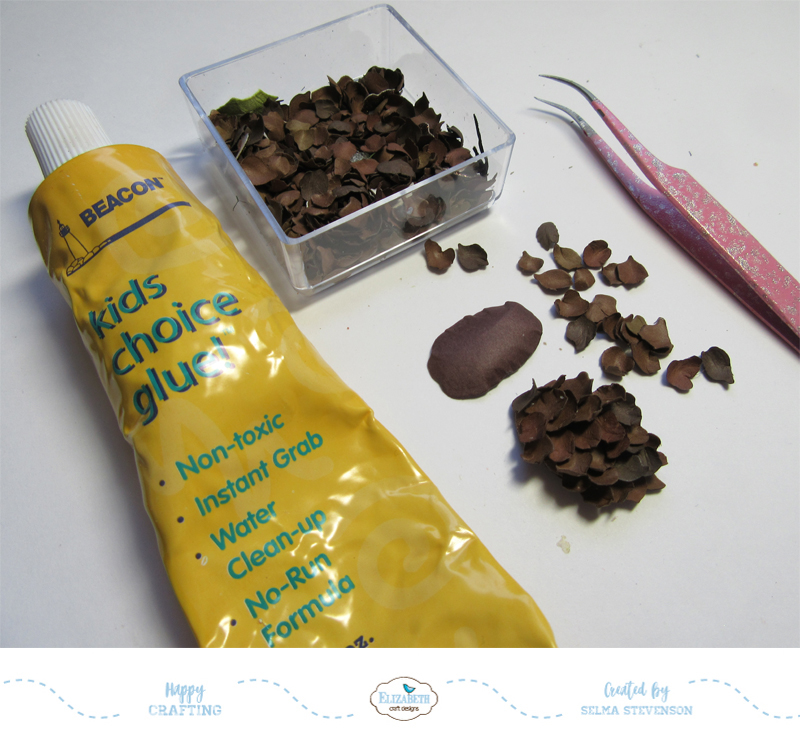
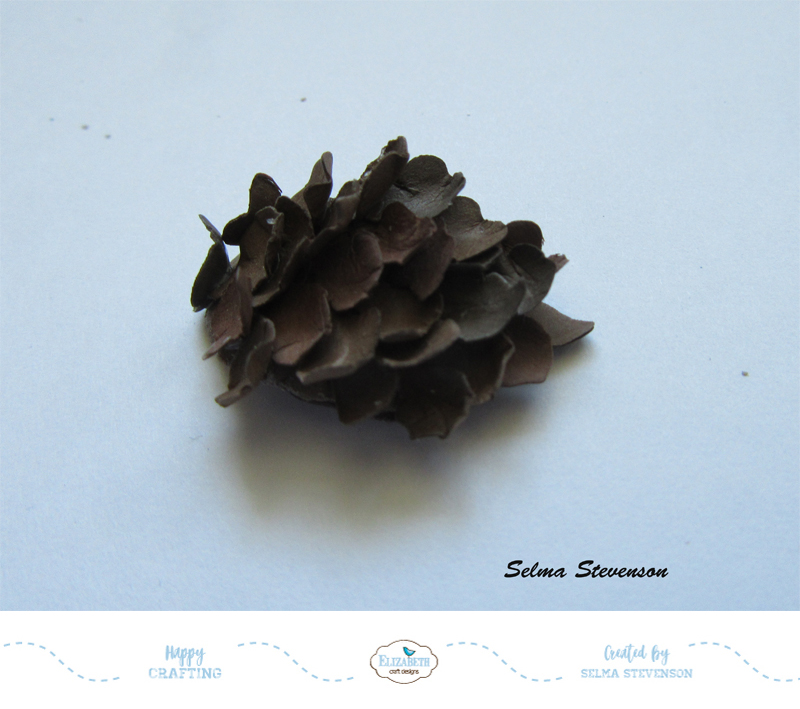
Use the Garden Notes Whitepine Bough & Pine Cone die set to die cut pieces to create two pine cones. Die cut 4 oval pieces and 6 plates of the pine cone petals.   To assemble, shape the oval pieces with the large ball stylus.  Glue two oval pieces together, adding glue to only the edges of the oval.  By using two oval pieces it will help hold the rounded shape of the pine cone.


Use the small loop tool and shape all the pine cone petals - pull down from one end to the next and it will slightly cup each one.

There are two ways you can create the pine cone.  Susan shows in her Facebook Susan's Garden Club video to glue the petals on the oval with the cupped side down and you will have a pinecone that hasn't yet opened.  She pulls the tips of the petals back once they are glued, for a more open pinecone.


For a more open pinecone I prefer to add the petals with the curved sides facing up.  Add the first couple of petals at the tip of the oval with the curved petals down, then start gluing the petals with the curve facing up.  Alternate all the petals going across in rows.

Use the Garden Notes Leafy Berry Branch die set and die cut two branches, using a very light brown card stock.  Shape the leaves using the Elizabeth Craft Designs Fine Pointed Tweezers.  Place the point of the tweezers on the end of the leaf and pinch up.  This will give the leaves dimension.  Add red Nuvo Crystal Drops for the berries.  Allow to dry before assembling the centerpiece.

Glue four pine boughs on the lower left side of the card and four boughs on the left.  Glue the longest branch from the Leafy Berry Branches on each side, over the pine boughs.

Attach the assembled Candle Flourish, with dimensional tape, in the center between the pine boughs and berries.

Use the Garden Notes Poinsettia die set and assemble one white poinsettia.  Use the very pale yellow PanPastel from Set #3 to shade the lower half of each petal then use the light yellow green PanPastel from Set #1 to shade over the the light yellow just at the base.   Shape the poinsettia using the Flower Tool Kit.  Attach the poinsettia at the base of the candle.  Use yellow green Nuvo Crystal Drops to make 5 dots in the center of the poinsettia.  While the Nuvo Drops are still we, drop in a few yellow Prills.

Add the pine cones on each side of the poinsettia, as shown.

This card will mail nicely in one of the large clear acrylic boxes.


Wednesday, October 31, 2018

Merry Christmas


Suzanne Cannon's A Way With Words Flourished Christmas Minis die set is such a beautiful die set to create elegant Christmas cards.  For this card I combined this die set along with the new small A Way With Words Merry Christmas and Garden Notes Poinsettia die set.

A Way With Words, Flourished Christmas Minis
A Way With Words Flourished Christmas Minis

This is a 6-inch card created by using a piece of the Silver Gray Soft Finish Cardstock.

Use the ModaScrap Wood Effects card stock and cut one strip of the wood grain and attach to the left side of the card.  

Use the Fitted Squares die set and die cut a 4 inch square of ivory card stock.  Use the Gold Border Peel Off Stickers and place stickers around the edges. 

Use the A Way With Words Flourished Christmas Minis die set and die cut the ornament and the reindeer, using gold metallic card stock.  Attach to the center of the ivory square.   Use the gold Dot Peel Off Stickers to add snow around the ornament, as shown.  Attach this square to the top of the card.

Use the A Way With Words small Merry Christmas die set and die cut the sentiment using gold metallic card stock.  Add to the lower right corner of the card.  Add three gold Dot Peel Off Stickers, as shown.

Use the Garden Notes Poinsettia die set and create one poinsettia.  I used an off-white pearlized card stock for the poinsettia and shaded the center using light pink PanPastel.  (This card stock did not shape nearly as well as the white Soft Finish Cardstock I usually use.)  Shape the poinsettia and leaves using the Flower Tool Kit and assemble using Kids Choice Glue.  Add yellow and green Prills to the center.  Sponge light green ink on the leaves.  Sponge pink PanPastels on the edges of the leaves.  Attach the poinsettia to the lower left corner. 

Use the Garden Notes Whitepine Bough & Pinecone die set and die cut 4 pine boughs  Glue the boughs under the poinsettia.

This card can be mailed in one of the clear acrylic boxes.


LinkWithin

Related Posts with Thumbnails