It is always fun to spend a day out shopping with a friend. Today I have created a card using the new Row Houses Clear Stamp Set to create a shopping scene. Here is how the card was created.

Use permanent black ink and the Row Houses Clear Stamps Set to stamp all of the images onto white cardstock. Color with either markers or watercolors of your choice. Die cut the images, using the matching Row Houses Die Set.
Die cut white cardstock and a piece of craft foam with the largest Stitched Ovals die. Craft foam is optional and will add dimension to the oval frame. (Refer to the project photo.)
Use the second- and third-largest Stitched Ovals dies to cut a narrow black frame that will be placed inside the white oval.
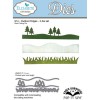
Use the Outdoor Edges die set to cut three different pieces of white cardstock to use for the grassy hills. These need to be long enough to fit behind the oval opening. Color with green watercolors or markers. Glue the pieces together, overlapping slightly, so they will cover approximately 2/3 of the bottom of the oval. Attach a piece of light blue card stock for the sky.
Use the Rainbow Sky die set to cut two white cardstock clouds.
Use the Corners 1 die set to cut 4 black cardstock corners.
Using black ink and a sentiment from the Winter Sentiments Clear Stamp Set stamp the sentiment. Die cut the sentiment using the Stitched Fishtail Banners die that most closely fits around the words.
You now have all the pieces to complete this little scene.
Attach the sky/grass piece to the back of the large white oval frame, using Clear Double Sided Adhesive. (If you have used a layer of craft foam to create a dimensional frame, the Clear Double Sided Adhesive will hold cardstock to it very well.)
Arrange the buildings, trees, table and chair pieces on the green portion inside the oval frame. Use Beacon Kids Choice Glue and/or foam tape to attach them.
Apply glue to the back of the narrow black oval frame and push it down inside the foam layer of the oval frame as a finishing touch.
Adhere the Stitched Banner at an angle across the upper left. Trim off the excess portion of the banner at the edge of the white rectangle.
Adhere the four black corners.
Adhere the framed picture to a black cardstock side-fold card base. If using Rich Black Soft Finish Cardstock, the inside of the card will be white. If using other black cardstock for the card base, add a white rectangle inside the card for writing a personal message, or write with a white opaque ink pen.
The products used are linked below.


(: ----- Love it.
ReplyDelete