Welcome to my Creative Corner. I love to spend my spare time designing cards and especially enjoy creating beautiful flowers using Susan's Garden Club die sets. I love sharing my work and tutorials with you and really appreciate you taking time to visit my blog. Hope I can inspire you to create something beautiful.
Pages
▼
Thursday, September 30, 2010
Guest Designer for Melanie
Tonight I have the honor to post a card I created using stamps from Melanie Muenchinger's new set "Buds and Vases" available from GinaK Designs. I always love to guest design for Melanie.
The terra cotta pot was stamped on light brown card stock and colored lightly with colored pencils and OMS. Many of the open flowers, partially open flowers, buds and leaves were stamped and colored with Copic markers then cut out. These are all single stamps in this set. Also some stems were stamped. A slit was cut along the inside edge of the pot and stems inserted. I started arranging flowers on each stem then added leaves to fill it in. Tiny bronze beads were glued to the center of each open flower.
The white square under the flowers was created using a Martha Stewart border punch. Another piece of white card stock was embossed with the Cuttlebug dotted Swiss embossing folder and placed in the center of this frame. The rust piece was scored with the ScorBuddy along the edges. These were layered onto white then to a mustard card. The vase and flowers were attached and a small piece of grass created with a Martha Stewart grass punch added. The tag was created with a sentiment from this stamp set.
I know lots of you do not like to cut images out, but I love to do this so had a lot of fun creating this beautiful pot of flowers. I have several other cards made using this set that I will be posting next week. You can see this set at GinaK Designs under "New Releases".
Joan's Garden Challenge #17
I found three design papers I have had for a very long time that met the challenge requirements. On the circle I added a beautiful flourish from Heartfelt Creations dies called "Perfect Petals Diecuts, HCD704". This set of die cuts is available from Joan's Gardens. A piece of trim was added across the middle. The verse is from the JustRite "Loving Thoughts" stamp set, also available from Joan's Gardens. It was stamped with brown ink. To complete the card, brown pearls were added to each corner, on the flourish, and under the sentiment.
Have you been following the clues for the big announcement Joan will have tomorrow. You won't want to miss this. Also, have you checked out all the items on sale -- some items up to 50% off.
Here is the link to check out all the information for this week's challenge.
Wednesday, September 29, 2010
Heartfelt Creations releases the Winter Wonderland Collection
Today I am sharing one of the cards I created using one of the new Heartfelt Creations Winter Wonderland Collection stamp sets. This collection features nine new Precut stamp sets and one new exclusive Heartfelt Creations die, made by Spellbinders, and one existing Spellbinder Shapeabilities die "Snowflake Wonder". Read below to see how you can win this complete collection.
My card was made using the Heartfelt Creations Medallion Precut set (HCPC 3336) . The image was stamped using VersaMark ink then “Heat and Stick” was added. The Heat and Stick was heated and ultra fine purple glitter was sprinkled over the hot glue. It was quickly heated again with a heat gun to set the glitter. The medallion was cut out using the matching ornament die (HCD 705) then attached to a piece of purple card stock. Using scissors, a narrow border was cut out around the image.
Both the purple and white backgrounds were embossed using the Cuttlebug “snowflake” embossing folder. The white background was backed with a piece of the purple card stock. A Martha Stewart snowflake border was cut and placed behind the white background. Purple rhinestones were added to the center of the snowflakes. A purple silk bow was added to complete the card. This card is 5.5” square.Emma Lou posted a great video, on the Heartfelt Creations blog, to show you some great techniques using this new stamp set
To view all the new products in this release, and other beautiful cards created by the design team, you can click here. To celebrate the new release, Heartfelt Creations will be giving away the complete release valued at $159.00 to two lucky winners. Leave a comment on the Heartfelt Creations Blog or the Heartfelt Creations Facebook page by October 5th to be entered to win. The winners will be announced on October 6.
Thank you for stopping by today.
Tuesday, September 28, 2010
Greetings from the Pumpkin Patch
I am so happy to have Internet again. My modem went out yesterday morning and just got back up and running.
I want to tell you about a big sale going on at Joan's Gardens. Some of the JustRite products are on Sale 20 to 50% off until Thursday, September 30th or as long as her inventory lasts. She also has some Cuttlebug embossing folders, Spellbinders, and paper packs on sale. Be sure to go over and check it out here. She also has a big announcement she is going to make on Friday you are not going to miss out on. She will be giving a hint each day until then. The first one who guesses the item she is referring to wins a great prize. So, leave as many comments as you wish and be that winner. She won't announce the winner until October 1.
Ok, now for my card. I stamped the JustRite image from the Autumn Blessings stamp set and colored it with Copic markers. A second image was stamped so I could cut out the pumpkins and attach them with dimensionals. The image was cut out with an oval Nestability and sponged prior to removing it from the die. Glitter was added to the pumpkins. A Sizzix fence was cut and placed over the design paper then the image attached with dimensionals over it. A gingham bow and three buttons added to complete the card.
Have you entered the Joan's Garden's Thursday Challenge? There is so much going on over at Joan's Gardens hope you will go over and check it all out. Everyone loves a sale so hope you see lots of items there to add to your stash.
Sunday, September 26, 2010
Joyous Noel
Have you seen the sneak peaks for the new stamp sets that will be released at Heartfelt Creations on September 28th? The above card is one that is featured on the Heartfelt Creations blog this week.
The Cuttlebug “Holly” embossing folder was used for the embossed background on the textured green card stock. Brilliance Gold ink was used to create texture on the holly. They were embossed with detail gold embossing powder. One of the leaves in the embossed design was cut around with a knife so it would lay on top of the label. Two of the smallest holly leaves from the Heartfelt Creations Ornament die set were cut out. Gold embossing powder was also added to these leaves and they were attached with dimensionals over the edge of the label. The top corners were pierced and a pearl added to the center of each.
A glue pen was used to add glue to the word “NOEL” and green glitter added. Red pearls were added on the embossed berries around the holly leaves. The green embossed piece was layered on gold metallic card stock then attached to an ivory card.
You can see more projects completed by some of the other designers on the Heartfelt Creations blog here.
Saturday, September 25, 2010
Granddaughter's Card
Today I am posting a card my oldest granddaughter created for her mom's birthday. She has not done much stamping and I think she did a really nice job. She went through the JustRite catalog and picked out a layout she really liked. Her mom's two favorite colors are yellow and blue so she wanted to create a card using these colors. She found a piece of design paper in my paper stash and worked from there.
The birthday greeting is from the JustRite "Baroque Nested Frames" stamp set. She used the largest frame twice - once going vertical and once horizontal. She wanted to make some of my vellum flowers so I gave her a little demo on how to make them, then created her own. I love that she put a vellum yellow center in the blue flower to carry out the color scheme. A tiny yellow pearl was added to the center of each. I am very proud of her beautiful card and I am sure her mom will love it. Great job Alison.
All the products used for this card, except the design paper, is available from Joan's Gardens.
Have a wonderful weekend.
Friday, September 24, 2010
Merry and Bright
Today's card is made with the JustRite "Groovy Snowmen" stamp set. It was stamped using black Memento ink and colored with Copic markers. It was cut out with the Dahlia Nestability and sponged with Distressed Ink. The design paper is from the Kaiser Craft "Tis the Season Collection" paper pad. A piece of ribbon was added to the bottom of the card. The greeting is from the JustRite "A Merry Little Christmas" stamp set. It was cut out with a circle Nestie then mounted on a scallop maroon circle. Glitter was added to the design and rhinestones added to complete the card.
All the products used on this card can be purchased from Joan's Gardens.
Thursday, September 23, 2010
“JustRite 12 Weeks of Christmas Blog Hop #3
EDIT: I am posting this again to let you know I left off all the score lines. Please see the change below in red.
Welcome to JustRite Stampers’ newest Wednesday feature, 12 Weeks of Christmas Blog Hops #3! Every Wednesday up until Thanksgiving some of your favorite designers will be joining some of the JustRite design team for a series of Christmas blog hops, showcasing JustRite’s entire Christmas Collection of stamps! So mark your calendars for Wednesdays at 9am Central for great Christmas gift, card & project ideas, starting at the JustRite Inspiration blog!
Today my project was created using the JustRite "Backyard Birds" stamp set. I created a luminary cover that can stand alone with a flameless candle inside but it also fits the base of the Febreze Flameless Luminary. Mine is shown in the base.
To create the cover you will need two pieces of design paper cut 6 1/4" by 5 1/2". Score each piece at 1/4" and 3 1/4 ". When finished designing your cover, these two pieces will be taped on the 1/4" score line to create the cover. Use a decorative punch along the top edge of the luminary cover. You will also need 4 pieces of vellum 4 1/2" x 2 7/8" for the windows.
I used the Nestabilities Label One for the opening in each panel. The cardinal was gold embossed on the front of the vellum and colored with markers on the back. This gives a stained glass look. Each panel was attached to the backside of the designer paper with ScorTape. I used a gold maker to outline around the opening on the front. Once you have your vellum panels attached and have added any additional embellishments on the front, place ScorTape on the 1/4" narrow side of each panel and create your square luminary.
I have also created luminary covers using the JustRite "Groovy Snowmen" and also the "Vintage Christmas" stamp sets. They are all just as pretty. These covers will fold down flat so will make great little gifts to send in the mail. Like I said at the top, these can be used as a stand alone luminary with a flameless candle as well as in the Febreze base.
Please visit these designers’ blogs to see what fabulous Christmas projects they have for you on the hop today!
JustRite Inspiration Blog
Debbie Olson
Becca Feeken
Sharon Harnist
Jeanne Streiff **
Michele Kovack
Mona Pendleton
Heidi Blankenship
Beate Johns **
Sankari Wegman
Selma Stevenson (You are here)
Kellie Fortin
Angela Barkhouse
Pam Imholz
Kazan Clark
Liz Weber
Stephanie Kraft
**Betty Johns and Jeanne Streiff's blog may be down between 1-4 p.m. central time today for maintenance. Be sure to check their blogs later if you are unable to connect.
Enjoy the hop!
Joan's Gardens Thursday Challenge #16
It is time for another Thursday Challenge at Joan's Gardens. This week the challenge is to use shades of brown and tan; buttons; and three Nestie layers.
My card was made using the JustRite "Beautiful Blossoms" stamp set. The designer paper is from Anna Griffin. The image was stamped with brown ink on Kraft card stock. I used bleach to lighten part of the petals and colored the rest with Copic markers. I was trying duplicate the flower in the design paper. The design was cut out with an oval Nestie and then two different size scallop Nestie ovals layered below it. Two bands were cut and layered. The lighter one was sponged with Tim Holtz Distressed ink. The smaller Nestie scalloped oval was also sponged with the same ink. A Tim Holtz button was added to the design and three tan buttons added to the band over trim. Webster's Pages trim was added to the top of the card.
Be sure to go over and check out all the information about this challenge at Joan's Gardens. I'd love to see your card submitted. Remember you have a chance to win a wonderful prize. And the best part, each person who has been chosen by the random drawing for the weekly challenges, will be eligible to win the $100 gift certificate from Joan's Gardens. The drawing for this big prize will be drawn at the end of the year.
Special Prayer Request: If you follow Joan's blog, you know her mom's tumor has returned and they are having to make some really serious decisions on treatment. This family needs your prayers. Here is the last email I received from Joan:
" We have decided we are taking mom to Bloomington Indiana (about 4 hours away) to have proton radiation. I am not sure how I am working out the details, but we feel it is what needs to be done. They will review her records to determine if she is a candidate for it. I pray she will be. So much to think about and get in order. I have such a busy October planned, so not sure how it is all going to work. I am just trusting the Lord to work out the details."I know Joan and her family will greatly appreciate your prayers.
Monday, September 20, 2010
Christmas Preparations
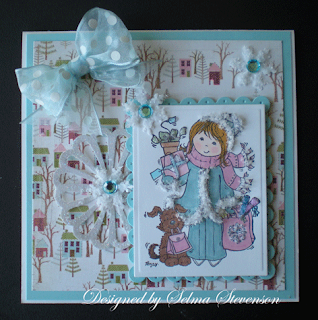
This cute little girl is getting all ready for Christmas. This stamp is from the Stampavie collection and is called Sarah Kay "Christmas Preparations". You can purchase this stamp from Joan's Gardens.
The image was stamped on white card stock and colored with Copic markers. Copic glitter pens were used on the ornaments. After coloring her, she was cut out with a Nestie label and sponged with Tim Holtz Destressed ink. The verse is from the JustRite "Whimsical Christmas" stamp set. It was also cut out with a Nestie and sponged with the same ink. A piece of lace was layered across the middle of the card with ScorTape then the design attached with dimensionals over it. A few aqua pearls were added to complete the card.
Sunday, September 19, 2010
Joan's Thursday Challenge #15
I want to remind you about the fun Thursday Challenge at Joan's Gardens. This week the challenge is to make a card or project using the following:
- Color - Orange, Green and Blue
- Embellishment - Printed Ribbon and something hanging
- 3 different prints - can include ribbon print
- Distress with ink
I noticed there are not a lot of entries yet you so you have a really good chance in winning the weekly drawing. Hope you will participate.
I was lucky to find a piece of design paper that had orange, green and blue stripes. For my second print I added the orange design paper with the polka dots. My third print is in the green ribbon. For something hanging I added a bee charm.
The verse is from the new JustRite stamp set "Nature's Nested Sentiments". I cut it out with an oval Nestie and punched each of the scallops. It is attached on dimensionals. Tim Holtz "Spiced Marmalade" Distress Ink was used around the sentiment and on the punched flowers.
I think I got all the items in the challenge included. This was a fun challenge and I hope you will join in. Go over to Joan's Gardens and check out all the information about the challenge and see other cards that have been submitted. Also check out the great prize this week.
The JustRite stamps and Tim Holtz Distress Ink can be purchased from Joan's Gardens.
Saturday, September 18, 2010
Happy Fall
Today's card was designed with another stamp set from the Heartfelt Creations Autumn collection called "All Seasons Tree PreCut Set". Isn't it a gorgeous tree!
I was playing around with my Twinkling H20's again today. I painted the H20 onto the rubber stamp and stamped it onto ivory card stock. Using a variety of colors, I blended the different colors onto the tree to make it look like it was changing to fall colors.
The top layer was created by stamping the smallest oak leaf, from the Heartfelt Creations "Open Falling Leaves" stamp set, with H20 "pumpkin spice". I stamped it three times before adding more color. You just need to spritz the stamp lightly between stampings. The Twinkling H20's really leave a pretty shine, which doesn't show up in my photo. A circle was cut in this layer with a Nestie. To frame the opening I used a slightly smaller Nestie and cut a circle out in the brown card stock and layered these with dimensionals over the image. The verse is from the "All Seasons Tree" stamp set. It was gold embossed then cut out with a Spellbinder Fancy Tag. Gold brads were added to the tag and corners to complete the card.
The stamps and Nestabilities can be purchased from Joan's Gardens.
Have a great weekend.
Friday, September 17, 2010
Give Thanks
Our weather has changed and it really feels like Autumn has arrived. There are pumpkins and mums on almost every porch. This card was made using the Heartfelt Creations "Pumpkins/Autumn Vines" stamp set. I have used the pumpkin stamps on other cards but not the pretty autumn vines, so wanted to make another card using this set.
I tried a new way of coloring today. I have had a lot of Twinkling H20 paints for several years and never used them. I decided it was time. These paints are so easy to use and give off such a pretty shine. All the pumpkins were cut out so I could make an "arrangement". The pretty vines were stamped on a piece of ivory card stock and then embossed with the "Victoria" Cuttlebug embossing folder. Tim Holtz "Tea Dye" Distress ink was sponged over the embossing. I stamped the vines a second time so I could cut the leaves out to give them dimension. All the pumpkins were attached with dimensionals then a strip of grass was added. This was created with a Martha Stewart grass punch. Two gold brads were added to this panel. It was mounted onto a piece of brown card stock. The verse is from the same set and was gold embossed onto the designer paper. A bow was added to complete the card.
The products used for this card can be purchased from Joan's Gardens.
I'll be back tomorrow with another card. Thanks for stopping by.
Thursday, September 16, 2010
Exciting News
Before I tell you about my card I have some exciting news. I have been selected to work as a designer with Heartfelt Creations. As you all know I have been designing for Joan's Gardens and using these stamps for a while now. I fell in love with Heartfelt Creations stamps as soon as Joan introduced them on her blog and I use them a lot, so it was very exciting to be selected to work on the HFC design team. Some of my blogging friends are also on the team: Olga, Linda, Clare and Giovana. I am also looking forward to meeting and working with the rest of this talented team.
Today I have made another autumn card using four stamp sets. The pumpkins and leaves were stamped on ivory card stock and sponged. To give them some sheen, I patted them onto a VersaMark ink pad and using a brush, added Sparkling Copper PearlEx. I'm sorry, it does not show up well in the photo but they have a beautiful shine/glitter to them. To "ground" the pumpkins, I used the Martha Stewart grass punch and punched two rows of grass to nestle the pumpkins in. The leaves were scattered around the pumpkins.
The verse was stamped using Vivid brown ink and sponged with Tim Holtz Distress inks. It was mounted on dimensionals. Two brown pearls were added to the top corners.
Stamp sets used:
Heartfelt Creations "Pumpkin/Autumn Vines Precut Set", and "Open Falling Leaves Precut set.
JustRite "Nature's Nested Sentiments" and" Victorian Nested Frames"
All the products used on this card can be purchased from Joan's Gardens.
Thanks for stopping by.
Tuesday, September 14, 2010
Hummer Paradise
I love to sit and watch the hummingbirds come on the deck to feed. They are so amazing. We have several feeders plus hanging flower baskets and it is so fun to see them buzz from one place to another. When I saw this Heartfelt Creations stamp set, I knew I had to have it; the name of the set is "Hummer Paradise PreCut Set". This is another stamp set you can order from Joan's Gardens.
The image was stamped and colored with colored pencils and OMS. After I cut it out, it was sponged around the edges with Tim Holtz Tea Dye Distress Ink. I used a new tool -- it is the Inkssentials Ink Blending Tool. What a great job this does. I love it because it has a handle to hold on to. These products are also available from Joan's Gardens.
The image was attached to black card stock and I used scissors to cut a black mat around it to help make the design stand out more. The designer paper is from the Basic Grey "Max & Whiskers" paper pad. A piece of ivory card stock was embossed using my ScorBuddy and the ScorBug embosser. You just run this little tool along the line and it gives you these little raised dots. Lots of fun to use. This piece was also sponged with the Tea Dye Distress ink and matted on black cs. Black pearls were added.
The greeting is from the Heartfelt Creations "Daisy Patch Swirls PreCut Set". It was cut out with a Spellbinder Fancy Tags die and sponged then attached with dimensinals.
It a gorgeous day out so think I will go out and plant some tulip bulbs before the weather gets cold.
As always, thanks for stopping by.
Monday, September 13, 2010
Rustic Autumn Wheel
Autumn Easel Card
In yesterday's blog post I stated I had decorated my front porch for Autumn and I have had requests to show a picture. Here it is. I still need to get some more pumpkins and mums, but this is it for now.
Today my card is made with another Heartfelt Creations stamp set. This one is called "Rustic Autumn Wheel PreCut Set". It really works great for an easel card but of course you wouldn't have to do this. I also used two additional pumpkins from the "Pumpkin/Autumn Vines PreCut Set".
The image was stamped using Vivid brown ink and was colored using Koh-i-noor colored pencils and Gamsol. The cloudy sky background was sponged on using a large sponge dauber. The large stamp includes three size pumpkins but I added to additional small pumpkins attached with dimensional glue dots.
A piece of plaid designer paper was added to the base of the easel card. A Heartfelt Creations border was cut and placed along the bottom. The greeting is from the Rustic Autumn Wheel stamp set. It was cut out with a Nestability and sponged prior to taking it out of the die. Two matching plaid corners were cut and added to the top to help frame the picture, and a few pumpkin colored rhinestones added to complete the card.
You can order your Heartfelt Creations stamps from Joan's Gardens here.
This card has been entered into Mark's Finest Papers, Speedy the Cat's Challenge.
Sunday, September 12, 2010
Chic Shopping
Today I worked on getting my front porch decorated for Autumn then I came in and made a Christmas card. Something about this doesn't seem quite right, does it. Well, I couldn't resist. I received some new Stampavie stamps from Joan's Gardens and have been anxious to start working with them.
This is a Penny Johnson stamp called Chic Shopping. I think it is so cute. The design was colored with Copic markers. Glitter and Polar White Flower Soft were added. The background paper is from the Basic Grey "Eskimo Kisses" paper pad. A Martha Stewart punched design was added to the left of the design and a snowflake added to the center. A rhinestone and flower soft was added to the three snowflakes on the card. A bow was added to the top.
Today Joan has posted a lot of new Stampavie stamps, new designer paper and some new adhesive on her blog. Be sure to check it out. All these stamps are so adorable it is hard to choose which ones you want. You can see them all here.
Saturday, September 11, 2010
Tutorial on Coloring Autumn Leaves
This card was created using some new stamps I just received from Joan's Gardens. I used three Heartfelt Creations stamp sets: "Open Falling Leaves PreCut Set"; "Elegant Autumn Swirl Leaves PreCut Set"; and "Pumpkin/Autumn Vines PreCut Set".
I have prepared a tutorial below to show you how to color the leaves, but first I will tell you about the card. I started off with a piece of design paper from Basic Grey and gold embossed the swirl from the "Elegant Autumn Swirls Leaves" stamp set. Isn't it gorgeous! I added leaves over the gold embossed leaves from the leaves shown below in the tutorial. One of each size pumpkins from the "Pumpkin/Autumn Vines" set were stamped with Vivid brown ink and colored with Copics. There are matching Heartfelt Creations "Pumpkins Nestabilities" to cut the pumpkins out. Additional leaves from the "Elegant Autumn Swirls Leaves" set were scattered around the base of the pumpkins. A bow and a few pearls were added to complete the card.
TUTORIAL ON HOW TO COLOR AUTUMN LEAVES
Stamp the leaves from the Heartfelt Creations "Open Falling Leaves PreCut Set" using brown ink onto glossy card stock.
You can use any autumn colors you want on your leaves blending yellows, oranges, reds, and greens. To apply the color, using sponge daubers to sponge color on in small areas. In this photo I have used yellow ink.
Next I sponged on orange ink to a small portion of each leaf. You can go out of the lines because you are going to use the matching dies to cut the leaves out.
In this photo I have added some red ink. You want to blend the colors together.
Here I have sponged on some green ink.
Here I have used a pumpkin ink and blended all the colors together. You can use any light color such as any shade of yellow or orange. You want to completely go over all the colors on each leaf to really blend all the colors together.
Here I have stamped more leaves and used different colors so I could have a variety of colored leaves. They look so different after they are cut out and arranged on your project, don't they (see card).
It is so much fun to work with Heartfelt Creations stamp sets because they also have matching Spellbinder dies to cut out the images. This is such a quick and easy way to cut out your images so you can arrange them to create one of a kind cards or projects.
I hope this tutorial is helpful. I'd love it if you would leave a comment at the bottom of this post and let me know.
Joan Fricker, from Joan's Gardens has a large selection of these wonderful stamps and dies in her store. Click this link to see all the new HeartFelt Creations that have just been released plus get a sneak preview of future sets coming out. I know you will love them all!
SUPPLIES: Heartfelt Creations stamps and dies; glossy card stock, sponge daubers, Basic Grey Design Paper, and Detail Gold Embossing Power can all be purchased from Joan's Gardens.
GREAT NEWS: Today Joan announced that Emma Lou Beechy, owner/designer from Heartfelt Creations is going to be conducting a workshop at Joan's Gardens on October 16 from 9 to 5. She is a fantastic designer and I'm sure you won't want to miss this workshop; it is filling up quickly so be sure to check out all the information here.
Plant A Little Sunshine Today
I have been noticing lots of sunflowers in people's yards so it inspired me to make a card using my Spellbinder's Sunflower die. To form the flower, I layered three of the larger flowers and one of the smaller ones. The center portion of the petals were colored with Copic markers. For the very center I cut out two of the center pieces using dark brown card stock. I then took a small piece of a cotton ball and put it between the two pieces and glued them together. I wanted the center to be kind of "puffy". Black Flower Soft was then glued on this piece. Two leaves from this set were cut out and sponged.
The verse is from the JustRite "Seeds of Kindness" stamp set. It was cut out with a Nestability and each scallop pierced. It was attached with dimensionals. The brown border along the bottom was cut with a border die from Heartfelt Creations. A brown bow was added and well as some yellow pearls to complete the card.
All the products used to make this card can be purchased from Joan's Gardens.
I received the Heartfelt Creations "Open Falling Leaves" stamp set and will be working on a tutorial for you later.
I really appreciate you stopping by. Have a great weekend.
Friday, September 10, 2010
Heartfelt Thanks
Stamp Set Available from Joan's Gardens
I was so excited to receive a package from Joan's Gardens today because it included a stamp set I fell in love with as soon as I saw it listed on Joan's Blog. It is from Heartfelt Creations and the name of the set is "Clematis/Cottage Precut Set". Isn't it beautiful.
The image was stamped and colored with Copic markers. I wanted to use the Cuttlebug "Birds and Swirls" embossed background with this stamp so I cut around the stamped image. I thought it would be fun to put a fence in front of the design and I really like this Martha Stewart fence but it had "bats" on some of the post, so I cut them off. It doesn't look like a "spooky" fence, does it??? I cut a thin piece of card stock and extended the post of the birdhouse so all the flowers would be above the fence. I then added some grass made with a Martha Stewart punch. A Sizzix die was used for the extra leaves behind the birdhouse. The greeting is from the Heartfelt Creations "Elegant Autumn Swirls Leaves" stamp set. The whole verse says "day of Thanks". I only wanted the "Thanks" so I used a VersaMark marker to ink the word, then black embossed it. I didn't have much room for the greeting since this is a small card, so I cut around the word. This was a fun card to work on because I was adding lots of different elements to it.
I LOVE working with the Heartfelt Creations stamps. Have you checked out all the new releases coming out -- they are listed here at Joan's Gardens. While you are there, be sure to check out the weekly challenge -- if you use a Heartfelt Creations stamp this week, your name is entered twice in the Random Drawing, and if you also use a Heartfelt Creations Die, you name is entered three times. You can read all the details here.
It is hard to believe it is already Friday. Have a great weekend.
Thursday, September 9, 2010
May You Be Blessed
This card was made for Joan's Gardens Thursday Challenge #14. Here is the challenge for this week: Make a card or project this week and use the following:
- Colors - Red, Brown and Green
- Embellishment - Pearls and trim - preferably lace
- BONUS: If you use a Heartfelt Creation Stamp, your name will be entered twice. If you also use a Heartfelt Creation Die, your name will be entered 3 times.
The poinsettia on my card was created using the Heartfelt Creations "Poinsettia Petals" stamp set and the matching dies. The petals were stamped with red Brilliance ink and the green leaves stamped with always artichoke ink. These stamps are so much fun to work with because it is a breeze to cut them out using the matching dies. The petals were all layered onto glue dots to create the dimension. Gold beads were glued to the center.
The background paper is from the Kaiser Craft "Tis The Season Collection" 6" Paper Pad. It was layered onto red card stock. A piece of Webster's Pages "Designer Trim" was added along the side with ScorTape. I don't like to double trim under the designer paper because it makes it "lumpy". I cut the trim to the side needed and placed ScorTape on the back to attach it.
The greeting is from the JustRite "Christmas Nested Frames & Occasions" stamp set. It was stamped with green ink and the border was colored in with Copic markers. I used scissors to trim around the design.
I'll be watching for your cards over at Joan's Gardens.