

I love this simple birthday card! I had fun coloring the image and creating the fun frame.
I used Els van de Burgt Studio Stitched Squares for the frame. The 2nd, 3rd, and 4th (from the largest) dies were taped to a piece of white card stock and run through the die cutting machine. Be sure all three dies are spaced evenly so you have nice even frames. You will have two open frames and one Stitched Square.
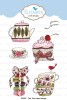
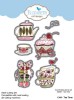
Stamp the cup cake from the Tea Time stamp set onto a piece of white card stock and color with markers. Use the matching die to die cut the image. Attach the cupcake on the small Stitched Square Frame, as shown, Use a light blue marker to add a shadow below the cupcake. Use the little star stamp, from the Dream Sentiments stamp set, to stamp yellow stars around the cupcake.
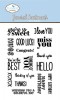
Use the General Sentiments stamp set to stamp the sentiment. Underline the sentiment with a small black Line Peel Off Sticker. I used a Wink of Stella marker to give a little shine to the top of the cupcake, the cherry, and the stars.
Use the two largest Stitched Frame dies, and tape them to a piece of fun foam, available from a craft store, to die cut a frame to go under the largest frame. Use the smallest Stitched Frame die to die cut a fun foam square to go under the center square. If you use fun foam for these two pieces, it will give a solid, dimensional base for both pieces. Attach the matching die cuts using 10mm clear double sided adhesive strips. The double sided adhesive works great to attach the fun foam to the card stock.
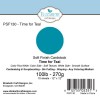
Create a card using Time For Teal Soft Finish Cardstock. The backside of this cardstock is white; which will create a white finish on the inside of the card. Attach the large frame, centered, on the blue card front. Attach the white fram, that does not have fun foam on the back, down inside the large frame. Next, attach the center frame, that has fun foam attached in the center of the frame.
This card has a little dimension, but will mail easily in a regular envelope.
The products used are linked below.


2 comments:
Your card is just perfect! I love the colors you chose to play with and the cupcake is adorable!
A great cupcake image that you colored beautifully!
Post a Comment